Soft robots are a peculiar wing of technology. They don’t use frames and motors for locomotion, but as the name implies they are made of soft materials. They move by pumping fluid — it could be air or liquid — in and out of bladders that push or pull against the body itself. [Matthew] points out that fabricating soft robots has traditionally been a time-consuming and difficult task. He’s trying to make it easier by 3D printing molds into which soft robots can be cast. This way the parts can be designed in CAD, converted to a mold design, and pushed to a 3D printer.
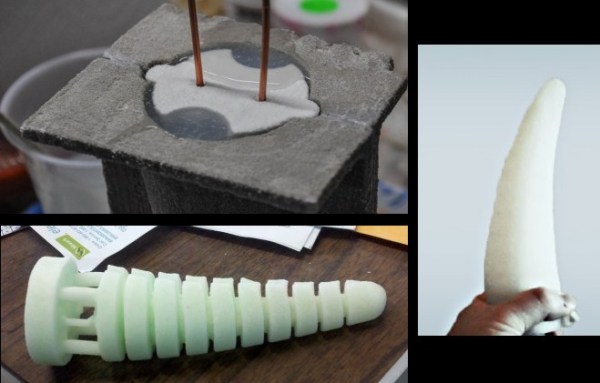
The object with which he’s been testing the technique functions like an octopus tentacle. The image at the bottom left illustrates the internal structure, with rings separated to allow the appendage to flex, and tubes running parallel to the appendage to provide the force needed to bend it. Above that image you can see one of the molds that was used, and the final product is on the right. The video after the break shows a demonstration of this bending left and right as air is pumped in using the bulb of a blood pressure cuff (or Sphygmomanometer for those paying attention).