RAM Upgrade For WRT300N Router

[Heli] had a WRT300N wireless router sitting around collecting dust. He decided to squeeze at bit more entertainment value out of it by seeing if he could pull off a RAM upgrade. He managed to double the router’s RAM and posted a walk through (translated) to help you do the same.

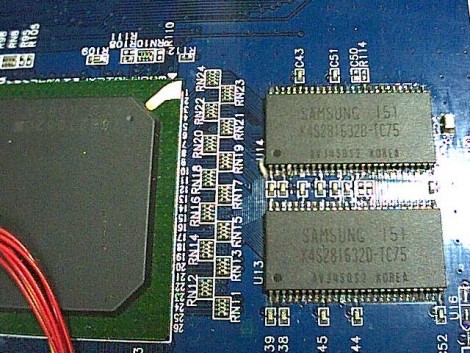
Swapping out surface mount RAM chips isn’t the easiest thing in the world and you must wondering what prompted this. It seems he wanted to run the LuCI package on the router but it was slow (or even incapable) of booting with the stock hardware’s 16 Mb. He first sourced some pin-compatible replacement chips from an old Pentium III computer. While his soldering iron was hot, he also wired up a JTAG header, which connects via the red wires just visible to the left. When he first fired up the unit he was happy that it was able to boot, but it still only detected 16 Mb.

It turns out you’re going to need to roll your own kernel to get it to take advantage of the upgrade. Source code for OpenWRT is easy to find and there’s plenty of guides for compiling it. If you try this, make sure to read [Heli’s] post carefully as he’s got some important configuration information that will help you to avoid bricking your router.

Using A Router As A Linux-based PID Controller

espresso_machine_pid

[Nathan] had an small router kicking around and thought that he might as well put it to good use. He had always been interested in getting a better handle on his espresso machine, and figured that the router would be a perfect Linux-based PID controller.

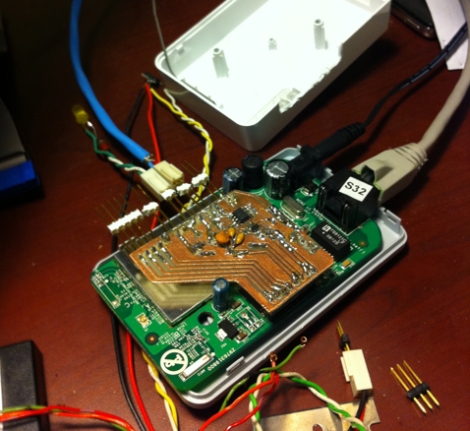
He installed OpenWRT on the router, then disassembled it in order to get access to the router’s GPIO pins. He built a small PCB that allows him to get temperature info from the machine to the router using i2c. [Nathan] put together a PID package for OpenWRT, allowing him to control the machine over SSH, though he may build in a user-friendly web interface sometime in the future.

He says that most espresso machine PID controllers he has seen come in the form of big ugly boxes slapped on the side of the machine’s case, though we have to disagree with him on that point. Opinions aside, he is going for a minimalist design, and while he says that he is only about half way through the project, we think things are looking promising so far.

When everything is said and done, we hope to get a much closer look at all of his code, schematics, and more information on the router he used as well.

Measuring Home Networks With BISMark

The Broadband Internet Service BenchMARK is an open source initiative to put tools in the hands of the common Internet user that will make measurement and analyzation of home network traffic easier. It targets LAN and WAN network utilization by measuring latency, packet loss, jitter, upstream throughput, and downstream throughput. Of course gathering data isn’t worth anything unless you have a way to present it, and to that end the Project BISMark team has been developing a web interface where you can view the usage of anyone who’s running the firmware.

The project builds on top of OpenWRT, which means that you should be able to run it on any router that’s OpenWRT compatible. This includes the ubiquitous WRT54G routers and many others. We remember when DD-WRT added bandwidth monitoring as part of the standard release, which really came in handy when the stories about ISP bandwidth capping started to hit. We’re glad to see even more functionality with this package as it can be hard to really understand what is going on in your network. After the break you’ll find a video detailing the features of BISMark.

Continue reading “Measuring Home Networks With BISMark”

Wifon Is Back And Better Than Ever

wifon_v2

Hackaday forum member [Emeryth] recently posted his newest creation, the Wifon 2.0, which is an update to a project we featured last year. The second iteration of the device looks to make several improvements on the already solid concept.

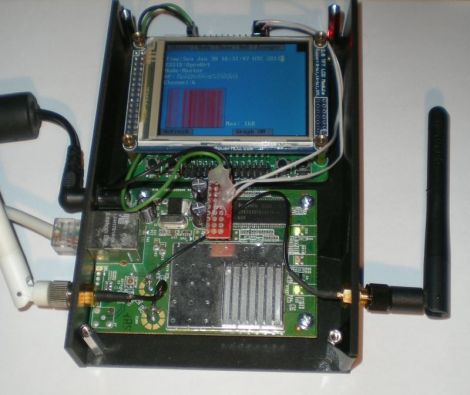
Ditching the simple 16×4 LCD, version 2 sports a full color 320×240 touch panel LCD. A faster STM32 micro controller replaces the Atmega88 he used the first time around, allowing him to create a much more advanced user interface. The micro runs the ChibiOS/RT real time operating system, which enables multitasking, making the entire project a lot easier. Like the first version, an original Fonera performs all of the pen testing, though this time around he has ditched the vanilla DD-WRT distro for Jasager, which is purpose-built for running the Karma attack.

The project is coming along nicely, and [Emeryth] says he has a few simple apps running on the device already. He has found that running several applications on the device simultaneously is testing the practical limits of the Foneras capabilities, though he may add more memory to the router in order to squeeze a little more life out of it.

[via Hackaday forums]

Wireless Hackerspace Status Notifier

space_probe

Hackerspaces are always looking for novel ways to let their members know that they are open for business, and this notifier [Angus] from Make, Hack, Void recently put together is no exception.

While dumpster diving one day, he came across a fantastic-looking lab power supply from the ‘70s. He gutted it, saving the variable transformer for a future project, and started constructing his notifier. When someone enters the hackerspace, they simply set the dial on the “Space Probe” to the amount of time they expect to be there. The built-in Seeduino sends the data over Bluetooth to an OpenWRT-enabled router, which uses a couple of Lua scripts to notify members via email and Twitter.

Since almost all of the processing is done on the router side, it leaves the Arduino in the probe with little more to do than flash an LED and send ASCII status messages any time the knob is turned. [Angus] is well aware that this would probably make most people’s heads spin, but he hopes that other hackerspace members use that untapped potential to further enhance the notifier.

Stick around to see the Space Probe in action, and if you are interested in seeing what other hackerspaces use to keep their members in the know, check out this status switch from Hack42.

Continue reading “Wireless Hackerspace Status Notifier”

WiFi Radio Plays Your Tunes In Style

wifi_radio

Instructables user [Jan] likes listening to music while hacking away in his workshop, but listening to the same CDs gets tired and boring after awhile. He contemplated listening to streaming audio over the Internet, but hated the idea of needing a computer around at all times. After a bit of reading, he found some information about building a WiFi radio, and got started on constructing his own.

Using a guide he found at the MightyOhm, he hacked an Asus router to use OpenWRT, adding a music player daemon to tune in various stations. He added a small LCD display and an ATmega32 to drive it, as well as a rotary encoder to allow him to switch between stations.

The case was built using several layers of  MDF which were cut using a CNC mill, and joined together with glue and wooden dowels. The front and back panels were milled out of  alucobond sheets, with the remainder of the case covered in white wood veneer. The detail that went into this build is great, we especially love the “WiFi Symbol” speaker grilles.

All of his code and schematics are available for download, should you desire to make a WiFi radio of your own. Stick around to see a video of his completed radio in action.

[via MightyOhm]

Continue reading “WiFi Radio Plays Your Tunes In Style”

Home Automation Without Pulling Wires

Here’s a bit of simple home automation using hacks with which we’re become pretty familiar. [Mrx23] combined OpenWRT, a microcontroller, and a set of RF controlled outlet switches to add automation to his plug-in devices. An RF remote that controls the switched outlets has been connected to an Arduino. The router communicates with the Arduino via a serial connection. And the router is controlled by a web interface which means you can use a smartphone or other web device to control the outlets.

The best thing about this system is the power that the router wields. Since it has an underlying Linux kernel you have the option of setting CRON jobs to turn lighting on and off, and group settings can be established to set up a room’s lighting level for watching movies, hosting guests, etc. Combine this with the fact that OpenWRT can use port forwarding for Internet control and the possibilities really start to open up.

[Thanks Arpad]