Hackaday Links: December 16, 2011

Free-form Christmas ornament

Here’s [Rob]’s free form circuit that’s a Christmas ornament for geeks. It looks great, but sadly isn’t powered through a Christmas light strand. It’s just as cool as the skeletal Arduino we saw.

Prototyping with flowers

Well this is interesting: protoboard that’s specifically made to make SMD soldering easier. The guys at elecfreaks went through a lot of design iterations to make sure it works.

We’ll call it Buzz Beer

The days are getting longer and cabin fever will soon set in. Why not brew beer in your coffee maker? It’s an oldie but a goodie.

Christmas oscilloscope
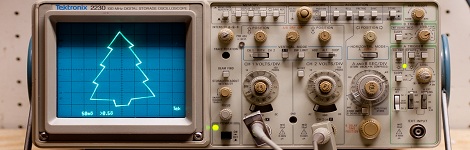
With just an ATtiny and a little bit of  futzing around changing the coefficients of a partial differential equation, you too can have your very own oscilloscope Christmas tree. Don’t worry though, there are instructions on how to implement it with an Arduino as well. HaD’s own [Kevin] might be the one to beat, though.

So what exactly does a grip do?

You know what your home movies need? A camera crane, of course. You’ll be able to get some neat panning action going on, and maybe some shots you couldn’t do otherwise. Want a demo? Ok, here’s a guy on a unicycle.
Playing Classic 60s Tunes With An All Electronic Band

house-of-the-rising-sun

If you are considering repurposing some old computer equipment to create music, be aware that the bar has been raised just a tad. YouTube user [BD594] spent some time sifting through his bin of used electronics and put together a 5-piece band that plays a pretty awesome rendition of The Animals’ “House of the Rising Sun”.

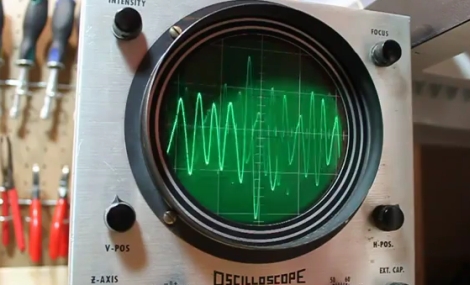
Last week, we saw a pretty impressive hack with a floppy drive that could bang out music using a calculator, but this takes things to a whole new level. [BD594] used an old HP ScanJet to simulate the song’s vocals, while an Atari 800XL combined with an oscilloscope is used as an organ. A Ti-99/4a is used in conjunction with another scope to play guitar notes, while a PIC-controlled hard drive does double duty, playing both the bass drum and cymbals.

We dare you to watch the video below and NOT be thoroughly impressed with his work.

[BD594] says that once he has a bit of free time, he’ll be putting out another video – something we’ll be anxiously waiting to see.

Continue reading “Playing Classic 60s Tunes With An All Electronic Band”

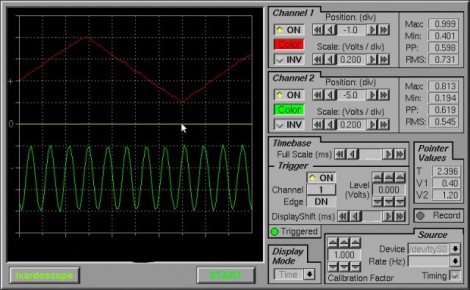
Lxardoscope Is A Linux+Arduino Oscilloscope

[Privatier] wrote in to let us know about lxardoscope, his project that lets you use an Arduino as hardware input for a Linux-based oscilloscope display. This implementation offers two channels with about 3000 samples per second from each. He touts some of the GUI options like vertical resolution between 2mV and 10V per division. That part kind of stumps us because we don’t see how a measurement of 10V (or more) can be taken using the schematic included. But you’re comprehension may surpass ours so do take a look yourself.

He is using an Arduino Uno for his testing. But to get around some issues he’s experienced with other USB-based solutions he implemented a serial port connection instead. You’ll need to remove the ATmega chip from the Arduino board after flashing the code to it, and then build a circuit around it which includes a power source where -2.5V is ground and 2.5V is VCC. All in all, you’ll need a 16 Mhz crystal, HEF4069 hex inverter, ATmega8-family microcontroller, and a few passive components to build this on a breadboard.

Want To Play Pong On Your Oscilloscope?

I always have! I don’t know why, but I like the idea of using an oscilloscope screen as a general use video display. Why not? In my case it sits on my desk full time, has a large screen area, can do multiple modes of display, and is very easy control.
Making an oscilloscope screen do your bidding is an old trick. There are numerous examples out there. Its not a finished project yet, so be nice. It is actually rather crude, using a couple parts I had on hand just on a whim. The code is a nice mixture of ArduincoreGCCish (I am sorry, still learning), and includes the following demos:

  1. Simple low resolution dot drawing
  2. A font example
  3. A very quickly and badly written demo of pong

The software runs on an Attiny84 micro controller clocked at 16Mhz, paired up with a Microchip MCP42100 dual 100k 8 bit digital potentiometer though the Attiny’s USI (Universal Serial Interface) pins. This is a fast, stable and accurate arrangement, but it requires sending 16 bits every time you want to change the value of one of the potentiometers so its also very piggy. I was just out to have some fun and did not have a proper 8 bit DAC. This was the closest thing outside of building one.
Join us after the break for pictures a (very) brief video and more.

Continue reading “Want To Play Pong On Your Oscilloscope?”

Displaying Graphics On An Oscilloscope

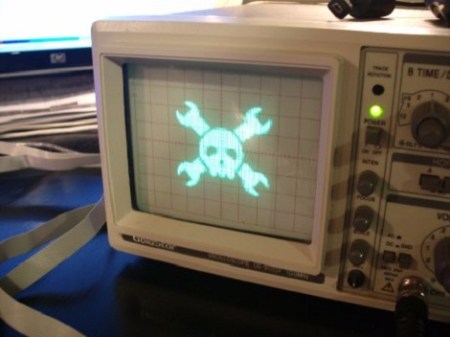
[Andrew Rossignol] was curious one day and decided that he wanted to display graphics on an oscilloscope after playing around with the X and Y inputs.

[Andrew] started out with a resistor ladder on the DAC of his AVR Butterfly. He was able to to draw a line on the oscilloscope’s screen but bandwidth limitations forced him to reconsider his approach. A friend wrote a Python script to generate C code so the ports of the Butterfly can be toggled. After getting the Butterfly to generate a voltage for every non-white pixel, [Andrew] was impressed with the results so the code was modified determine the brightness of each pixel. The setup managed 10 shades of gray and careful selection of what graphics to post on the build log assured the project a little bit of blog cred.

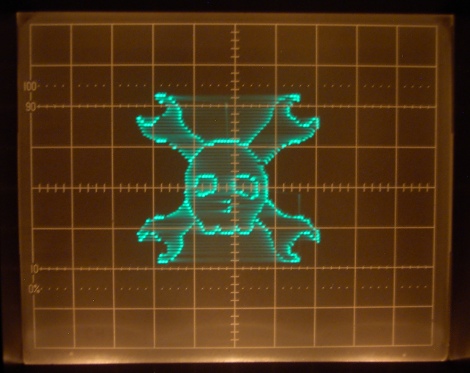
There are a few ways to display a picture on an oscilloscope, like plugging the Hsync and Vsync into the inputs of a scope. Except for a few music visualizations, we haven’t seen a scope display generated from a microcontroller. Great work [Andrew], but we’d like to mention there’s a grayscale Hack a Day logo from way back when.

Check out a video of [Andrew]’s oscilloscope after the break.

Continue reading “Displaying Graphics On An Oscilloscope”

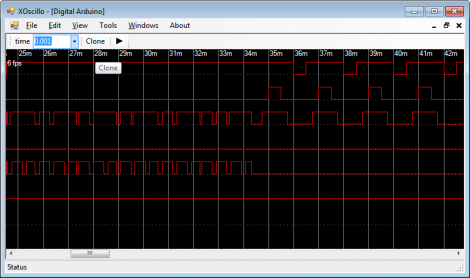
Xoscillo Turns Arduino In An Oscilloscope

If you don’t have an oscilloscope you’d be surprised how many times you find yourself needing one. But if you have an Arduino on hand, the next time you might be able to get by with this software suite that can use a development board as oscilloscope inputs. The project is called xoscillo, and it allows an Arduino, or a Parallax USB Oscilloscope, to probe the signals while a computer does the heavy lifting.

The Arduino can be used for up to four input channels at 7 kHz. It’s possible to probe seven signals at 4 kHz as well. But the main feature that caught our eye is the ability to use several Arduino boards at one time in increase the number of channels available to you.

Granted, this is pretty slow for many digital electronic troubleshooting needs. But at least it’s something you can pull out when you just don’t have any other ideas about what is going wrong with your prototype circuit. We’re sure that sooner or later you’ll break down and buy a proper hackable oscilloscope. After all, your Arduino is probably already occupied as an I2C sniffer.

[Thanks Adam]

Quick Hack Disables IPod Dock Auto-standby

ipod_dock_hacking

[Aaron] wrote in to share with us a quick hack that has made his life a little easier. He bought a Rocketfish RF-HV3 portable iPod dock to listen to his music, but he wanted to utilize it as an alarm clock as well. He also found that the speakers worked quite well when he hooked up his Yaesu handheld transmitter to the dock.

The only problem he had with it was that the dock would automatically power down when there was no input for 5 minutes. That’s fine when the dock is running on batteries, but if [Aaron] was going to use it as an alarm clock or to listen to his HAM radio, that simply wouldn’t do.

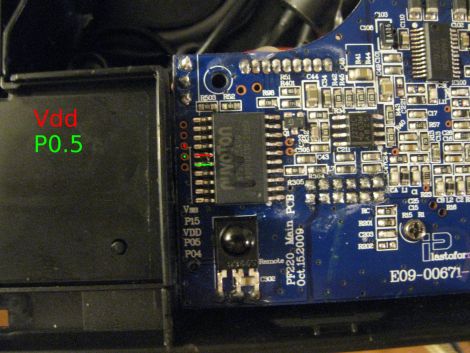
He pulled the dock apart and started poking around with his DSO Nano scope. He found that if pin 16 stays low for 5 minutes, it turns off the dock even if there is a signal coming through. His fix for the problem was actually quite simple – all he did was solder the VDD pin to the pin in question, and the 5-minute timeout was disabled.

We’re glad that [Aaron] was able to solve his problem in such an easy manner – it just goes to show what you can do with a scope and a few minutes’ time.