A 6502 Retrocomputer In A Very Tidy Package

One of the designers whose work we see constantly in the world of retrocomputing is [Grant Searle], whose work on minimal chip count microcomputers has spawned a host of implementations across several processor families.

Often a retrocomputer is by necessity quite large, as an inevitable consequence of having integrated circuits in the period-correct dual-in-line packages with 0.1″ spaced pins. Back in the day there were few micros whose PCBs were smaller than a Eurocard (100 mm x 160 mm, 4″ x 6.3″), and many boasted PCBs much larger.

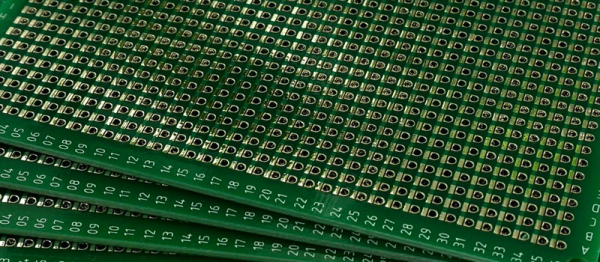
[Mark Feldman] though has taken a [Grant Searle] 6502 design and fitted it into a much smaller footprint through ingenious use of two stacked Perf+ prototyping boards. This is a stripboard product that features horizontal traces on one side and vertical on the other, which lends itself to compactness. Continue reading “A 6502 Retrocomputer In A Very Tidy Package”

Evaluating The Unusual And Innovative Perf+ Protoboard

Back in 2015 [Ben Wang] attempted to re-invent the protoboard with the Perf+. Not long afterward, some improvements (more convenient hole size and better solder mask among others) yielded an updated version which I purchased. It’s an interesting concept and after making my first board with it here are my thoughts on what it does well, what it’s like to use, and what place it might have in a workshop.

Perf+ Overview

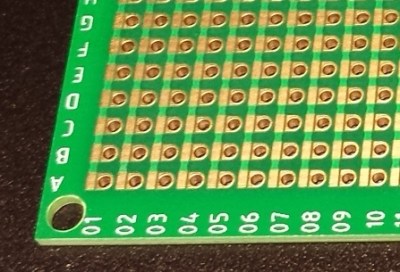
One side of a Perf+ 2 board. Each hole can selectively connect to bus next to it with a solder bridge. The bus strips are horizontal on the back side.
One side of a Perf+ board. Each hole can selectively connect to the bus next to it with a solder bridge. These bus strips are vertical. The ones on the back are horizontal.

The Perf+ is two-sided perfboard with a twist. In the image to the left, each column of individual holes has a bus running alongside. Each hole can selectively connect to its adjacent bus via a solder bridge. These bus traces are independent of each other and run vertically on the side shown, and horizontally on the back.

Each individual hole is therefore isolated by default but can be connected to one, both, or neither of the bus traces on either side of the board. Since these traces run vertically on one side and horizontally on the other, any hole on the board can be connected to any other hole on the board with as few as two solder bridges and without a single jumper wire.

It’s an innovative idea, but is it a reasonable replacement for perfboard or busboard? I found out by using it to assemble a simple prototype.

Continue reading “Evaluating The Unusual And Innovative Perf+ Protoboard”

Hackaday Links: Leap Eve, 2016

The current Mac Pro is a masterpiece of design that looks like a trash can. We’ve been waiting for someone to take one of these computers and stuff a MiniITX board in there, but seeing as how the Mac Pro costs $3000, that probably won’t happen anytime soon. Here’s the solution. It’s a trash can computer case that is also too expensive for what it is. Now all we need is someone to put a big fan inside one and turn this computer into a wacky waving inflatable arm flailing tube man.

[Mike Harrison] recently got his hands on a $20,000 SPARC CPU module. This is an enormously thick board that must be dozens of layers thick. How many layers was an open question until he put the board in a CNC milling machine. The setup is pretty much what you would expect with a few lines of g-code repeated over and over. The real trick comes from using one of the outputs for lubricant to trigger the shutter release on a camera. How many layers were in the CPU module? About 30, or something like that.

Almost a year ago, we saw the latest advances in perfboard. It was a perfboard with each hole connected to rows and columns on a selectively solderable orthogonal busses. Something like that. Actually, we still can’t wrap our head around it. Now, it’s a crowdfunding campaign with a few new and useful features. There’s also a layout tool that will show you where to place your components and where to make solder bridges.

[Ray Wilson] started Music From Outer Spacethe place to learn about DIY analog synthesizers. Ray now has cancer, and as you can imagine, being a self-employed engineer specializing in analog synthesizers doesn’t provide great health coverage. [Ray]’s family set up a GoFundMe page to pay for the medical expenses.

We haven’t seen much in the land of 3D scanners, and we’re betting most of that is because they’re so expensive. The guys from CowTech have a kickstarter up for a 3D scanner that’s just $99. It’s based on the Ciclop scanner but designed around a custom Arduino shield and remains fully open source.

Remember the screen printed electroluminescent displays that were printed directly onto t-shirts from a few months ago? Now that company is working on a much cooler design: the Hackaday Jolly Wrencher. It works, but there are still a few problems: they’re setting the shirt on fire a little. Don’t worry, if these are ever reasonably safe and somewhat affordable, an EL Jolly Wrencher shirt will be in the Hackaday Store.

Need a rechargeable multimeter? It’s actually pretty easy. With an 18650 Lithium Ion cell and a 9V boost converter, this circuit will fit in most devices that need a 9V battery. To do this right, you’ll also need a USB charging port, to be used once every couple of years when the battery needs charging.