For those that haven’t experienced it, the early days of parenthood are challenging, to say the least. Trying to get anything accomplished with a raging case of sleep deprivation is hard enough, but the little bundle of joy who always seems to need to be in physical contact with you makes doing things with your hands nigh impossible. What’s the new parent to do when it comes time to be gainfully employed?
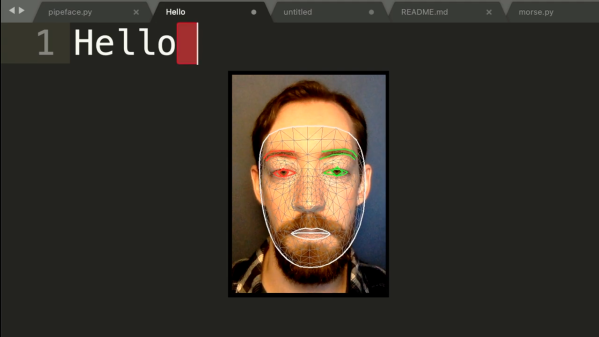
 Finding himself in such a boat, [Fletcher]’s solution was to build a face-activated keyboard to work around his offspring’s needs. Before you ask: no, voice recognition software wouldn’t work, at least according to the sleepy little boss who protests noisy awakenings. The solution instead was to first try OpenCV and the dlib facial recognition library to watch [Fletcher] blinking out Morse code. While that sorta-kinda worked, one’s blinkers can’t long endure such a workout, so he moved on to an easier set of gestures. Mouthing Morse code covers most of the keyboard, while a combination of eye, eyebrow, and other facial twitches and tics cover the rest, with MediaPipe’s Face Mesh doing the heavy-lifting in terms of landmark detection.
The resulting facial keyboard, aptly dubbed “CheekyKeys,” performed well enough for [Fletcher] to use for a skills test during an interview with a Big Tech Company. Imagining the interviewer on the other end watching him convulse his way through the interview was worth the price of admission, and we don’t even care if it was a put-on. Video after the break.
CheekyKeys is pretty cool, doing something with a webcam and Python that we thought would have needed a dedicated AI depth camera to accomplish. But perhaps the real hack here was how [Fletcher] taught himself Morse in fifteen minutes.
Continue reading “Twitch And Blink Your Way Through Typing With This Facial Keyboard”