Reverse Engineering The SEGA Mega Drive

With the widespread adoption of emulators, almost anyone can start playing video games from bygone eras. Some systems are even capable of supporting homebrew games, with several having active communities that are still creating new games even decades later. This ease of programming for non-PC platforms wasn’t always so easy, though. If you wanted to develop games on a now-antique console when it was still relatively new, you had to jump through a lot of hoops. [Tore] shows us how it would have been done with his Sega Mega Drive development kit that he built from scratch.

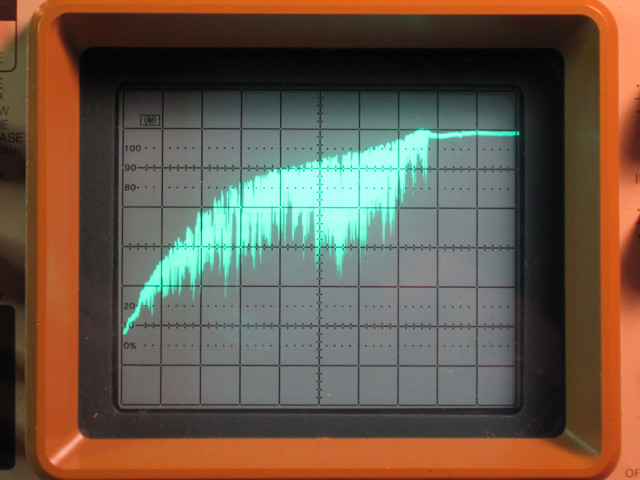
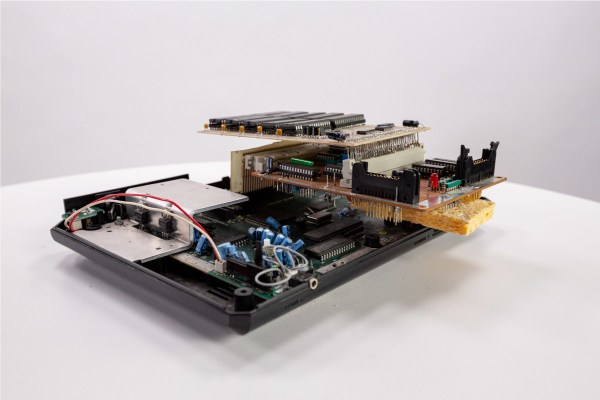
While [Tore] had an Atari ST, he wanted to do something a little more cutting edge and at the time there was nothing better than the Mega Drive (or the Genesis as it was known in North America). It had a number of features that lent the platform to development, namely the Motorola 68000 chip that was very common for the time and as a result had plenty of documentation available. He still needed to do quite a bit of reverse engineering of the system to get a proper dev board running, though, starting with figuring out how the cartridge system worked. He was able to build a memory bank that functioned as a re-writable game cartridge.

With the hard parts out of the way [Tore] set about building the glue logic, the startup firmware which interfaced with his Atari ST, and then of course wiring it all together. He was eventually able to get far enough along to send programs to the Mega Drive that would allow him to control sprites on a screen with the controller, but unfortunately he was interrupted before he could develop any complete games. The amount of research and work to get this far is incredible, though, and there may be some helpful nuggets for anyone in the homebrew Mega Drive community today. If you don’t want to get this deep into the Mega Drive hardware, though, you can build a cartridge that allows for development on native Sega hardware instead.

Rich showing off

Make Your Python CLI Tools Pop With Rich

It seems as though more and more of the simple command-line tools and small scripts that used to be bash or small c programs are slowly turning into python programs. Of course, we will just have to wait and see if this ultimately turns out to be a good idea. But in the meantime, next time you’re revamping or writing a new tool, why not spice it up with Rich?

Rich showing off it's traceback

Rich is a python library written by [Will McGugan] that offers text formatting, colors, graphs, progress bars, markdown, syntax highlighting, charts, and more through the power of ANSI codes. The best part is that it works with macOS, Windows, and Linux. In addition, it offers logging solutions that work out of the box. One of the best features of Rich is the inspect functionality. You can pass in an object, and it will use reflection to print a beautiful chart detailing what exactly the object is, helpful in debugging. The other feature is the traceback, which shows a formatted and annotated snapshot of relevant code on the stack during exceptions.

The source itself is well-written python with comments and typing information. There’s a good chance you’ll pick up a trick or two reading through it. Rich is used to build Textual (also by [Will]), which aims to be a GUI API that runs in the terminal. It served as an excellent example of what Rich is capable of. It is incredible how long these protocols have been around. [Will] even ran Rich on a Teletype Model 33. If you’re working with a bit more of a constrained environment, why not bring some color to your Arduino serial terminal?

What do we want? Monowheel!

Monowheel Mayhem: When Good Gyroscopic Precession Goes Bad

Since the dawn of the age of the automobile, motorheads have been obsessed with using as few wheels as possible. Not satisfied with the prospect of being incompletely maimed by a motorcycle, the monocycle was born. Gracing the covers of Popular magazines and other periodicals, these futuristic wheels of doom have transfixed hackers of all kinds. [James Bruton] is one such hacker, and in the video below the break you can see his second iteration of a 3d printed monowheel.

[James]’ wonderful monowheel is beautifully engineered. Bearing surfaces, gears, idlers, motors, and yes, twin gyroscopes are all contained within the circumference of the tire. The gyroscopes are actuated by a rather large servo, and are tied together by a gear that keeps their positions in sync. Their job is to keep the monowheel balanced at all times.

But as [James] discovered, the chief difficulty of only having one wheel isn’t lateral balancing. Ask any monocyclist and they’ll assure you that it’s possible. The real trick is balancing the machine fore and aft. Unlike a two wheeled velocipede, the monowheel has nothing to exert torque against save for a bit of gravity.

As [James] found out the hard way, it was within this fore-aft balancing act that the gyroscopic precession reared its ugly head. The concept is explained well in the video. We won’t spoil the surprise ending because the explanation and conclusion are quite good so make sure to watch to the end!

If you’d like to look at [James]’ first version, we covered it here. And if you’re the daredevil type, perhaps we can interest in you in a two stroke human sized monowheel that will probably end in an ER visit. At least they wore a helmet. Thanks to [Baldpower] for the tip!

Continue reading “Monowheel Mayhem: When Good Gyroscopic Precession Goes Bad”

High temperature 3D printer

Extreme Thermal Mods For 3D Printing Exotic Materials

For general everyday use, there’s nothing wrong with the standard selection of plastics that most 3D printer filaments are available in. PLA, ABS, PETG — they’ve all got their place, and they’re all pretty easy to work with. But if you need to work with more exotic materials, you might need to go to extremes and modify an off-the-shelf printer for high-temperature work.

For the team led by [Andreas Hagerup Birkelid] at the Norwegian University of Science and Technology, the standard menu of printer chow wasn’t up to the jobs they had in mind. They wanted to print using polyether ether ketone, or PEEK, a high-performance thermoplastic with useful mechanical and thermal properties, in addition to chemical resistance. Trouble is, the melting point of PEEK is a whopping 343°C (649°F), making it necessary to turn up the heat — a lot. A standard Creality CR-10 printer was upgraded to withstand not only the 500°C max temperature of the new hot end and 200° printed bed, but also to survive operating in what amounts to an oven — a balmy 135° in a chamber made from IKEA cabinets. That entailed replacing plastic parts with metal ones, upgrading belts, pulleys, and wires, and moving all the electronics outside the enclosure. Even the steppers got special treatment, with water cooling to keep their magnets from reaching the Curie point.

The mods seemed to do the trick, because a Benchy printed in a carbon-fiber PEEK filament came out pretty good. It seems like a long way to go and kind of pricey — $1,700 for the printer and all the mods — but if you have a need to print exotic materials, it’s way cheaper than a commercial high-temp printer.

[via 3D Printing Industry]

Drilling A Well With A Well Drill

Drill Does Well In Double Duty As Well Drilling Drill

There are a large number of methods commercially used to bore a hole into the ground for the sake of extracting drinking water, and the all require big loud equipment. But what if you just want a small well? Do you really have to call in the big guns? [The Working Group on Development Techniques] is a student association at the University of Twente in the Netherlands who shows in the video below the break that some simple homemade fixtures and a powerful hand drill are quite enough to do the job!

There's more to drilling a drill than drilling with a drill
There’s more to drilling a well than just drilling well

Chief among these fixtures is a swiveling mechanism that serves to hold the drill and its weight, give control over the drill, and inject water into the pipe that the drill bit is attached to. Plans for the swivel are made available on [WOT]’s website. What looks to be a DIY drill bit uses commercially available diamond tips for hardness.

What makes the video remarkable is that it discusses every stage of drilling the bore hole, lining it with casing, and then making it suitable for pumping water from. The video also discusses the chemicals and methods involved in successfully drilling the hole, and gives an overview of the process that also applies to commercially drilled wells.

Naturally you’ll want to make sure your drill is corded so that you can drill for long periods, but also so that it doesn’t grow wings and fly away!

Continue reading “Drill Does Well In Double Duty As Well Drilling Drill”

Longer Range EVs Are On The Horizon

When electric cars first started hitting the mainstream just over a decade ago, most criticism focused on the limited range available and the long recharge times required. Since then, automakers have been chipping away, improving efficiency here and adding capacity there, slowly pushing the numbers up year after year.

Models are now on the market offering in excess of 400 miles between charges, but lurking on the horizon are cars with ever-greater range. The technology stands at a tipping point where a electric car will easily be able to go further on a charge than the average driver can reasonably drive in a day. Let’s explore what’s just around the corner.

Continue reading “Longer Range EVs Are On The Horizon”

Dirty faders.

Giving Vintage Synths New Life In A Potentiometer Cleaning Showdown

As anyone who has ever owned a piece of older equipment that has a potentiometer in it can attest to, these mechanical components do need their regular cleaning ritual. Whether it’s volume knobs on a receiver or faders on a mixer, over time they get crackly, scratchy and generally imprecise due to the oxidation and gunk that tends to gather inside them.

This is your potentiometer caked with gunk.

In this blast from the past, [Keith Murray] shows a few ways in which fader-style potentiometers can be cleaned, and how well each cleaning method works by testing the smoothness of the transition over time with an oscilloscope. It’s enlightening to see just how terrible the performance of a grimed-up fader is, and how little a blast of compressed air helped. Contact cleaner works much better, but it’s essential to get all of the loosened bits of gunk out of the fader regardless.

In the end, a soak in isopropyl alcohol (IPA), as well as a full disassembly followed by manual cleaning were the only ones to get the fader performance back to that of a new one. Using contact cleaner followed by blasting the fader out with compressed air seems to be an acceptable trade-off to avoid disassembly, however.

What is your preferred way to clean potentiometers to keep that vintage (audio) gear in peak condition? Let us know in the comments below.

Thanks, [Grant Freese], for the tip!