FriendlyARM: A Different Flavor Of Raspberry

A lot of old science fiction movies show people wearing the same–or nearly the same–clothes. We’re left guessing if this is because there is a single centralized plant mass-producing skin-tight jumpsuits, or if everyone is under orders to dress the same. Now that we live in the past’s future, it looks like science fiction was a poor predictor of fashion. People want variety.

Which calls to mind development boards. How many different ones do we need? Need doesn’t matter, because we have plenty of them. There may be strong leaders: in the 8-bit world, you think of the Arduino, and on the Linux side, maybe the Raspberry Pi. But there are options.

[Eric Brown] recently compared several inexpensive development boards from FriendlyARM including the NanoPi M3, the NanoPi M1, and the NanoPC-T3. These range from about $11 to $60 with the M3 costing $35. You can see an M1 booting on an HDMI screen in the video below.

Continue reading “FriendlyARM: A Different Flavor Of Raspberry”

Raspberry Pi Cluster Build Shows How And What

Raspberry Pi clusters are a dime a dozen these days. Well, maybe more like £250 for a five-Pi cluster. Anyway, this project is a bit different. It’s exquisitely documented.

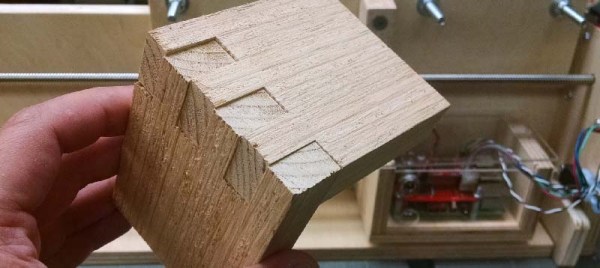
[Nick Smith] built a 5-node Pi 3 cluster from scratch, laser-cutting his own acrylic case and tearing down a small network switch to include in the design. It is, he happily admits, a solution looking for a problem. [Smith] did an excellent job of documenting how he designed the case in CAD, prototyped it in wood, and how he put the final cluster together with eye-catching clear acrylic.

Of interest is that he even built his own clips to hold the sides of the case together and offers all of the files for anyone who wants to build their own. Head over to his page for the complete bill of materials (we didn’t know Pis were something you could order in 5-packs). And please, next time you work on a project follow [Nick’s] example of how to document it well, and how to show what did (and didn’t) work.

If 5 nodes just doesn’t do it for you, we suggest this 120-node screen-equipped monster, and another clear-acrylic masterpiece housing 40 Pis. This stuff really isn’t only for fun and games. Although it wasn’t Pi-based, here’s a talk at Hackaday Belgrade about an ARM-based SBC cluster built to crunch numbers for university researchers.

Shower Thoughts In Your Car

The subreddit for Shower Thoughts offers wisdom ranging from the profound to the mundane. For example: “Every time you cut a corner you make two more.” Apparently, [Harin] has a bit of an addiction to the subreddit. He’s been sniffing the CAN bus on his 2012 Hyundai Genesis and decided to display the top Shower Thought on his radio screen.

To manage the feat he used both a Raspberry Pi and an Arduino. Both devices had a MCP2515 to interface with two different CAN busses (one for the LCD display and the other for control messages which carries a lot of traffic.

The code is available on GitHub. There’s still work to do to make the message scroll, for example. [Harin] has other posts about sniffing the bus, like this one.

We’ve covered CAN bus quite a bit, including some non-automotive uses. We’ve even seen the CAN bus for model railroading.

Build A Replica Apple ///

[Mr. Name Required] pointed us to a great video on the modeling of a replica Apple /// to the small scale needed to contain a Raspberry Pi by [Charles Mangin].

[Mr. Name] pointed out that the video was a great example of the use of reference photos for modeling. [Charles] starts by finding the references he needs for the model. Google image search and some Apple history websites supplied him with the required images.

He modeled the Apple /// in Autodesk 123. It has sketch tools, but he chose to craft the paths in iDraw and import them into the software. This is most likely due to the better support for boolean combination tools in vector editing software. Otherwise he’d have to spend hours messing with the trim tool.

Later in the video he shows how to change the perspective in photographs to get a more orthographic view of an object. Then it’s time for some heavy modeling. He really pushes 123 to its limit.

The model is sent off for professional 3D printing to capture all the detail. Then it’s some finishing work and his miniature Apple /// is done. Video after the break.

Continue reading “Build A Replica Apple ///”

Networked Solar Birdhouses Deep In The Woods

[Oitzu] in Germany wrote in to let us know about a series of short but very informative blog posts in which he describes building a series of solar-powered, networked birdhouses with the purpose of spying on the life that goes on within them. He made just one at first, then expanded to a small network of them. They work wonderfully, and [Oitzu]’s documentation will be a big help to anyone looking to implement any of the same elements – which include a Raspberry Pi in one unit as a main gateway, multiple remote units in other birdhouses taking pictures and sending those to the Pi over an nRF24L01+ based radio network, and having the Pi manage uploading those images using access to the mobile network. All with solar power.

Continue reading “Networked Solar Birdhouses Deep In The Woods”

Virtually Free Rapsberry Pis

One of the nice things about the Raspberry Pi is that it runs Linux and you can do a lot of development right on the board. The converse of that is you can do a lot of development on a Linux desktop and then move things over to the Pi once you get the biggest bugs out. However, sometimes you really need to run code on the actual platform.

There is, however, an in-between solution that has the added benefit of upping your skills: emulate a Pi on your desktop. If you use Linux or Windows on your desktop, you can use QEMU to execute Raspberry Pi software virtually. This might be useful if you don’t have a Pi (or, at least, don’t have it with you). Or you just want to leverage your large computer to simplify development. Of course we would be delighted to see you build the Pi equivalent of the Tamagotchi Singularity but that’s a bit beyond the scope of this article.

Since I use Linux, I’m going to focus on that. If you insist on using Windows, you can find a ready-to-go project on Sourceforge. For the most part, you should find the process similar. The method I’ll talk about works on Kubuntu, but should also work on most other Debian-based systems, including Ubuntu.

Continue reading “Virtually Free Rapsberry Pis”

Raspberry Pi Zero Now With Camera Support, Still Only $5

The latest version (1.3) of everyone’s favorite $5 computer now sports a frequently requested feature: a camera connector. The Pi Zero will now use the same economical camera modules available for the full-sized Raspberry Pi units.

The price of the Pi Zero is unchanged at $5, but there is a small catch. While the Raspberry Pi camera modules themselves will work just fine on the Pi Zero, the usual camera cable they come with will not. The Pi Zero’s camera cable connector is a little smaller than the ones on the full-grown Pi, so it needs a special cable to interface the camera modules to the slightly smaller connector found on the Pi Zero.

This should be good news. The new connector has appeared because another production run is ramping up. Logic points to greater availability of the $5 wonder board, but we’re still not holding our breath.

Adafruit Pi Zero camera cable
Pi Zero with camera module connector cable. [Image source: Adafruit]
With the Pi Zero now able to use camera modules, perhaps camera-based Pi projects like these digital binoculars or time-lapse camera rigs can now get even smaller.

[via Engadget]