We’ve all raised a clench fist in anger over lost data, and it’s usually the result of unjustified optimism and lack of planning. [George] shared his solution that prepares for the worst: a circuit that provides backup power to a RasPi and its hard drives. [George’s] Pi setup runs as both an Apple Time Machine server and a website backup server, and a power outage could corrupt the data stored on the Pi’s attached hard drives.
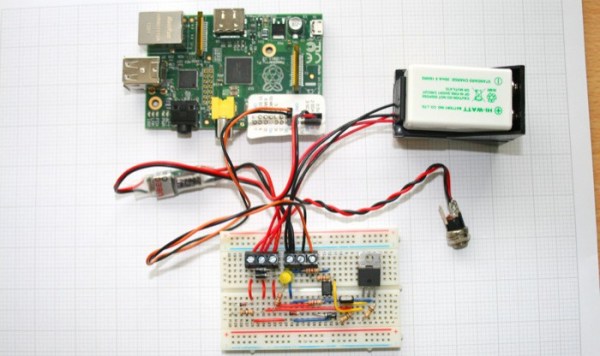
Rather than turn to commercial solutions, however, [George] wanted to take advantage of the Pi’s low power consumption and create an inexpensive custom circuit that would safely and automatically power down the devices upon loss of power. To detect a power failure, the build connects one of the Pi’s GPIOs to an opto-isolator, which—through a zener diode—connects to the 12V wall adapter: though [George] welcomes suggestions for alternative methods of safely identifying a mains power loss. The rest of the circuit serves as a trickle charger for the two attached 9V batteries and as a regulator to supply the correct voltage to the RasPi. Power MOSFETs connected to a GPIO handle the delayed power off.
You can view (and edit!) the circuit online here and find the relevant source code on [George’s] website. If you want to build your own RasPi file server, try cramming all the parts into an old optical drive enclosure.