super_sized_3d_printer

Huge DIY 3D Printer Predictably Prints Huge 3D Items

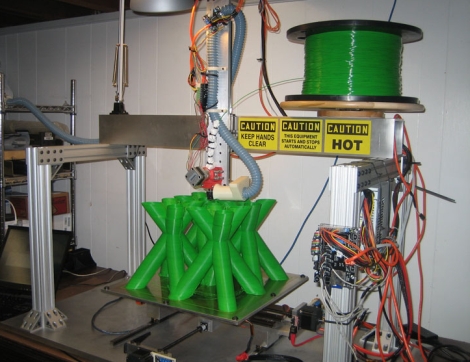
Well, if we ever need something huge built on a RepRap, now we know who to call. [Jim] over at Grass Roots Engineering wrote in to share a large 3D print he just finished, which was extruded by an equally impressive home-built 3D printer.

The part he built consists of a bunch of hollow green tubing in a criss-cross pattern and was printed in just under 2 days. He never mentions what the part is going to be used for, but at 376 x 376 x 250mm (14.8 x 14.8 x 9.84in), he estimates that this is the biggest single part printed with a DIY 3D printer.

The printer itself is based on the RepRap, but is obviously far larger. It prints using ABS plastic utilizing a maximum build area of 403 x 403 x 322.7mm (15.86 x 15.86 x 12.7in). Built over the course of 3 years, it was fully operational in 2010 but has undergone several improvements as [Jim’s] needs have changed.

It’s a fantastic looking machine, and it seems to print quite nicely. We would sure love to have one of these in our workshop.

Continue reading to see [Jim’s] 3D printer in action.

Continue reading “Huge DIY 3D Printer Predictably Prints Huge 3D Items”

Delta Robot 3D Printer

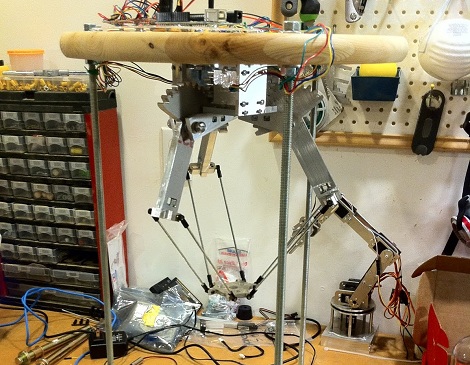
Sometimes, not all our builds work out the way we hoped. That’s what happened to [Rob] and his attempt at a Delta robot that does stereo lithography. A Delta robot is capable of very fast and precise movements, so [Rob] slapped a laser module on the end of the arms. After putting some UV curing resin in front of the laser, he was left with a blob of goo and we’re trying to figure out why.

[Rob] thinks the admittedly terrible print quality was due to diffraction and the reflective build plate. If this were the case, we’d agree with the assessment that adding some dye to the resin would help. Some commentors on [Rob]’s blog have suggested that he’s running the laser too slowly. It’s a shame [Rob] scrapped his build and turned it into a plain-jane X & Y axis build. Delta robots can be really damn fast, and adding a printer to one might mean prints that take minutes instead of hours. There are a few people working to get a Delta RepRap off the ground, but this project still has another prototype or two before that happens. Check out [Rob]’s attempt at Delta robot stereolithography after the break.

Thanks to [techartisan] for sending this one in.

Continue reading “Delta Robot 3D Printer”

Bootloader Burning Basics

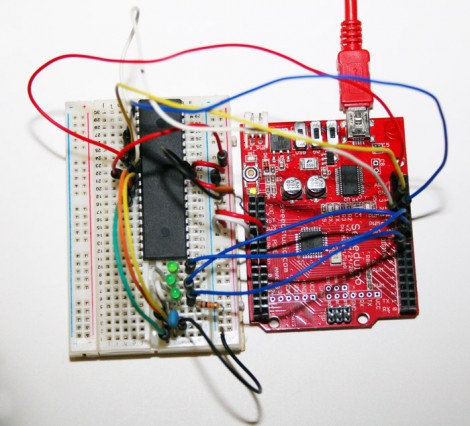
[Charles Gantt] and a few others were having trouble burning the Sanguino bootloader to an ATmega644 chip. With some help from the [Nils Vogil] via the RepRap IRC [Charles] got it worked out and wrote a guide for burning the bootloader using an Arduino as an ISP programmer.

We’re not familiar with the specifics of the Sanguino bootloader, but [Charles] mentioned that he was unable to flash it onto the AVR chip without a resonator. The resonator serves as an external clock source for the chip. We’d bet the programming process changes the fuse settings on the chip to use an external source. Without that source, you won’t be able to communicate with the chip afterwards.

The solution just adds the resonator to the programming circuit. This should be useful when burning any bootloader using an Arduino. But it does make us wonder if there isn’t an alternative method that would let you draw the clock signal from the Arduino itself?

RepRap Voyeurism

Hey everybody, [Nbitwonder] is building his own RepRap 3D printer. What’s special about that? Well, not much and and lot all at the same time. The art of building a self-replicating 3d printer still has a lot to do with luck and forum-crawling to make all of the decisions that go into this complicated project.

Back in March [Nbitwonder] did a collaborative project over at Thingiverse and scored himself a set of printed parts from a guy who already has one of these printers. He then order a set of the non-printable hardware and has since been assembling it. If you’re interested but haven’t already taken the plunge, there’s enough pictures and information in this set of posts to satisfy your craving… for now.

We say this build is an art because it goes beyond just plunking the pieces together. Take the print head, for instance. Instead of going with the extruder that is considered the default for a Mendel build, [Nbitwonder] is working on a variation called Greg’s Hinged Accessible Extruder. We can’t wait until the hardware assembly is done, because it’s the calibration that really interests us.

Incredibly Fast 3D Printing With The Ultimaker

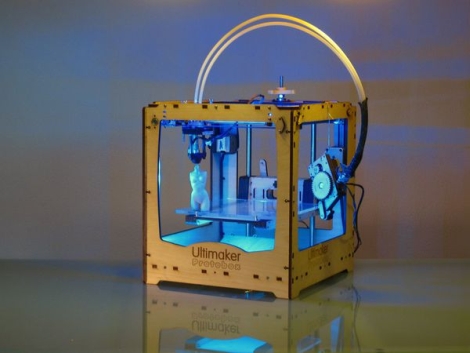
ultimaker_3d_printer

There’s a new 3d printer on the block, and hot damn is it fast!

Hailing from the Netherlands, the Ultimaker 3D Printer has finally hit US shores, and aims to give the MakerBot a run for its money. The Ultimaker was designed by Utrecht Fab Lab manager [Siert Wijnia] along with two frequent lab patrons, [Erik DeBruijn and Martijn Elserman]. The trio were big fans of the MakerBot, but they wanted to make a better 3D printer.

And make a better printer, they did.

The Ultimaker can print using Either ABS or PLA plastic just like the MakerBot, but it is several magnitudes faster than its predecessor. While the MakerBot utilizes a moving build platform, the Ultimaker has a print head that can move along three axes. The moving print head, along with offset motors which are mounted on the printer’s frame allow the Ultimaker to build taller object than the MakerBot, at higher speeds.

That’s not to say that the MakerBot is bad in any way – rather, the presence of a new kid on the block shows how the evolution and progression of open source design benefits us all.

Keep reading to see a video of the Ultimaker in action, you won’t regret it!

Continue reading “Incredibly Fast 3D Printing With The Ultimaker”

3D Printer Looks Factory Made

[Richard Sum] came up with a great looking 3D printer and put his project up as a campaign on IndieGoGo.

[Richard]’s ‘SUMPOD’ is based off the reprap like a lot of other 3D printers, but the SUMPOD has a look of professionalism to it; the printer looks like something that would come from a factory. We think a lot of thought went into the design and fabrication of this printer.

The specs of the machine aren’t too bad either. It’s build area is 150x150x100 mm, or nearly 2 inches than the Makerbot Thing-O-Matic. We asked [Richard] about the drive system of the machine, and he told us there is a linear bearing/belt setup for the x and y axes with a screw drive for the z axis. The electronics are standard NEMA 17 motors and reprap RAMPS fare, so everything electrical is tried and true.

[Richard] plans on adding a Dremel attachment for pcb and lithophane milling. We hope that some design files of the SUMPOD released, but in the mean time we’re really looking forward to seeing the progress of this project.

OnshouldersTV Knows How To Use OpenSCAD

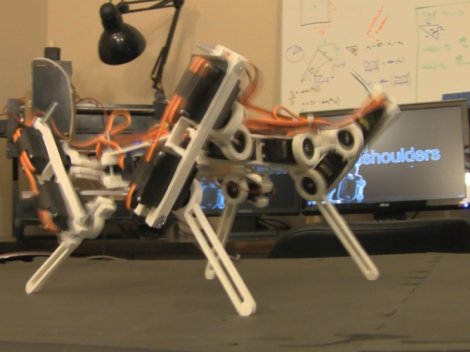
Recently there’s been a increase in the popularity of OpenSCAD as the tool of choice in the 3d printing community. [Gavilan Steinman] is putting out a series of webTV shorts on the use of OpenSCAD. While it lacks a lot of the features of big CAD suits (such as the ability to generate drawings of your parts), the community has proven it’s effectiveness as a design tool. There are only two episodes out so far but they cover  OpenSCAD, mathcast, 3d printing, and a really neat robot design.  Watch them below.

Continue reading “OnshouldersTV Knows How To Use OpenSCAD”