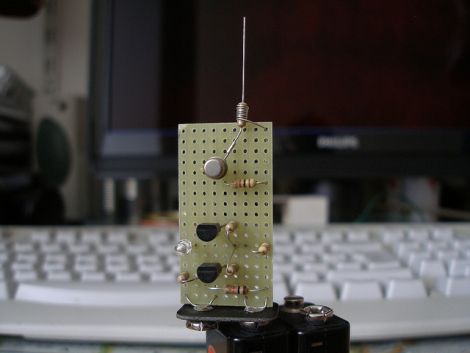
DIY High Voltage Electric Field Detector

electric_field_detector

Who needs a Fluke high voltage detector when you’ve got one of these things?

Actually, we still recommend a professional high voltage detector for serious work, but you’ve got to like this electric field detector that [Alessandro] recently put together.

The detector works by using a JFET to detect the high impedance electric fields that are generated by high voltage lines. The JFET amplifies the signal while dropping the impedance in order to drive a pair of NPN transistors which are used as a threshold amplifier. Once the voltage hits 3V, an LED is lit, indicating the presence of high voltage near the detector’s probe. A wire-wrapped resistor does double-duty serving as the probe while providing a high impedance path to ground, ensuring that stray charge does not accumulate on the JFET’s gate, causing false readings.

It’s a neat project, and something that can be constructed in no time, making it perfect for beginner electronics classes.

Keep reading to see a quick video of the HV detector in action.

Continue reading “DIY High Voltage Electric Field Detector”

[Dino] Celebrates The 131st Anniversary Of The Photophone

photophone_demonstration

[Dino Segovis] wrote in to share yet another installment of his Hack a Week series, though this one is quite timely.

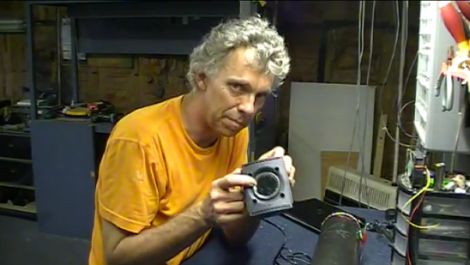
It was 131 years ago today that [Alexander Graham Bell] unveiled the Photophone to the world. A precursor to fiber optic technology, [Bell’s] incredibly important invention can be easily replicated in your garage, as [Dino] shows us.

The original Photophone was constructed using a megaphone and crystalline selenium cells at the focal point of the receiver, however this version can be made with easy to obtain parts. [Dino] rigged his laptop up to a speaker on which he mounted a mirror, before setting it out in the sun. The vibrations of the mirror modulate the sunlight, reflecting it onto a solar cell positioned at the end of a long, black PVC tube. The solar cell’s leads are fed into an amplifier followed by a speaker, which broadcasts the audio.

The demonstration goes off without a hitch, and while some might be underwhelmed by the technolgy, imagine how incredible it would have looked 131 years ago!

OnshouldersTV Knows How To Use OpenSCAD

Recently there’s been a increase in the popularity of OpenSCAD as the tool of choice in the 3d printing community. [Gavilan Steinman] is putting out a series of webTV shorts on the use of OpenSCAD. While it lacks a lot of the features of big CAD suits (such as the ability to generate drawings of your parts), the community has proven it’s effectiveness as a design tool. There are only two episodes out so far but they cover  OpenSCAD, mathcast, 3d printing, and a really neat robot design.  Watch them below.

Continue reading “OnshouldersTV Knows How To Use OpenSCAD”

Warm Tube Clock, Take 2

warm_nixie_v2

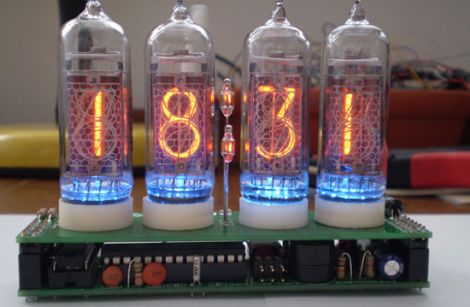
[Mure] wrote in to let us know he has put the finishing touches on the second iteration of his Warm Tube Nixie clock. We featured his original creation here last year, and while many things remain the same, he has still found a few things that he was able to improve on.

The first notable feature is the new real time clock. Instead of using a discrete crystal to keep time and a temperature sensor for compensation, he has opted to use a DS3231 RTC IC. It is far more accurate than the crystal, and it features a built-in temperature sensor as well. The alarm functionality has been simplified too, moving the controls into firmware rather than having to use a sliding switch to do so.

With the mainboard redesign, it would have been easy to leave behind the nixie “shields” he created for his first clock, but with a focus on interoperability, he chose to make this clock fully compatible with version one’s shields and vice versa.

While the changes aren’t groundbreaking, it’s nice to see a project like this undergo continued refinements. If you want to build a clone of this clock, [Mure] has made sure that all of the schematics and source code are available on his site.

Continue reading to see a brief video demo of the clock in action.

Continue reading “Warm Tube Clock, Take 2”

Portable SID Plays Chiptunes

[Markus] on the DangerousPrototypes forum came up with a great little SID player.

The SID was (is?) the awesome sound generation chip inside the Commodore 64, and along with Game Boys and NESs laid the foundation for the chiptune scene. We’re happy to finally see a small SID player that doesn’t resort to SID emulation or a relatively huge MIDIbox.

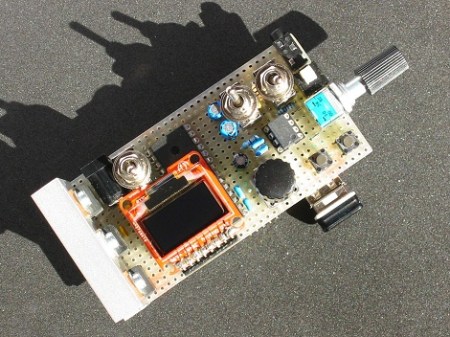
The SID player itself is a shield on a CUI32 PIC dev board. The PIC32 emulates the 6510 and 6526 CPU and CIA chips found in the Commodore 64. A small USB memory stick stores the High Voltage SID Collection and the file system is navigated with an OLED screen. [Markus] says that the player draws 370 mA, so he runs it off a small wall wart. Still, we’re wondering if it’s possible to run this off of an SD card with a SwinSID so power draw can be reduced and a fully portable SID player can be realized.

We’ve got a touch of nostalgia for chiptune and demoscene music right now, so we’re going to listen to some [Nelly Furtado] [Janne Suni] right now, but you can check out the video demo [Markus] posted after the break.
Continue reading “Portable SID Plays Chiptunes”

Kinect-driven Cart Makes Shopping A Snap

wi_go

[Luis de Matos] is working on a neat Kinect project called Wi-GO that aims, as many do, to enhance the lives of individuals with disabilities. While the Wi-GO project is geared towards disabled persons, it can be quite helpful to the elderly and pregnant women as well.

Wi-GO is a motorized shopping cart with a Kinect sensor mounted on the back. The sensor interfaces with a laptop and functions much as you would as you would expect, scanning the area in front of the cart for objects and people. Once it identifies the individual it is meant to help, the cart diligently follows behind as the person goes about their typical shopping routine. The robot keeps a safe distance to avoid collisions, but remains within reach so that it can be used to carry goods.

If you take a look a the video below, you can see Wi-GO in action. It starts off by showing how difficult it would be for an individual in a wheel chair to use a shopping cart alone, and follows up by showing how much easier things are with Wi-GO in tow.

While the project is only in prototype form at the moment, we suspect that it will only be a matter of time until you see devices like Wi-GO in your local supermarket.

Continue reading “Kinect-driven Cart Makes Shopping A Snap”

Precision Frequency Measurement Library For 8-bit Microcontrollers

[Paul] has been working on porting over Arduino libraries for use with the Teensy microcontroller platform. This tends to be pretty simple since they both use the same Atmel chip architecture. But once in a while he finds the Arduino libraries are not what they’re cracked up to be. When looking to port over a frequency measurement library he ended up writing his own that works better and is much more portable.

He had two big beefs with the Arduino Frequency Counter Library. The first is that it required the compensation factor the be calibrated using an accurate frequency counter. That’s a chick-and-egg problem since many people who build a frequency counter with an Arduino are doing so because they don’t already have a standalone tool. The second problem is that the Arduino library was hardcoded for ATmega168 or ATmega328 chips.

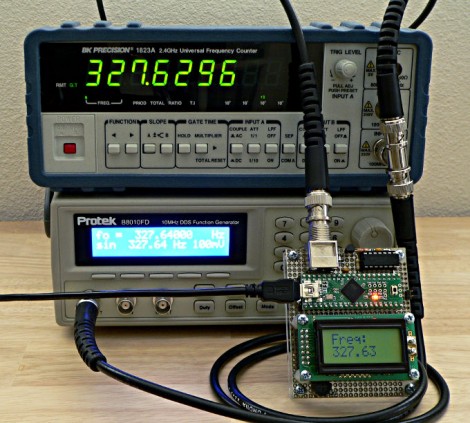
This new library fixes both issues with just one trade-off. Your hardware setup must be using a crystal oscillator. You can see above in the image above that the frequency measurement is quite accurate with this method. The package also uses a thin abstraction layer which will make it easy to port to any 8-bit microcontroller which is programmed in C.