CNC Etch-a-Sketch Draws On Itself

cnc_etchasketch

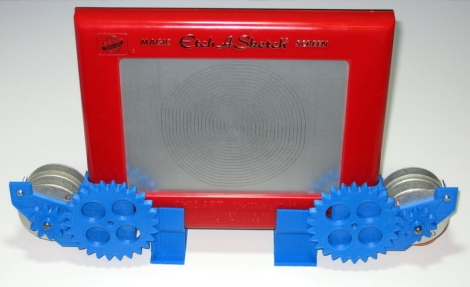
Having never been any good with an Etch-a-Sketch, [Ben] decided it was time to tame the children’s toy that had taunted him for so long. He received one in a gift exchange a few years back and hung onto it, recently digging it out again to fit it with some CNC components.

Using his RepRap, he printed a set of mounting plates and gears to drive the Etch-a-Sketch’s dials. He installed a pair of Airpax steppers to the gears and wired them up to an ATmega AT90 USB board he had sitting around. He installed RepRap firmware on the microcontroller, since it has a built-in gcode interpreter, making it easy for him to upload any gcode file to the Etch-a-Sketch for drawing.

You can see a quick demonstration of the device in action below. He converted a spiral image to gcode, then uploaded it to the Etch-a-Sketch – the machine does the rest. It draws pretty quickly as well – [Ben] even suggests that he could probably get it moving fast enough to melt the stylus!

It would be great to see the Etch-a-Sketch configured to support an online interface. That way he could allow people to upload images to the device, later showing off the artwork in a web gallery not unlike the LOL Shield Theatre we featured last week.

[via Make]

Continue reading “CNC Etch-a-Sketch Draws On Itself”

Thingiverse Receives First DMCA Takedown

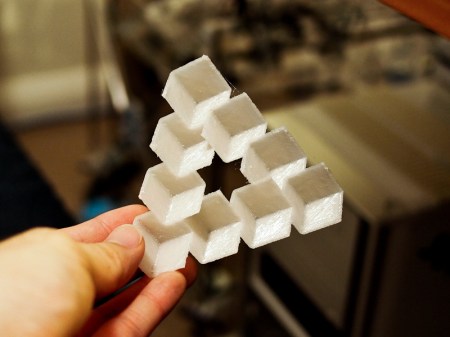
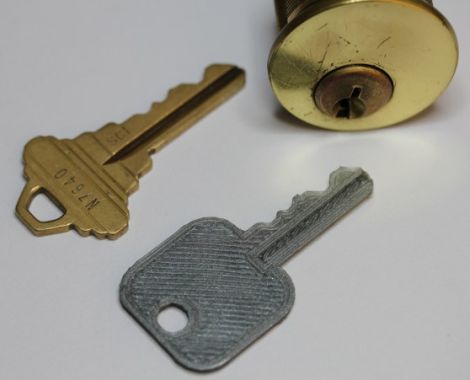
A landmark in home 3d printing was set when [Dr. Ulrich Schwanitz] sent a DMCA takedown notice to Thingiverse.com on users [artur83] and [chylld’s] takes on his Penrose triangle model. ([chylld’s] take is pictured above) While the takedown itself is highly debatable, we do think it’s cool that home 3d printing has come far enough to begin infringing on the copyrights of objects themselves. Right now media pirating has the front stage, but it’s not hard to look a little further into the crazy sci-fi universe that is our future and see a battle being fought over the rights to physical objects.

[via Thingiverse Blog]

Molded Parts: Prusa Mendel In 30 Minutes

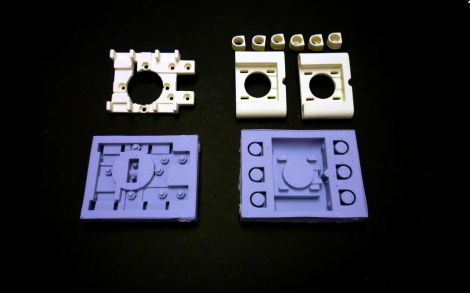
This set of white RepRap parts were created in molds, instead of being printed by another RepRap. [Mark A. Ganter] of the University of Washington admits that this breaks the idea of a 3D printer that is self-replicating. But the molds – which were created by tweaking Prusa Mendel parts to be mold friendly – have the ability to produce every plastic part necessary to build your own RepRap and they can do it much faster. Once the molds were completed [Mark] and his students were able to produce a full set of parts in just 30 minutes, cutting as much as 14 hours off of the time it would have taken to print the parts. Still not convinced? How about this: the molds can be created by a 3D printer or by using a high-resolution power printing method like they have here.

The process starts by printing master parts, then creating a silicone RTV mold from them. Once the molds are ready, [Mark’s] team pours polyurethane into them and waits for it to harden. They plan to share the STL files in less than a week so that you can make your own molds to use to build your RepRap army.

Inkjet Print Head Made With A 3D Printer

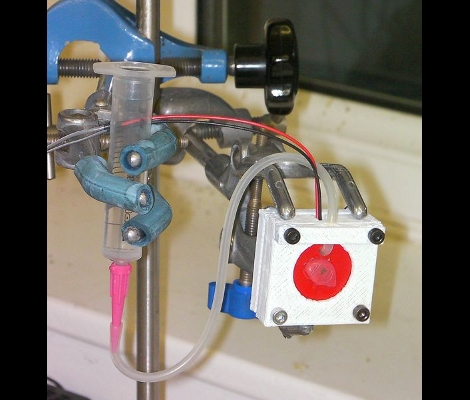
This is an inkjet print head made using a RepRap. The manufacturing process is both simple and ingenious. It uses a vibrating piezo buzzer to pump printing liquid through a tiny nozzle. The red disc seen above is exactly the same diameter as the piezo that resides behind it. There is a hole offset from the center to feed ink in between the two discs. Take a look at the test footage after the break.

To make the nozzle a hole was cut in the plastic disc, then a pin inserted and the whole thing was covered with hot glue. The next step was to remove the pin and shave down the glue until the narrow aperture is open. [Adrian Bowyer] is still in the testing phase for this assembly, but once he gets the bugs worked out he plans to test it with a heating element so that it can print using wax and other materials that are liquid when hot.

[Vik] tipped us off about this one after seeing the printable transistors from the other day.

Continue reading “Inkjet Print Head Made With A 3D Printer”

RepRapped Transistors

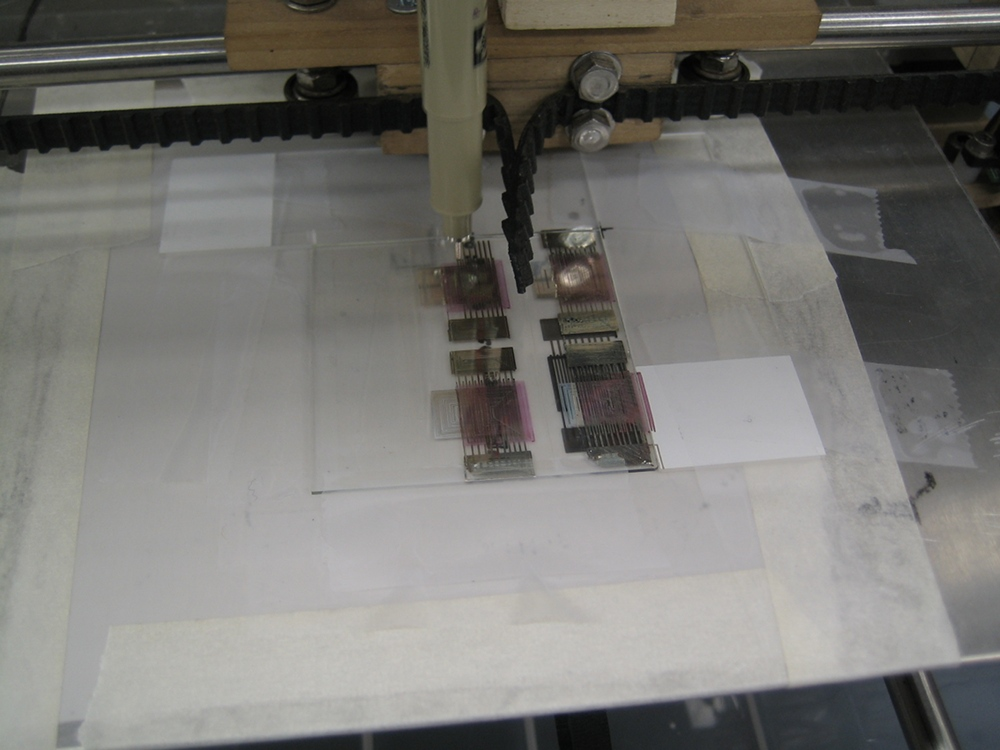
[Mr. Kim] and [John Sarik] made a presentation(pdf) at last weekend’s Botacon conference on how they made organic field-effect transistors (OFETs). A wooden RepRap, the fancifully named Unicorn from Makerbot (or printed from Thingiverse), hacked felt pen, a handful of chemicals, and a couple of pieces of lab equipment were needed to print (plot) out transistors. We were unable to attend the conference, so this is what we inferred from the slides. Silver ink is printed onto a glass slide to form the gate regions, cured and partially masked-off. A layer of CP1 Resin is spin-coated onto the slide to form the dielectric barrier between the gate and the semiconductor, the drain, and source regions. Silver ink is once again used, this time to print out the drain and source regions. The last thing printed is P3HT dissolved in toluene to form the semiconductor region. It would be interesting to see this process modified so that all coatings and curing can be done without removing the slide from the printer.

My RepRap Is Bigger Than Yours

This 3D printer build is a thing of beauty. It prints in ABS plastic on quite a large base. The platform provides all of the X and Y movement, making the gantry stationary except for the Z axis. it is possible to print parts up to about 15″x15″ by 13″ high. The gray hose snaking down around the right side of the print head is a fume extractor, keeping the air clear around the PID controlled head, and heated base. Judging from the example items this prints with fantastic accuracy.

[via Make]

The Twelve Days Of… Self-replicating

Okay, it’s more like the 23 days but who’s counting? [Kliment] is giving the gift of self-replication this holiday season by uploading one new printable part a day. If you follow along and print each one you’ll have a Prusa Mendel by Christmas (this started on 12/2 so you’ll need to catch up). The Prusa is a variation on the Mendel that uses bushings wherever possible, reducing the need for bearings down to just two.

So yeah, you need to have access to a 3D printer in order to make the parts for this 3D printer, but that’s how it always works. [Kliment] has gone the distance to make this little exercise enjoyable. The parts that take longer to print are reserved for the weekends, some have been altered to include a holiday theme, and all of them have been optimized to fit on a Makerbot build platform.

[Thanks Christopher]