ESP8266-Powered Receipt Printer Puts RESTful API On Dead Trees

Taking his digital information into the real-world, [Davide Gironi] has built his own note transcriber from a point-of-sale receipt printer and an ESP8266.

You’ve seen these receipt printers at the order window of restaurants. A server puts in an order from any of the machines throughout the restaurant and a paper summary spits out for the chef line to start in on (and even cuts itself off from the roll).  Why shouldn’t we have this convenience in our own lives?

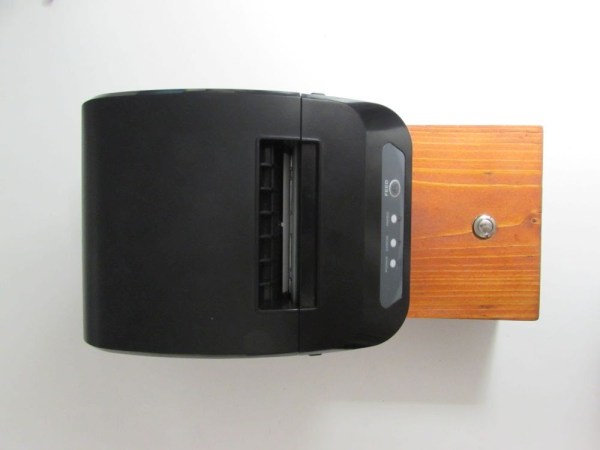
The printer communicates using a variant of the Epson Standard Code for Printers, for which [Davide] has written a library and thankfully shared the code. Adding an ESP8266 using a couple voltage regulators and some passive components makes this wireless, except for power. It has all the fun bells and whistles to set up the WiFi credentials and once running, just push the button on the base and it’ll spit out your data.

But wait, where is that data coming from? The web-based settings page lets you configure a URI to the RESTful source of your choosing. (XKCD has one, don’t they?) It also lets you configure header, footer, error messages, and of course your company hacker logo.

One of our favorite receipt-printer moments was when Hackaday editor of yore [Eliot Phillips] brought a selfie receipt printer to Supercon. We couldn’t find any pictures of that one, so we’ll leave you with the excellent hack [Sam Zeloof] pulled off by cramming one of these into a Polaroid camera.

Continue reading “ESP8266-Powered Receipt Printer Puts RESTful API On Dead Trees”

Making A Robot Cleaner Even Smarter

Some electric cleaners are effective and some hardly even seem to make a difference. The ILIFE V7s may be a robot cleaner, but even with its cleaning modes and anti-collision system, it still requires IR signals to complete any tasks. Tired of having to be physically in the same place as his robot cleaner, [pimuzzo] decided to take matters into his own hands and build a RESTful remote control to send IR signals from afar.

The program uses the ESP8266WebServer and IRremoteESP8266 libraries for handling HTTP requests and sending and receiving infrared signals. The remote also respond to Actions on Google for controlling the robot over a Google Assistant.

The IR signals are a bit funky – as one user highlighted, finding the IR protocol is a nontrivial task that can be accomplished by recording the IR signals from the original remote with a IR receiver and matching the marks, spaces, and carrier frequency with those of known protocol codes. [Oitzu] was able to match the timing to the NEC 32 bit protocol and find the exact codes on an oscilloscope, which simplified the translation of the codes for the remote.

Sometimes when life gives you a robot cleaner, it’s your job to make it smarter.

Hack My House: Garage Door Cryptography Meets Raspberry Pi

Today’s story is one of victory and defeat, of mystery and adventure… It’s time to automate the garage door. Connecting the garage door to the internet was a must on my list of smart home features. Our opener has internet connection capabilities built-in. As you might guess, I’m very skeptical of connecting a device to the internet when I have no control over the software running on it.

The garage door is controlled by a button hung on the garage wall. There is only a pair of wires, so a simple relay should be all that is needed to simulate the button press from a Raspberry Pi. I wired a relay module to a GPIO on the Pi mounted in the garage ceiling, and wrote a quick and dirty test program in Python. Sure enough, the little relay was clicking happily– but the garage door wasn’t budging. Time to troubleshoot. Does the push button still work? *raises the garage door* yep. How about the relay now? *click…click* nope.

You may have figured out by now, but this garage door opener isn’t just a simple momentary contact push button. Yes, that’s a microcontroller, in a garage door button. This sort of scenario calls for forensic equipment more capable than a simple multimeter, and so I turned to Amazon for a USB oscilloscope that could do some limited signal analysis. A device with Linux support was a must, and Pico Technology fit the bill nicely.

Searching for a Secret We Don’t Actually Need

My 2 channel Picotech oscilloscope, the 2204A, finally arrived, and it was time to see what sort of alien technology was in this garage door opener. There are two leads to the button, a ground and a five volt line. When the button is pressed, the microcontroller sends data back over that line by pulling the 5 V line to ground. If this isn’t an implementation of Dallas 1-wire, it’s a very similar concept.

Continue reading “Hack My House: Garage Door Cryptography Meets Raspberry Pi”

Breadboard Circuit of a Funduino, a DS18B20 Temperature Sensor, and an ESP8266 module.

Keep An Eye On Your Fermenting Beer With BrewMonitor

The art of brewing beer is as old as civilization itself. Many people enjoy brewing their own beer at home. Numerous steps must be taken before you can take a swig, but fermentation is one of the most critical. [Martin Kennedy] took up the hobby with his friends, and wanted a convenient way to monitor the fermentation temperature remotely. He started working on the BrewMonitor, a cloud-based homebrewing controller powered by an Arduino clone.

His goal was to create something cheap, convenient, and easy to set up. Traditional fermentation monitoring equipment is very expensive. The typical open-source alternative will set you back 80 euros (roughly $101), using the Arduino-sensor with a Raspberry Pi gateway via the BrewPi webserver. [Martin] did not want to go through the hassle of viewing BrewPi remotely, since it requires a home network and all of the configuration that would entail. Instead, he coupled an Arduino clone with a DS18B20 temperature sensor while using an ESP8266 module for wireless communication, all for less than 18 euros ($23). This connects to a simple webpage based on Scotch.io with a PHP backend (Laravel with RESTful API), a MySQL database, and an AngularJS frontend to display the graph. Once the sensor is placed into the fermenter bucket’s thermowell, the temperature is transmitted once a minute to the REST API. You can see the temperature over time (in Celsius). The design files are available on GitHub.

[Martin] would like to expand the functionality of BrewMonitor, such as adding the ability to adjust the temperature remotely by controlling a heater or fridge, and lowering its cost by single boarding it. Since the information is stored on the cloud, upgrading the system is much easier than using a separate gateway device. He doesn’t rule out crowdfunding campaigns for the future. We would like to see this developed further, since different yeast species and beer styles require very stringent conditions, especially during the weeks-long fermentation process; a 5-degree Celsius difference can ruin an entire brew! Cloud-based temperature adjustment seems like the next big goal for BrewMonitor. DIY brewers salute you, [Martin]!

[via Dangerous Prototypes]