RetroPie Turned Game Gear

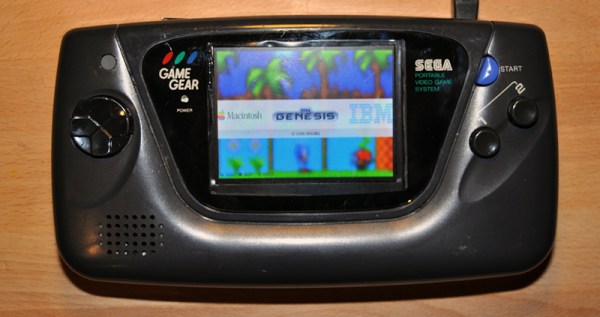
Running vintage console emulators on a Raspberry Pi seems to be the thing all the cool kids are doing. The coolest RetroPie builds take a vintage console – usually of the Nintendo genus – stuff a Raspi in there somehow, and Bob’s your uncle. [Phil Herlihy] over at Adafruit is throwing his hat into the ring with a similar build. For this one, though, he’s using Sega’s oft-maligned Game Gear. He might actually get more than a few hours out of the battery with this one, and the battery is rechargeable, too. You can’t beat that.

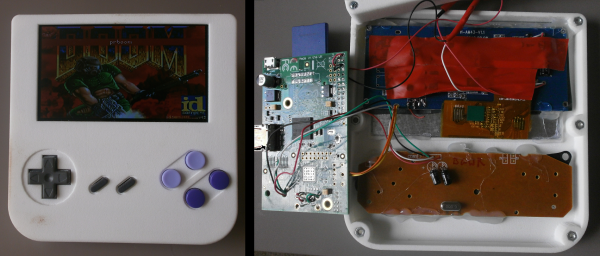
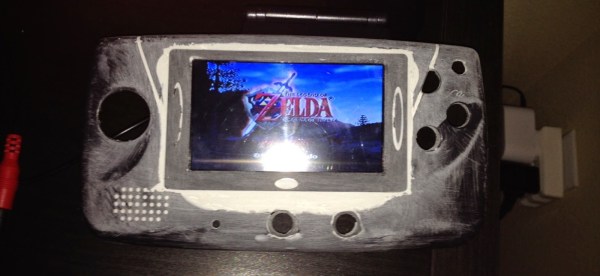
The build begins with tearing down an old Game Gear, chopping up the PCB to save the button contact, and starting to fit all the components in there. The display is completely replaced with a 3.5″ composite display, a bit larger than the 3.2″ display found in a stock Game Gear. That’s not a problem, there’s a surprising amount of space behind the bezel, and if you’re good enough with an xacto blade and a file, it will look stock.

The rest of the components include an amplifier board, battery charge regulator, a 2500mAh LiPo, and a Teensy to read the buttons. There are a few modifications required for the Pi, but the finished device presents a USB port to the outside world; keep a keyboard by your side, and this is a portable Pi in every respect.

PirateCade Is An Impressive Feat Of Woodworking And Design

Retro Arcade Machine Keeps the Classics

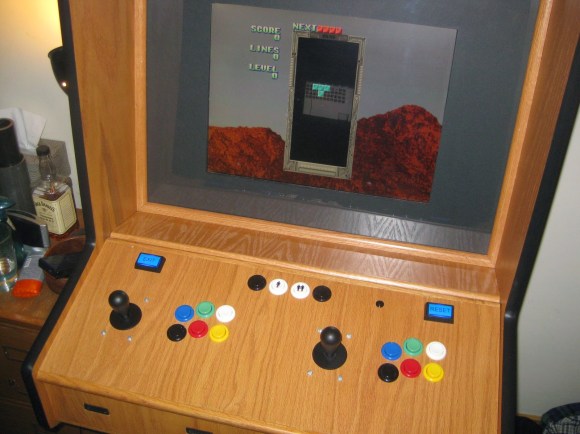
A six month journey of blood sweat and tears is finally over for [David Carver] and what he is left with is nothing short of beautiful. He calls it the PirateCade. We call it the perfect arcade cabinet.

This project is actually [David’s] very first Raspberry Pi project – at least it was, until his Pi crapped out on him. After running into too many problems with it and SD card corruptions, [David] decided against the RetroPie project platform and decided to upgrade to a full-blown PC, using an AtomicFE front-end and the Ultimark Ipac.

The entire cabinet is hand made out of solid wood; he didn’t have access to any fancy CNC routers or laser cutters. We gotta hand it to him, he’s quite the cabinet maker for an electronics guy. Continue reading “PirateCade Is An Impressive Feat Of Woodworking And Design”

Original Gameboy Gets Stuffed Full Of Cool Parts

Raspberry Pi Gameboy

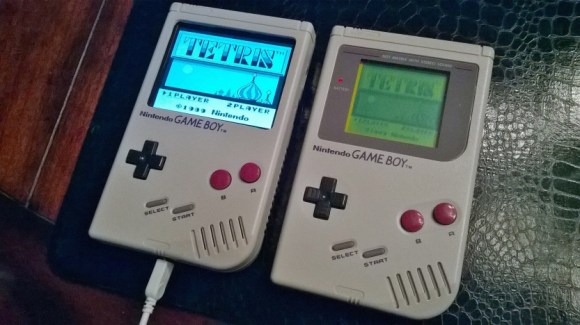
One day at Good Will, [microbyter] came across an original Gameboy for $5. Who reading this post wouldn’t jump on a deal like that? [microbyter] was a little disappointed when he got home and found out that this retro portable did not work. He tried to revive it but it was a lost cause. To turn lemons into lemonade, the Gameboy was gutted and rebuilt into a pretty amazing project.

Looking at the modified and unmodified units, it is extremely obvious that there is a new LCD screen. It measures 3.5″ on the diagonal and is way larger than the 2.6″ of the original screen. Plus, it can display colors unlike the monochrome original. Flipping the unit over will show a couple of buttons have been added to the battery compartment door to act as shoulder buttons.

The brains of the project is a Raspberry Pi running Retropie video game system emulation software which will emulate a bunch of consoles, including the original Gameboy. The video is sent to the LCD screen via the composite video output. The Pi’s headphone jack is connected to a small audio amplifier that powers the original speaker that still resides in the stock location. Connecting the controller buttons got a little more complicated since the original board was removed. Luckily there is a replacement board available for just this type of project that bolts into the stock location, allows the use of the original iconic buttons and has easily accessible solder points. This board is wired up to the Pi’s GPIO pins.

Continue reading “Original Gameboy Gets Stuffed Full Of Cool Parts”

Retro Gaming Console, Now With Internet Radio

RaspPi Retro Gaming Console with Internet Radio

Do you ever miss your gaming system of yesteryear? [yv3] did so he built a retro gaming console. Even though [yv3] likes his old school games, he didn’t want to be stuck listening to old school 8-track tapes while playing those games. The solution for him was to build a retro gaming console with integrated internet radio.

The gaming portion of the build relies on RetroPie. The RetroPie disk image contains all of the software and emulators needed to turn a Raspberry Pi into a dedicated retro gaming system. The RetroPie project supports a lot of gaming systems, [yv3] chose to include Atari, Sega Master System and Genesis, NES, SNES, and Turbografx-16.

Raspberry Pi Internet Radio manages the radio portion of this project and is set up to start playing automatically when the unit is powered on. There are 5 buttons to change the station, volume and settings. The radio stations are managed by a text file residing on the SD card. Audio from the radio can be directed to either the HDMI or the analog out of the RaspPi.

Continue reading “Retro Gaming Console, Now With Internet Radio”

RetroPie Portable Build Uses No Fancy Tools!

retro pie portable

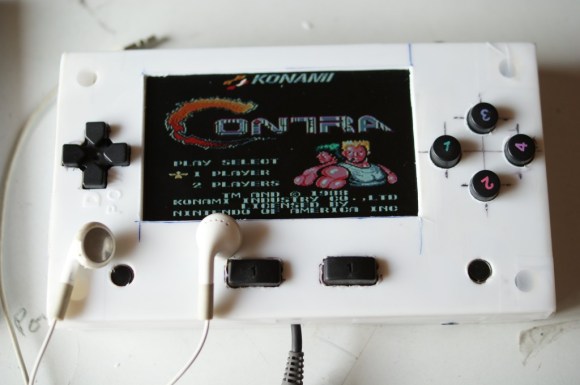
RetroPie Portable builds are great fun, but lots of them make use of expensive tools like 3D printers and laser cutters, which tends to dismay — [Kaushlesh] proves you don’t need any of that!

To build his unit he’s using a Raspberry Pi, a USB controller, a 6 x 4″ project box, a cheap LCD screen, a hot glue gun, and various electrical components — you will still need some soldering skill to complete this project!

By modifying the case he assembled the control boards by taking apart the USB controller. Protoboard made for an easy way to mount his new buttons, with it simply hot glued in place. Quite a bit of soldering later and everything is connected. He notes you’d better make sure everything works as you go otherwise it will be hard to find out what’s wrong when it is assembled!

Future upgrades include a rechargeable li-ion pack and built in speakers (he’s currently using headphones). Take a look after the break!

Continue reading “RetroPie Portable Build Uses No Fancy Tools!”

NES RetroPi

Original NES Guts Upgraded With RetroPie

If you have an old broken NES lying around and have no idea what to do with it, you may want to check out [snoius’s] latest project. He replaced the guts of his old NES with a Raspberry Pi. [snoius] started out by removing most of the electronics from his original NES to make room for the Pi. He left the original control panel board so he would be able to use the original power button and power LED. The NES power switch is an on/off toggle switch. [snoius] decided to just route the 5V USB power input directly through this switch. The result is a hard power switch for the tiny computer. The original power LED is wired up to the Pi’s 3.3V GPIO header through a 330 ohm resistor. Now when the Pi has power, the LED lights up.

The next step was controllers. It looks like [snoius] is using some USB SNES controller clones. He wanted to use the original NES controller ports but obviously the NES did not utilize USB. [snoius] used a saw to cut the backs off of the controller ports, leaving a flat surface. He then used a utility knife to carve out a hole in the shape of a female USB port. He mounted some ports in place and then wired the inside up to some short USB cables with male ends. These were plugged into a USB hub that is hidden inside of the NES case.

The Pi is also hooked up to a short HDMI cable and a short power cable. The loose ends of the cables are mounted to a small block of wood. Notches are cut out of the wood to better fit the cable ends. The rear of the NES has two holes cut out where the original connectors used to be in order to accommodate the new connectors.

With all of the hardware taken care of, [snoius] still needed a way to actually play his games. That’s where RetroPie saved the day. RetroPie is a Linux distribution for the Raspberry Pi that is specifically created to make it easy to play old video games. It includes emulators for many old systems including NES, SNES, SEGA Genesis, Gameboy, etc. [snoius] installed RetroPie onto an 8GB SD card and copied over all of the ROMs he could find. The end result is what appears to be an original NES at a glance, but is in fact multiple retro gaming systems in one. It also contains hundreds of video games in on board memory instead of requiring a large library of physical cartridges.

[via reddit]

Retropie Gaming Table

rasp pi gaming table

[Jody] just finished the write up on this awesome coffee table he’s been working on. It’s an all-in-one gaming table that makes use of Retropie.

When they finally got rid of the kids’ train-play-set table, they needed something to replace it. Eager to use his new collection of tools (including a 3D printer and a laser cutter!), [Jody] decided to build this thing from scratch. He admits he isn’t a very skilled woodworker, but we think he did an excellent job!

The screen is an old laptop LCD that [Jody] took apart and refitted into the nice wood frame you see above. He’s added speakers with 3D printed grills, and the whole thing turns on and off when the screen is lifted, all thanks to a pantry door switch he installed. In the side compartments he has wireless keyboards, mice, and xBox 360 controllers to play the games with. He and his son have already put many hours into the classic Cave Story, first released back in 2004.

There’s a great build log on his site, so if you’re interested in making your own, check it out!