GameGirl: A Better Portable Raspberry Pi

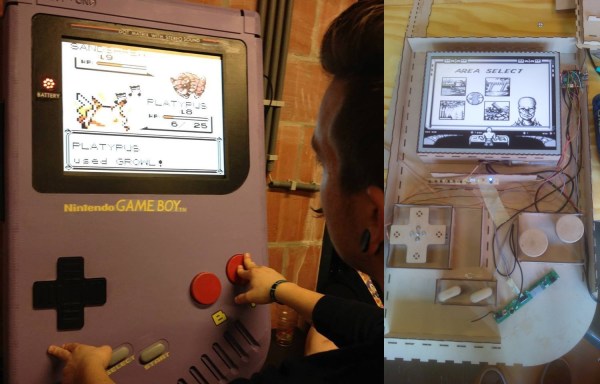
For better or worse, the most popular use for the Raspberry Pi – by far – is media centers and retro game consoles. No, the great unwashed masses aren’t developing Linux drivers for their Pi peripherals, and very few people are tackling bare metal ARM programming. That doesn’t mean creating a handheld console based on the Pi isn’t a worthy pursuit.

For their entry for the 2016 Hackaday Prize, [David] and [Jean-André] are building a portable Pi console that’s much better than an old Bondo-encrusted Game Boy enclosure stuffed with hot glue and wires. They’re doing this project the right way with a hardware accelerated display, custom software, and a high quality case.

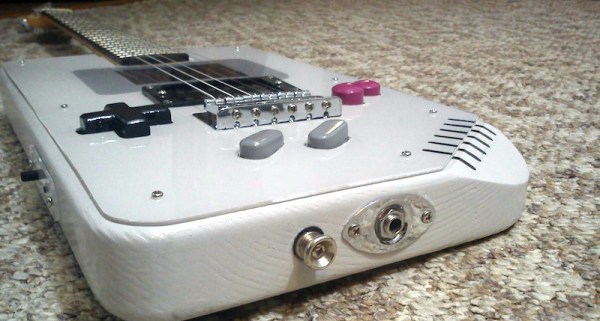
[David] is in charge of the hardware, and that means making a very, very small handheld console. The design of this GameGirl is extremely similar to the old-school Game Boy Pocket (or Game Boy Light). There’s a D-pad, four buttons, select, start, and two ‘shoulder’ buttons on the back. The build is based on the Raspberry Pi Zero, and thanks to the Pi’s standard 40-pin header, [David] is able to configure the display to use an RGB565 DPI interface. This means the display is stupidly cheap while still leaving a few GPIO pins left over for the SPI, buttons, backlight, and PWM audio.

[Jean-André] is the other half of the team, and his contributions to open source software make him exceptionally qualified for this project. He’s the main developer for Lakka, a DIY retro emulation console, and the #5 RetroArch contributor. No, this project isn’t using RetroPie – and there’s a reason for that. Emulator hackers are spending a lot of time optimizing emulators for the Raspberry Pi, only because of RetroPi. If these emulator hackers spent their time optimizing for an API like LibRetro, you could eventually play a working version of Pilotwings 64 on the Raspberry Pi and every other platform LibRetro is available for. All the effort that goes into making a game work with a Raspberry Pi is effort that goes into making that game work for the PSP, Wii, iOS, and a PC. Yes, its philosophical pissing in the wind while saying, ‘this is what the community should do’; this is open source software, after all.

With the right ideas going into the hardware and software, [David] and [Jean-André] have an amazing project on their hands. It’s one of the most popular entries and are near the top of the charts in the community voting bootstrap effort where every like on a project gets the team a dollar for their project. GameGirl is shaping up to be a great project, and we can’t wait to see the it in action.

The HackadayPrize2016 is Sponsored by:

Bartop Arcade Honors Aspect With 4:3 IPad Screen

Let’s face it, we all love arcades, but not all of us can fit a full size stand-up in our homes. [Bentika] knew the solution was a bartop style cabinet, but it had to be designed and built to his specifications. You see, he’s a bit of an aspect ratio nerd. Only a proper 4:3 screen would do for emulating games designed for just such a display. Modern 4:3 displays are hard to come by, unless of course you have an iPad handy. The 1024 x 768 screens used on the early model iPads are perfect for the task.

Driving these screens used to be a chore, but thanks to hacker reverse engineering and overseas manufacturing, these days, controllers are only a few clicks away. [Bentika] ordered a controller for the iPad 1 screen from eBay. What he got was a controller that only worked with the iPad 2 screen. Thankfully he had a pile of old iPads to play with, so it wasn’t an issue.

[Bentika] designed his cabinet using AutoDesk 123D based upon a basic outline provided by [Joshendy]. His final cut patters were created with Adobe Illustrator. He was able to get the entire cabinet laser cut for around $160, including materials. Cabinet assembly was easy, thanks to plenty of square gussets used to align the various pieces.

The controller for this arcade is of course a Raspberry Pi 2 running RetroPie. [Bentika] used a control block to interface the joystick and buttons to the Pi itself. RetroPie lends itself to “keyboardless” operation, he didn’t have to bring any of the Pi’s USB ports outside the case.

We have to say the final results are very nice. This system has all the portability of a CRT based bartop setup without the weight. You can check out more discussion of this hack over on Reddit, or click past the break for the video.

Continue reading “Bartop Arcade Honors Aspect With 4:3 IPad Screen”

Shoving A Raspberry Pi Zero Into An Xbox Controller

With the release of the Raspberry Pi Zero last month, we’ve been waiting in excitement to see the first creative hacks to come out, making use of its tiny size; which if you didn’t know, is smaller than a business card. [Terence Eden] hopped to it and made what might be the first Raspberry Pi Zero emulator: inside an Xbox controller.

10-Pi-Cardboard-insulator
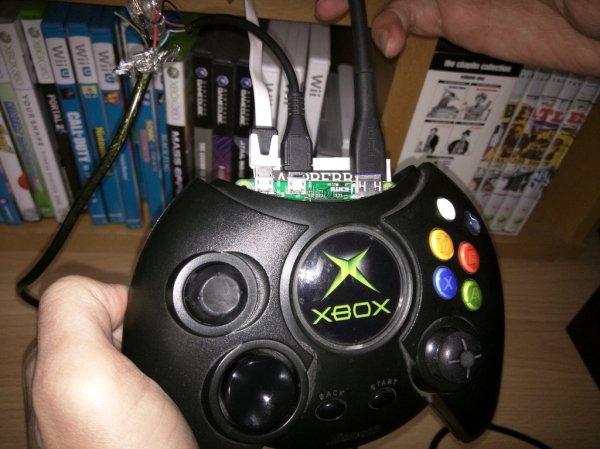
Thanks to its small size it’s actually a fairly straight forward hack with minimal modification to the controller in order to make it fit. In fact, you only need to remove the memory card holder from the controller and snip one bit of plastic in order to make it fit right in the middle — awesome.
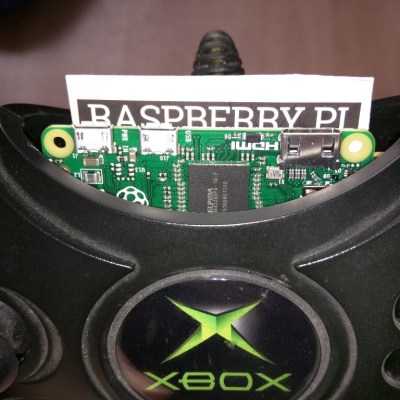
Now it does stick out a bit as you can see in the pictures, but we’re sure it won’t take someone long to make a 3D printed part that snaps into the controller giving it a more stock appearance. Unfortunately since HDMI can’t carry a power source to the Pi, [Terence] is using a micro-USB to power it — but there is enough space inside the controller for a battery pack if you wanted to make it truly portable.

Continue reading “Shoving A Raspberry Pi Zero Into An Xbox Controller”

Introducing The Nintendo Guitar Boy

Need to thrash out some wicked 8-bit riffs? There’s only one guitar you should be doing that with, and it’s a Guitar Boy!

[Fibbef], an administrator on BitFixGaming boards built this as an exhibition piece for his 2015 Game Boy Classic build off. He started the build just three months ago and we have to say we’re impressed. It’s a fully functioning Raspberry Pi Game Boy emulator — and a full fledged electric guitar. The A and B buttons double as volume and tone dials for the guitar, while also being push buttons for the Game Boy!

Under the hood is a Raspberry Pi B+ running RetroPie v2.3, with a 5″ LCD display, custom wooden buttons, the entire body is hand made, and a plexiglass shell covers the whole thing.

Continue reading “Introducing The Nintendo Guitar Boy”

The Biggest Game Boy Ever?

Feeling nostalgic? Miss the solid feel of an original Nintendo Game Boy? You could smash a window with one and keep playing Pokemon the whole time!  Well, [Raz] was, and he built what might just be the biggest Gameboy ever. Gameboy XXL: The Texas Edition.

Actually, it was commissioned for a Belgian music festival called Nintendoom — picture video game music + rave. Anyway, the organizer thought it would be so cool to have a giant functional Game Boy, so [Raz] got to work. He made it out of 10 square meters of 3mm thick MDF, which he laser cut into shape at the Brussels FabLab. The electronics inside consist of a 19″ LCD monitor, a Raspberry Pi, and a few jumbo size buttons.

It’s pretty freaking awesome. It runs Retropie which allows you to play pretty much whatever game you want. Check it out after the break.

Continue reading “The Biggest Game Boy Ever?”

RetroPie SNES Portable

RetroPie Portable Looks Like SNES Gameboy

[Mat] wanted a portable RetroPie project he could take while travelling. He made one with a laser cut plastic housing and, according to him, it turned out to be a ‘hideous deformed beast’. In version 2 he took a different approach and we must say it came out looking pretty nice.

This time [Mat] went with a 3D printed case. He designed it himself in SketchUp. Unfortunately, [Mat] doesn’t have access to a 3D printer so he had to send it out to a professional printing company to the tune of £60 ($90). Although that was a large chunk of change, he was happy with the quality of the print. The final exterior dimensions of the case is 13 x 13 x 2.5 cm.

A quick look at the controls will remind anyone of an SNES controller. [Mat] took the innards of an SNES-like USB gamepad and modeled the new case around it. Not having to cut up or otherwise modify the controller PCB makes for an easy addition to the project. Conveniently, the width of the controller was just about the same as the 4.3 inch LCD used for the gamepad’s display. Both fit nicely together.

Under the hood is a Rasberry Pi running RetroPie. An internal 2600mAh Lithium Ion battery provides up to 3.5 hours of game play. Battery charging management is provided by an Adafruit Powerboost 500 which also has a micro USB port that makes connecting an external charger easy.

RetroPie Game Gear

RetroPie Meets Game Gear, Again

If you’re a fan of video game systems of yesteryear then you are probably familiar with RetroPie. For those who aren’t, RetorPie is a collection of software and video game emulators that can run on a Raspberry Pi. The package makes it easy to get your fix of old games without having to own a bunch of consoles or loose your breath blowing on cartridges.

[brooksyx] already had a broken Game Gear, Raspberry Pi and a 4.3 inch LCD screen kicking around so he thought it would be a good idea to put them together into a handheld RetroPie. Clearly, the new screen was not going to fit in the old screen’s place. The Game Gear’s case was cut and the bezel from the new LCD screen was epoxied in place, gaps filled and finally sanded.

RetroPie Game Gear


The screen is not the only modifications done to the case. Down on the bottom right of the case front [brooksyx] added 4 buttons for the N64 C-buttons. Out back the battery compartments and cartridge slot were filled in.

This project isn’t done yet and we are excited to see how it comes out. If you’re digging this RetroPie portable, you may like this Game Gear with an unmodified case or this large-screened Game Boy.