Furby teardowns are a favorite of ours, and there’s nothing quite like flaying open a creepy talking deformed animatronic owl/hell beast. There’s a lot you can do with a set of screwdrivers and a pair of scissors, but it takes a real clever person to reverse engineer a Furby without any disassembly (Russian, here’s the translation).
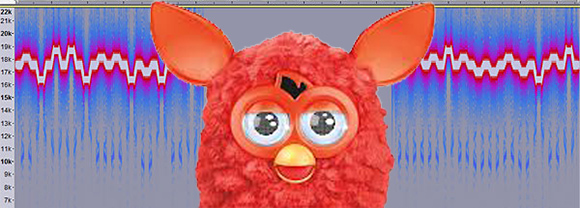
The new Furby comes with an iOS and Android app that allows children to interact with the Furby by feeding it, giving it commands, and even translating the Furbish into English. These apps work by playing a WAV file encoded with commands that give the Furby something to eat, or tell it to dance a merry jig.
Commands are delivered with these WAV files by means of a 4-digit, 4-bit code, complete with checksums. There are ten bits the Furby actually responds on, meaning there are potentially 1024 different commands the Furby can accept.
[iafan] wrote a Perl script to listen in on the audio generated by the Android Furby app and correlated all the possible commands with actions taken by the Furby. Everything is up on a git, allowing anyone to play an audio file and control the Furby’s mood and actions.
With this it should be possible to remotely control a Furby, letting it dance whenever you receive an email, or making it angry whenever someone retweets you. It’s a lot more clever than just putting a Furby through a wood chipper, but considering how creepy these things are, we’re not going to say it’s better.