Last week, the Nvidia Jetson TX1 was released. This credit card-sized module is a ‘supercomputer’ advertised as having more processing power than the latest Intel Core i7s, while running at under 10 Watts. This is supposedly the device that will power the next generation of things, using technologies unheard of in the embedded world.
A modern day smartphone could have been built 10 or 15 years ago. There’s no question the processing power was there with laptop CPUs, and the tiny mechanical hard drives in the original iPod was more than spacious enough to hold a library of Napster’d MP3s and all your phone contacts. The battery for this sesquidecadal smartphone, on the other hand, was impossible. The future depends on batteries and consequently low power computing. Is the Jetson TX1 the board that will deliver us into the future? It took a hands-on look to find out.

What is the TX1
The Jetson TX1 is a tiny module – 50x87mm – encased in a heat sink that brings the volume to about the same size as a pack of cigarettes. Underneath a block of aluminum is an Nvidia Tegra X1, a module that combines a 64-bit quad-core ARM Cortex-A57 CPU with a 256-core Maxwell GPU. The module is equipped with 4GB of LPDDR4-3200, 16GB of eMMC Flash, 802.11ac WiFi, and Bluetooth.
This module connects to the outside world through a 400-pin connector (from Samtec, a company quite liberal with product samples, by the way) that provides six CSI outputs for a half-dozen Raspberry Pi-style cameras, two DSI outputs, 1 eDP 1.4, 1 eDP 1.2, and HDMI 2.0 for displays. Storage is provided through either SD cards or SATA. Other ports include three USB 3.0, three USB 2.0, Gigabit Ethernet, a PCIe x1 and PCIe x4, and a host of GPIOs, UARTs, SPI and I2C busses.
The only way of getting at all these extra ports is, at the moment, the Jetson TX1 carrier board, a board that is effectively a MiniITX motherboard. Mount this carrier board in a case, modify a power supply and figure out how to wire up the front panel buttons, and you’ll have a respectable desktop computer.
This is not a desktop computer, though, and it’s not a replacement for a Raspberry Pi or Beaglebone. This is an engineering tool – a device built to handle the advanced robotics work of the future.
Benchmarks
No tech review would be complete without benchmarks, and since this is an Nvidia board, that means a deep dive into the graphics performance.
The review unit Nvidia sent over came with an incredible amount of documentation, pointing me towards GFXBench 4.0 Manhattan 3.1 (and the T-rex one) to test the graphics performance.
In terms of graphics performance, the TX1 isn’t that much different from a run-of-the-mill mobile chipset from a few years ago. This is to be expected; it’s unreasonable to expect Nvidia to put a Titan in a 10 Watt module; the Titan itself sucks up about 250 Watts.
 What about CPU performance? The ARM Cortex A57 isn’t seen very much in tiny credit-card sized dev boards, but there are a few actual products out there with it. The TX1 isn’t a powerhouse by any means, but it does trounce the Raspberry Pi 2 Model B in testing by a factor of about three.
Compared to desktop/x86 performance, the best benchmarks again put the Nvidia TX1 in the same territory as a middling desktop from a few years ago. Still, that desktop probably draws about 300 W total, where the TX1 sips a meager 10 W.
This is not the board you want if you’re mining Bitcoins, and it’s not the board you should use if you need a powerful, portable device that can connect to anything. It’s for custom designs. The Nvidia TX1 is a module that’s meant to be integrated into products. It’s not a board for ‘makers’ and it’s not designed to be. It’s a board for engineers that need enough power in a reasonably small package that doesn’t drain batteries.
With an ARM Cortex A57 quad core running at almost 2 GHz, 4 GB of RAM, and a reasonably powerful graphics card for the power budget, the Nvidia TX1 is far beyond the usual tiny Linux boards. It’s far beyond the Raspi, the newest Beagleboard, and gives the Intel NUC boards a run for their money.
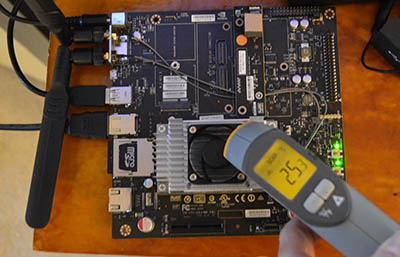
In terms of absolute power, the TX1 is about as powerful as a entry-level laptop from three or four years ago.
The Jetson TX1 is all about performance per Watt. That’s exceptional, new, and exciting; it’s something that simply hasn’t been done before. If you believe the reams of technical documents Nvidia granted me access to, it’s the first step to a world of truly smart embedded devices that have a grasp on computer vision, machine learning, and a bunch of other stuff that hasn’t really found its way into the embedded world yet.

And here lies the problem with the Jetson TX1; because a platform like this hasn’t been available before, the development stack, examples, and community of users simply isn’t there yet. The number of people contributing to the Nvidia embedded systems forum is tiny – our Hackaday articles get more comments than a thread on the Nvidia forums. Like all new platforms, the only thing missing is the community, putting Nvidia in a chicken and egg scenario.
This a platform for engineers. Specifically, engineers who are building autonomous golf carts and cars, quadcopters that follow you around, and robots that could pass a Turing test for at least 30 seconds. It’s an incredible piece of hardware, but not one designed to be a computer that sits next to a TV. The TX1 is an engineering tool that’s meant to go into other devices.
Alternative Applications, Like Gamecube
With that said, there are a few very interesting applications I could see the TX1 being used for. My car needs a new head unit, and building one with the TX1 would future proof it for at least another 200,000 miles. For the very highly skilled amateur engineers, the TX1 module opens a lot of doors. Six webcams is something a lot of artists would probably like to experiment with, and two DSI outputs – and a graphics card – would allow for some very interesting user interfaces.
That said, the TX1 carrier board is not the breakout board for these applications. I’d like to see something like what Sparkfun put together for the Intel Edison – dozens of breakout boards for every imaginable use case. The PCB files for the TX1 carrier board are available through the Nvidia developer’s portal (hope you like OrCAD), and Samtec, the supplier for the 400-pin connector used for the module, is exceedingly easy to work with. It’s not unreasonable for someone with a reflow toaster oven to create a breakout for the TX1 that’s far more convenient than a Mini-ITX motherboard.
Right now there aren’t many computers with ARM processors and this amount of horsepower out now. Impressively powerful ARM boards, such as the new BeagleBoard X15 and those that follow the 96Boards specification exist, but these do not have a modern graphics card baked into the module.
Without someone out there doing the grunt work of making applications with mass appeal work with the TX1, it’s impossible to say how well this board performs at emulating a GameCube, or any other general purpose application. The hardware is probably there, but the reviewers for the TX1 have been given less than a week to StackOverflow their way through a compatible build for the most demanding applications this board wasn’t designed for.
It’s all about efficiency
Is the TX1 a ‘supercomputer on a module’? Yes, and no. While it does perform reasonably well at machine learning tasks compared to the latest core-i7 CPUs, the Alexnet machine learning tasks are a task best suited for GPUs. It’s like asking which flies better: a Cessna 172 or a Bugatti Veyron? The Cessna is by far the better flying machine, but if you’re looking for a ‘supercomputer’, you might want to look at a 747 or C-5 Galaxy.
On the other hand, there aren’t many boards or modules out there at the intersection of high-powered ARM boards with a GPU and on a 10 Watt power budget. It’s something that’s needed to build the machines, robots, and autonomous devices of the future. But even then it’s still a niche product.
I can’t wait to see a community pop up around the TX1. With a few phone calls to Samtec, a few hours in KiCad, and a group buy for the module itself ($299 USD in 1000 unit quantities), this could be the start of something very, very interesting.


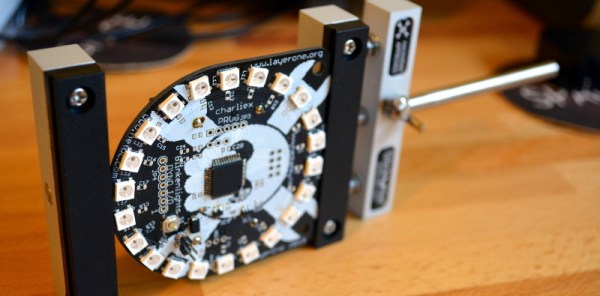


 Better yet is the ability to design jaws for your own needs. [Alex Rich], Stickvise’s creator, already has
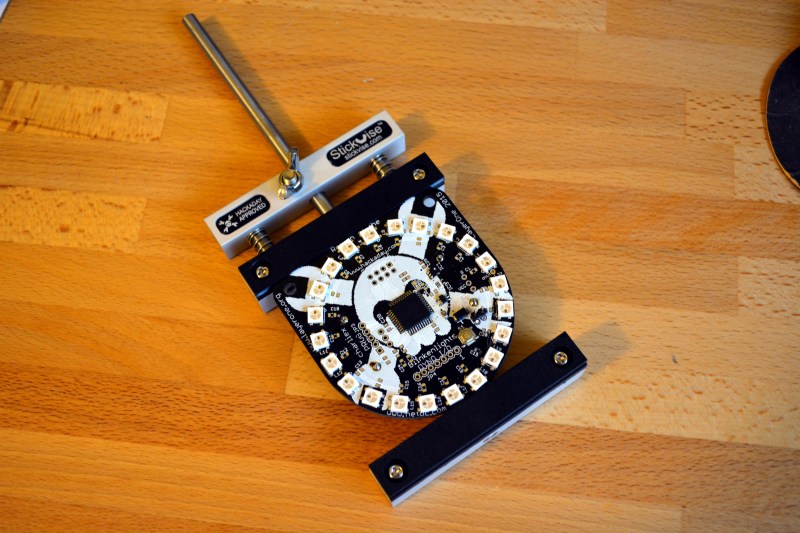
  If you have an eagle eye you’ll have noticed the Jolly Wrencher with “Hackaday Approved” next to it on the Stickvise. When [Alex Rich] started refining his original design

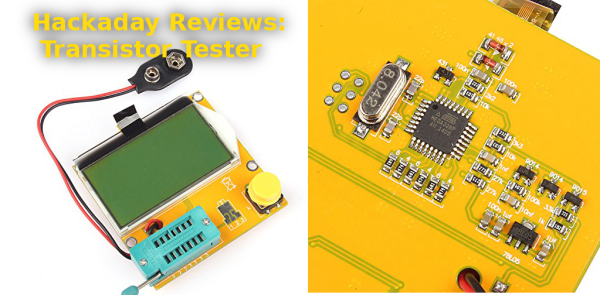
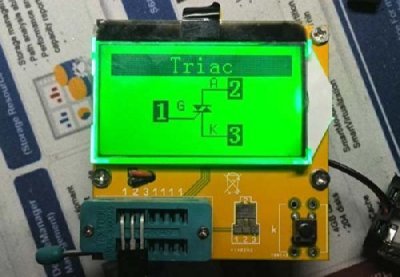 The tester worked surprisingly well – it was able to correctly identify BJTs, FETs, even esoteric parts. The only thing it balked on was a linear voltage regulator, which showed up as two diodes. Regulators are a bit more than a simple device though, so I can’t blame the tester there. The values returned were all reasonable as well. While I don’t have a calibrated lab to check against, the numbers lined up with my Fluke meter.


