Giant Clock Made In The Nick Of Time

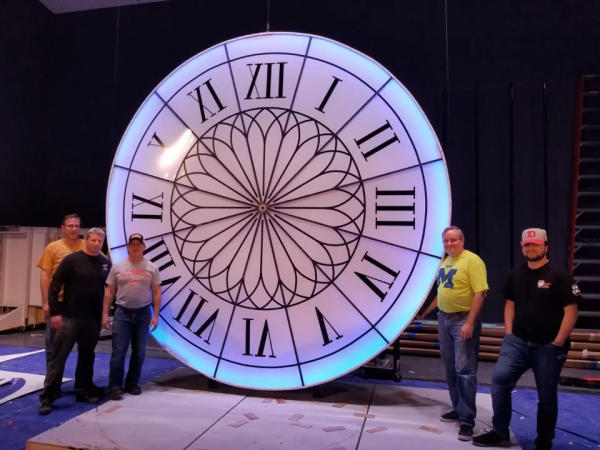
When [tnjyoung] was asked to build a huge lighted clock for a high school theater’s production of Cinderella with only two weeks before opening night, he probably wished for a fairy godmother of his own to show up and do it for him. But he and his team pulled it off, and it looks amazing. That medallion in the middle? It was laid out painstakingly by hand, using electrical tape.
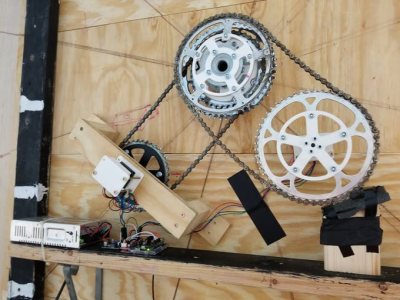
This thing is 12 feet wide and weighs more than 500 pounds. Even so, it isn’t a permanent set piece, so it has to move up and down throughout the show on airplane cables. Now for the minutiae: there’s an Arduino Uno with built-in Wi-Fi that receives UDP commands from a phone to raise and lower the clock at the appropriate times. The ‘duino is also controlling two stepper motors, one for the hour hand and one for the minute hand.

Time is almost a minor character in the story of Cinderella, since she has to get back by midnight. Because of this, [tnjyoung] programmed a dozen or so time cues that move the steppers at various speeds to achieve different effects, like time flying by as she dances the night away with the Prince. Hour you still just sitting there? Sweep past the break to watch the build process fly by in a matter of minutes.

Got all the time in the world? Make a clock out of clocks. Clocks all the way down.

Continue reading “Giant Clock Made In The Nick Of Time”

Gravity-Defying Water Droplet Fountain Gets An Upgrade

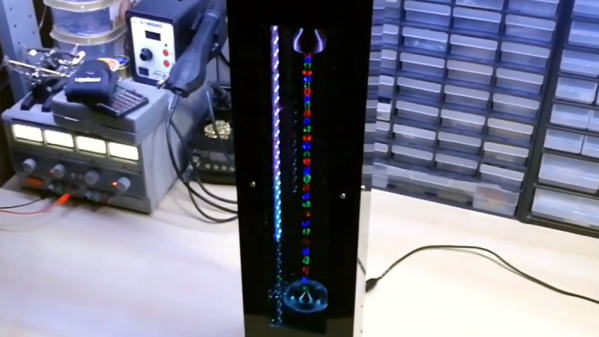
When we last saw [isaac879]’s levitating RGB time fountain, it was made of wood which meant that it would absorb water and didn’t really show off the effect very well. His new version solves this problem with an acrylic case, new PCB and an updated circuit.

Like the original, this project drops water past strobing RGB LEDs creating an illusion of levitating, undulating colored water droplets. The pump at the top creates the droplets, but the timing has a tendency to drift over time. He thus implemented a PID controller to manage the pump’s drip rate, which was done by having the droplets pass by an infrared diode connected to an ATTiny85. The ’85 used the diode and PWM to control the pump motor speed and communicated to the Arduino over I2C.

The video shown below shows the whole process of designing and building the new time fountain. Everything from circuit and PCB design to 3D printing to assembly is shown along with narration describing what’s going on in case you want to build one yourself. If you do, all the files and components required are listed in the info section of the video.

There’s more that [isaac879] wants to do to improve the time fountain, but V2 looks great. It’s sleeker and smaller than the original and solves some of the design issues of the first. For more inspiration, check out some of the other levitating water fountain projects that have been posted over the years.

Continue reading “Gravity-Defying Water Droplet Fountain Gets An Upgrade”

LED Flame Illuminates The Beauty Of Noise

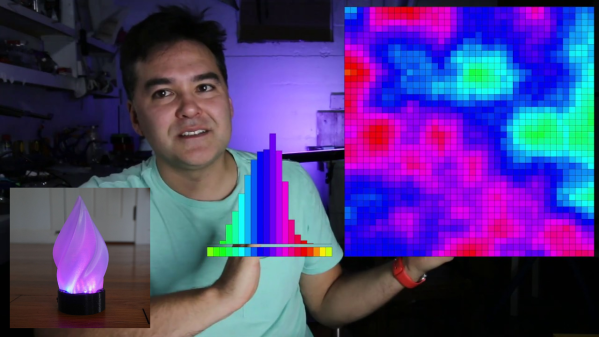
Have you ever wrapped up a nice blinky project only to be disappointed by the predictability of the light or the color patterns? When it came to lighting this LED candle, so was [fungus amungus]. But there’s a better way, and it involves noise.

Perlin noise was created in the early 80s by Ken Perlin while he was working on the movie Tron. Frustrated by the current state of computer graphics and too limited on space to use images, he devised an algorithm for generating natural-looking textures. Basically, you generate a bunch of numbers between 0 and 1, then assign values to those numbers, such as a range of greyscale values from black (0) to white (1), or the values from the color wheel. The result is much prettier than random numbers because the neighboring values for any given number aren’t radically different. You get nice randomness with hardly any overhead.

[fungus amungus] is using the FastLED’s noise function to generate the numbers, but there’s a whole lot more going on here. As he explains in the excellent video after the break, if you want to animate these values, you just add another dimension of them. Although [fungus amungus] is using a Trinket Pro and a NeoPixel ring, we think a simplified version could be done with a Circuit Playground Express using the built-in LEDs.

If you want to do it the hard way, start by making your own NeoPixel ring.

Continue reading “LED Flame Illuminates The Beauty Of Noise”

Bucky Glow: Have A Ball While You Practice Coding

About a year ago, [Jonathan Bumstead] built a giant, touch-sensitive, interactive RGB LED geodesic dome that somehow escaped our attention entirely. For this year’s Hackaday Prize, he’s designed a smaller version that’s just as awesome, but a lot faster and easier to build.

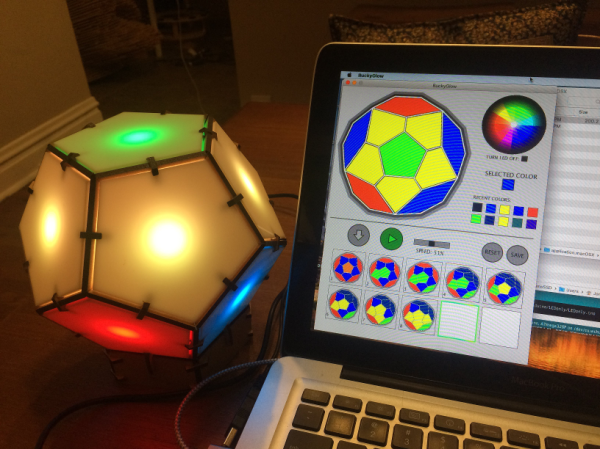
The Bucky Glow is great way for hackers of all ages to expand their coding and problem solving skills. This interactive dodecahedron consists of 11 RGB LEDs and a Nano inside 12-sided laser-cut MDF sculpture. The breakout header means you’re free to add interactive bits like a DIY capacitive touch keyboard, IR sensor/emitter pairs, motors, or whatever you want.

When it’s time to relax, Bucky Glow puts on a light show. It comes ready to party without any programming necessary, but if you wanna put on some Pink Floyd and get your hands dirty, [Jonathan]’s custom Processing app makes it easy to program complex light shows.

[Jonathan] is currently working on some different Bucky Glow dissemination methods, such as a kit version. For now, you can buy a fully assembled Bucky Glow through the One Bit Kit store. Interact with the break to try it before you buy it.

Continue reading “Bucky Glow: Have A Ball While You Practice Coding”

A Mini Stacker Arcade Cabinet

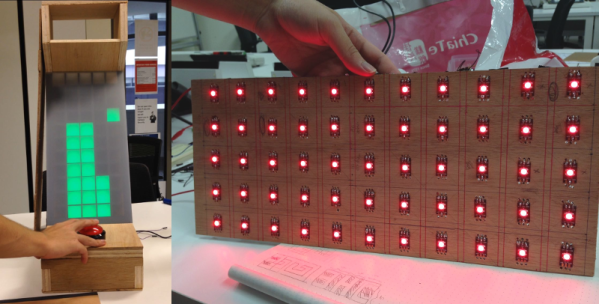
For [LumoW], what started as a school project turned into a passion project. He and his team made a hardware implementation of an arcade game called Stacker. Never heard of it? It’s pretty fun, kind of like an inverse Tetris. You can play the flash version here and see their mini arcade version after the break.

The game is based around the Mojo FPGA which the class required, and it’s programmed entirely in bitwise operators. It uses WS2812 RGB LEDs to represent the individual tower building blocks, and these are mounted on plywood in a matrix and separated into cells by a grid of foam board. After some trial and error, the team found the perfect shade of acrylic to diffuse the bright dots into glowing squares.

Since the game only needs one input, we don’t think [LumoW] should apologize at all for using the biggest, baddest button they could find. Besides, the game has that edge-of-your-seat action that can turn panic into heavy-handedness and cool DIY arcade games into shards of sadness.

Looking for something more advanced to do with an FPGA? Try your hand at vector games.

Continue reading “A Mini Stacker Arcade Cabinet”

Easy UFO Lights On Your Drone For Halloween

Sometimes it’s not so much what you put together, it’s how you use it. The folks at Adafruit have put up a project on how to dress up your drone with ‘UFO lights’ just in time for Halloween. The project is a ring of RGB LEDs and a small microcontroller to give any quadcopter a spinning ‘tractor beam light’ effect. A 3D printed fixture handles attachment. If you’re using a DJI Phantom 4 like they are, you can power everything directly from the drone using a short USB cable, which means hardly any wiring work at all, and no permanent changes of any kind to the aircraft. Otherwise, you’re on your own for providing power but that’s probably well within the capabilities of anyone who messes with add-ons to hobby aircraft.

One thing this project demonstrates is how far things have come with regards to accessibility of parts and tools. A 3D printed fixture, an off-the-shelf RGB LED ring, and a drop-in software library for a small microcontroller makes this an afternoon project. The video (embedded below) also demonstrates how some unfamiliar lights and some darkness goes a long way toward turning the otherwise familiar Phantom quadcopter into a literal Unidentified Flying Object.

Continue reading “Easy UFO Lights On Your Drone For Halloween”

Who Could Resist A Color Coded Clock?

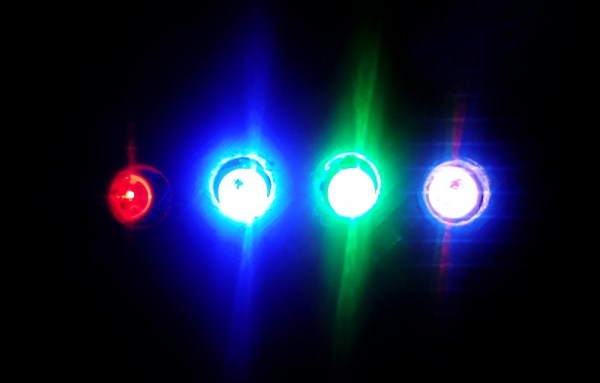
[Luc] wanted to make a clock like no other. He knows that the territory is well-trod, especially in the area of minimalist design. Undeterred, [Luc] came up with a fresh design that uses the resistor color code to display the time. He’s calling it the Nerd’s Ultimate Watch.

It doesn’t get much more minimalist than four RGB LEDs. Each one illuminates in the color that represents the digit in the current time. For instance, I’m typing this sentence at 1:37PM. The clock uses 24-hour time, so let’s call it 13:37. Using resistor color code time, that’s 1, 3, 3, 7, or brown, orange, orange, violet.
Continue reading “Who Could Resist A Color Coded Clock?”