Raspberry Pi Used As A Beacon Transmitter

rpi-beacon-transmitter

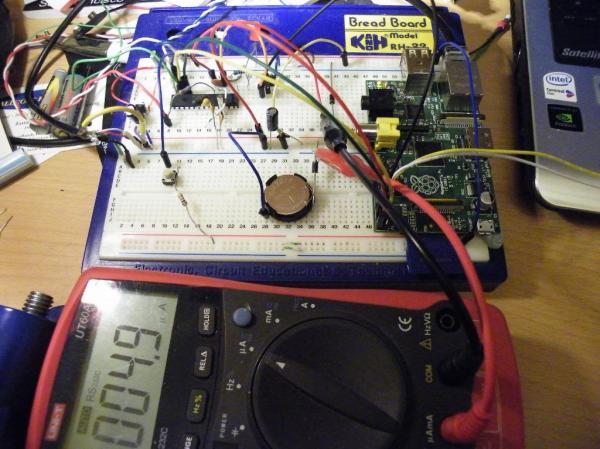
[m0xpd] got his hands on an inexpensive AD9850 DDS Module from eBay but needed a way to control it. He took inspiration from the projects that used a PIC microcontroller, but decided to add his own twist by using a Raspberry Pi to build a multi-mode beacon transmitter.

At the center of this breadboarded circuit lies the green AD9850 module. To its left is a level converter he built to get the 3.3V levels from the RPi board to work with the rest of the 5V hardware. The signal then feeds into a QRP amplifier and a low pass filter.

He didn’t start from square one when it came time to write the code for the RPi. Instead he grabbed an Arduino sketch for the very same DDS and ported it over to Python. The first test signal was his call sign sent in Morse code at QRSS speeds. But he also managed to get Hellschreiber messages working, making it a multiple-mode device.

[via Solder Smoke]

Hackaday Links: January 24th, 2013

Raspberry Pi’s answer to the iMac

links-rpi-imac

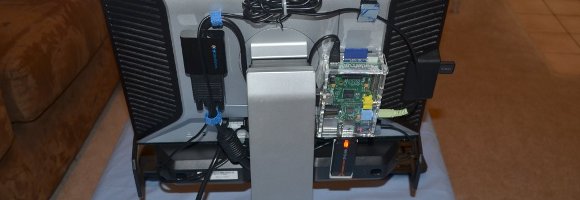
If you always wanted a sweet looking all-in-one computer like an iMac, but without OSX this one’s for you. [Michael Davis] glued everything you need for a Raspberry Pi computer to the back of an LCD monitor.

Dancing Japanese robot shows high creepiness factor

links-dancing-robot

You’ve just got to see this one to believe it. Someone choreographed some seriously lifelike dance moves for this robot. [Thanks – via Dr. GIY’s blog]

Helper script to install MSPGCC

links-mspgcc-install-script

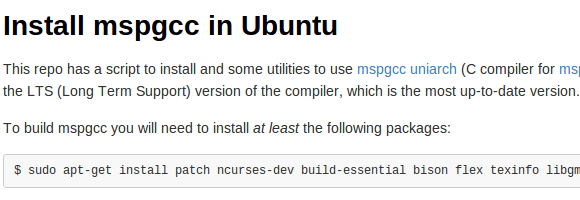
The repositories available to Ubuntu are nice, but if you want to get the newest version of the GCC toolchain for MSP430 microcontrollers you’re going to need to do the compilation yourself. [Jose] is trying to make the process a bit easier with this helper script which download and installs MSPGCC Uniarch.

Easy reset for WRT-54G routers

links-ddwrt-reset-button

The whole point of the router reset button being hard to press is so you don’t hit it by accident. But the difficulty of getting to it drove [Noah] crazy so he added his own easy to reach replacement.

Camera stabilization tips

links-camera-stabilizers

This is a public service to amateur videographers. You don’t need expensive equipment to make a video without nausea inducing shakes. Try out these simple camera stabilization tips. You can use a tripod as a counterweight, or a piece of 2×4 to give the point-and-shoot a dual grip.

Replacement Controllers For Slot Car Racing

replacement-controllers-for-slot-car-racing

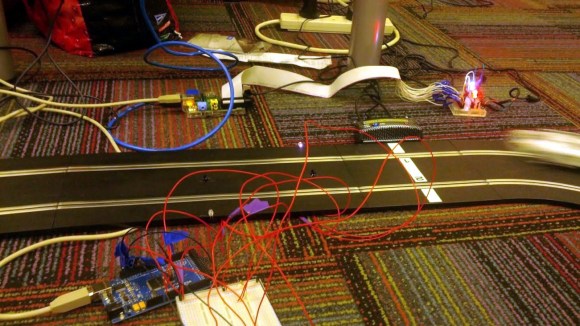
That blur on the right is a car racing into the frame. But look around the rest of the image and you’ll see the area is littered with extra hardware. [Matthew], [Doug], and [Barry] have been hard at work adding extra functionality and replacing the original controllers on this Scalextric slot car setup. So far it looks like their build log has not caught up with all the work they’ve done. We’re hoping to learn more details as they have time to write about them (this is coursework at University so we’re sure there’s a lot on their plates). But for now there are several videos and a gallery of images to drool over.

The cars are controlled by the voltage level in the track. The team replaced the stock controllers with a Raspberry Pi. It manages that voltage using Pulse-Width Modulation via MOSFETs. This allows the races to be automated but also makes it simple for a human operator to use just about any input device imaginable to control the cars. For good measure they also added a lap counter that uses an IR LED and detector to sense when a car passes the finish line.

After viewing several of their videos we think the goal of the project is to log the fasts times without sending the cars flying off the tracks during the turns.

Google Talk Bot Running On Raspberry Pi

google-talk-raspberry-pi

[Michael Mitchell] put together a demonstration of how Google Talk can be used to communicate with scripts. Although the concept isn’t new we haven’t seen very many projects that use the chat interface for issuing commands and receiving data. The one that does come to mind is this home automation project which uses Google Talk because it’s quite a bit faster than SMS or email communications.

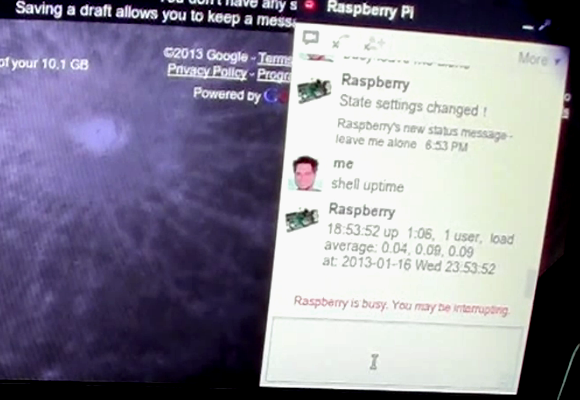
Luckily there’s already a Python library called pygtalkrobot which helps with the XMPPPY protocol used by Google Talk. In addition to that package, [Michael] also installs some extras which allow him to access the GPIO pins on the RPi via Python. In the video after the break he demonstrates switching and LED on and off, as well as reading from a slide switch connected to pin 8. Of course it’s a snap to code feedback from the OS itself. As you can see in the image above the RPi is reporting it’s uptime after being issued a command by [Michael]

Continue reading “Google Talk Bot Running On Raspberry Pi”

Raspberry Pi Power Controller Adds Shutdown And Startup Functionality

This breadboarded circuit uses a PIC chip to control the Raspberry Pi’s power supply. We first noticed this gap in the RPi features when we built an XBMC setup around the RPi board. It’s not the end of the world, but since installing the Raspberry Pi we have been unplugging it after each use. [Kevin Sangeelee’s] circuit could be the path to automating this process.

This is not really aimed at media applications. The PIC circuit does switch power to the RPi, but the goal was to add a push-button to do so. Other goals of the project include scheduled shutdown and data logging of brownout events on the power rail. As you can see, there’s a coin cell in the mix which keeps time when the system is in power down. The RPi communicates with the PIC via i2c. This facilitates full power-down using the Linux command ‘shudown -h’, as well as the ability to schedule a restart time.

Adding an IR receiver and tweaking the PIC code are all it would take to trigger the power controller from the couch.

[Thanks Donn]

Coffee Table Arcade Cabinet

ikea-arcade-gaming

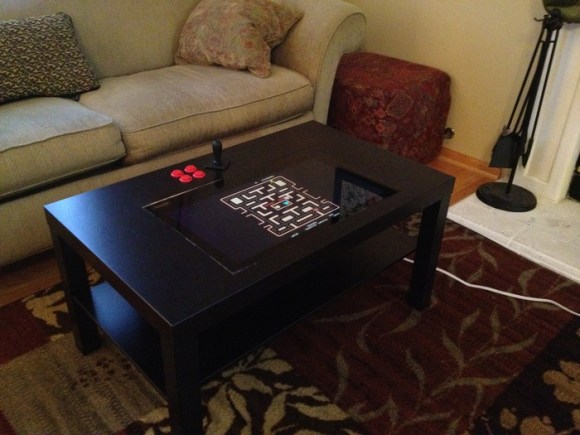
Get some Pac-Man fever while sitting on this couch thanks to the arcade rig built inside of the coffee table. The controls are a bit more sparse than more dedicated MAME rigs, but you should still be able to play most of the classics with four buttons and a joystick. After all, you need to reserve some room to put your feet up when you’re not gaming.

[Manny Flores] started the project with a Lack table from Ikea. The top is anything but solid. After tracing the outline of his LCD screen and cutting through the surface he discovered this is more of a beefed of cardboard than it is wood. The honeycomb of paperboard inside the surface of the table makes it really easy to clear out some space. In fact, when it came time to add the arcade buttons he just used a utility knife to cut the openings. Inside you’ll find a Raspberry Pi which interfaces with the buttons and joystick via an iPac USB controller board. A set of powered speakers mounted on the underside complete the design.

[via Adafruit]

Unwrapping Images Of Cylindrical Objects

unwrapping-images-of-cylindrical-objects

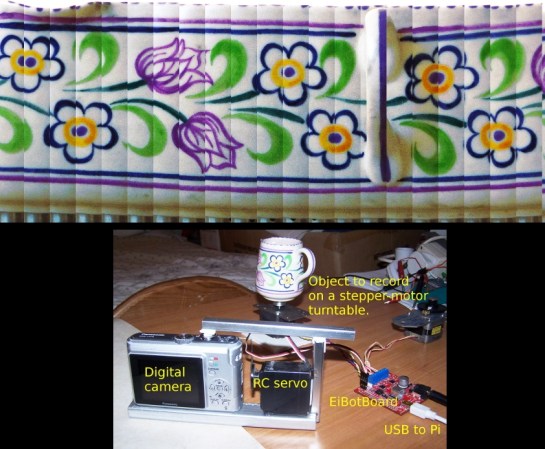
Here’s an automated setup that lets you create flat images of cylindrical objects. The example shown above takes a creamer and lets you see what the painted pattern looks like when viewed continuously.

The image capture rig is similar to turntable photography setups that allow you to construct animated GIF files or 3D models of objects. The subject is places on a stepper motor which allows precise control when rotating the object between frames. The EiBotBoard (which we’ve seen in at least one other project) is designed for the EggBot printer. But it is used here to interface the motor and capture equipment with the Raspberry Pi.

We’re a little uncertain if the RPi actually handles the image manipulation. The project uses ImageMagick, which will certainly run on the RPi. There is a mention of the Raspberry Pi camera joing the rig as a future improvement so we do expect to see a fully-automatic revision at some point.

[via Adafruit via EMSL]