Vintage Kegerator

Vintage Kegerator

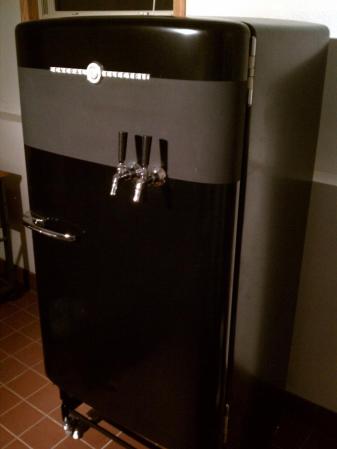
[Kerber] got his hands on a classic 1950’s General Electric fridge, and converted it into this classy vintage kegerator.

As his build log shows, it took an intensive restoration process to get this fridge back in shape. He completely stripped it down, scraping off the sixty year old insulation, fibreglass, and glue. Then the chassis was sanded down to a smooth finish and painted black. R-19 insulation was added to replace the old stuff.

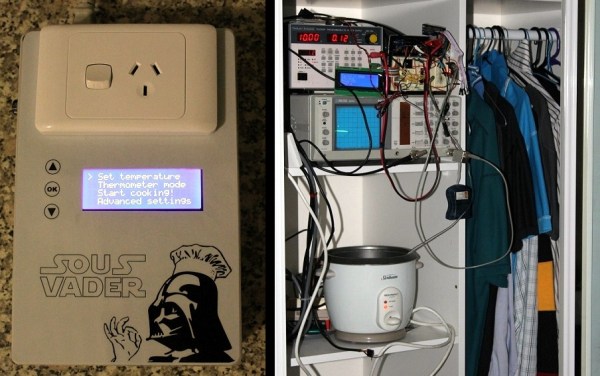
Next up was electronics. An Arduino, DS18B20 temperature sensor, and a solid state relay were used to regulate the temperature and prevent frozen beer. There’s also a Guruplug server that reads data from the Arduino every minute. It makes this data accessible through a web page, so the temperature of the kegs can be monitored from anywhere. [Kerber] admits that this is overkill, but leaves room for future expansion.

The kegerator draws about 180 Watts, and runs for about 6 minutes per hour to keep the temperature regulated. This is pretty impressive considering the age of the fridge. The final restoration looks great, and serves up data along with the beer.

Web Scraping Amazon And Rotten Tomatoes

web-scraping-amazon-and-rotten-tomatos

[Rajesh] put web scraping to good use in order to gather the information important to him. He’s published two posts about it. One scrapes Amazon daily to see if the books he wants to read have reached a certain price threshold. The other scrapes Rotten Tomatoes in order to display the audience score next to the critics score for the top renting movies.

Web scraping uses scripts to gather information programmatically from HTML rather than using an API to access data. We recently featured a conceptual tutorial on the topic, and even came across a hack that scraped all of our own posts. [Rajesh’s] technique is pretty much the same.

He’s using Python scripts with the Beautiful Soup module to parse the DOM tree for the information he’s after. In the case of the Amazon script he sets a target price for a specific book he’s after and will get an email automatically when it gets there. With Rotten Tomatoes he sometimes likes to see the audience score when considering a movie, but you can’t get it on the list at the website; you have to click through to each movie. His script keeps a database so that it doesn’t continually scrape the same information. The collected numbers are displayed alongside the critics scores as seen above.

Replacement Controllers For Slot Car Racing

replacement-controllers-for-slot-car-racing

That blur on the right is a car racing into the frame. But look around the rest of the image and you’ll see the area is littered with extra hardware. [Matthew], [Doug], and [Barry] have been hard at work adding extra functionality and replacing the original controllers on this Scalextric slot car setup. So far it looks like their build log has not caught up with all the work they’ve done. We’re hoping to learn more details as they have time to write about them (this is coursework at University so we’re sure there’s a lot on their plates). But for now there are several videos and a gallery of images to drool over.

The cars are controlled by the voltage level in the track. The team replaced the stock controllers with a Raspberry Pi. It manages that voltage using Pulse-Width Modulation via MOSFETs. This allows the races to be automated but also makes it simple for a human operator to use just about any input device imaginable to control the cars. For good measure they also added a lap counter that uses an IR LED and detector to sense when a car passes the finish line.

After viewing several of their videos we think the goal of the project is to log the fasts times without sending the cars flying off the tracks during the turns.

Simple IPhone Telescope Mount

This cheap and easy hack will let you use your old smart phone to take pictures and videos of the view through a telescope. [Xobmo] built the connector for just 55 cents. Apart from our concerns about scratching the lens when inserting the phone in the bracket we love the idea.

He was given the Celestron Powerseeker 70AZ as a gift from his wife last Christmas. He looked around the Internet and saw that there are already some solutions for recording video using an iPhone 3GS. This design on Thingiverse would be perfect, but he doesn’t have access to a 3D printer and ordering it form a service would cost almost $50. But when he got to thinking about it, all he needed was a ring to fit on the telescope and a way to connected the iPhone to it. He headed down to the hardware store and picked up a PVC coupler. After working with a hack saw and drill he ended up with a slot with two wings on it. Just slip the phone in and slide the ring on the eyepiece. You can see some action shots, and get a look at the mount itself, in the clip after the break.

Continue reading “Simple IPhone Telescope Mount”

Dead Motherboard Wall Hides An LED Marquee

dead-motherboard-led-marquee

[Jared] is a computer technician so he has no problem getting his hands on broken motherboards. It looks like he tends to save the more interesting colors and has finally found a use for the waste. He built this wall art which also acts as an LED marquee.

He came up with the size and shape — 18″ by 48″ — because it meshes well with a sheet of MDF. The outline allows for a grid made up of 2″ square pixels arranged seven high and twenty-one wide. The top and bottom rows will serve as a frame for the lights, which still leaves the five pixels necessary to display characters. From there he started wiring up the LED array, which is shown in the testing phase in the clip after the break. Each pixel is cordoned off by a frame of basswood which [Jared] fabricated on the table saw. The project is finished up by cutting the motherboards down to size and mounting them with threaded rod and nuts. The board chunks are not transparent but they’re smaller than the grid so the LEDs will make the edges glow.

This reminds us of the motherboards used to mimic stained glass from several years back.

Continue reading “Dead Motherboard Wall Hides An LED Marquee”

Sous Vadar

[Craig] pulled off a beautiful build with his Sous Vader project. The name is a geeky spin on sous vide, a method of cooking foods in water held at a precise temperature. Building your own setup at home saves a ton of money, but it’s also a lot of fun. This explains the frequency with which we see these builds here at Hackaday.

So this one has a flashy name, a fine-looking case, but the beauty continues on the internals. [Craig] posted an image with the cover off of the control unit and it’s absolutely gorgeous inside. Part of the reason for this is the circuit board he spun for the project which hosts the ATmega328 and interfaces with the LCD, buttons, temperature sensor, and mains-switching triac. But most of the credit is due to his attention to detail. The image on the right shows him prototyping the hardware. Since some of his meals take 20 hours to prepare it’s no wonder he found an out-of-the-way closet in which to do the testing.

Make sure to read all the way to the bottom of the post for some cooking tips. For instance, since he doesn’t have a vacuum sealer he uses zipper bags — lowering them into water to push out the air as they are sealed.

Stuffing An NES Into An FPGA

megaman_fpga

When the developer of the µTorrent torrent client and the ScummVM  LucasArts adventure game interpreter gets bored, something cool is bound to happen. Luckily for us, [Ludde] was a bit listless over Christmas, and with more time than energy to burn, implemented a Nintendo Entertainment System on an FPGA dev board.

The NES was powered by a Ricoh 2A03 CPU, a chip nearly identical to the 6502 found in the Commodore 64s and Apple IIs of the early 1980s. There are a few differences between the two, though: the NES CPU includes an Audio Processing Unit on the chip and is connected to a very cool Picture Processing unit elsewhere on the NES. [Ludde] put all these chips in his Spartan-6 FPGA with a lot of Verilog code.

The rest of the system – the RAM, display output, and controller input comes from the peripherals attached to the FPGA dev board. [Ludde]’s specific board didn’t have a good digital to analog converter, so the composite output was traded for a VGA output. It’s not a completely accurate color pallet, but it’s still an amazing piece of work for someone who was simply bored.