Replacing Selenium Rectifiers

Old radios often had selenium rectifiers to convert AC to DC. The problem is that the old units, dating back to 1933, are prone to failure and to release dangerous chemicals like hydrogen selenide. [M Caldeira] has a new board made to fit a particular rectifier and also allows a varying voltage drop. The circuit consists of a few diodes, a MOSFET, and a pot for adjusting the voltage drop. An IRF840 MOSFET provides the adjustment.

Did it work? It did. The good news is that if it fails — which shouldn’t happen very often — it won’t release stinky and noxious fumes

We wondered if he should 3D print a fake case to make it look more the part. If you haven’t seen a real selenium rectifier, they were made of stacks of metal plates coated with bismuth or nickel. Then, a film of doped selenium was annealed to the surface to form cadmium selenide. Each plate could handle about 20 V and the more plates you used, the more reverse voltage the device could withstand.

Selenium was also found in old photocells. If you fancy replacing other parts of an old radio, you might consider a faux magic eye or even one of the main tubes.

Continue reading “Replacing Selenium Rectifiers”

Timeframe: The Little Desk Calendar That Could

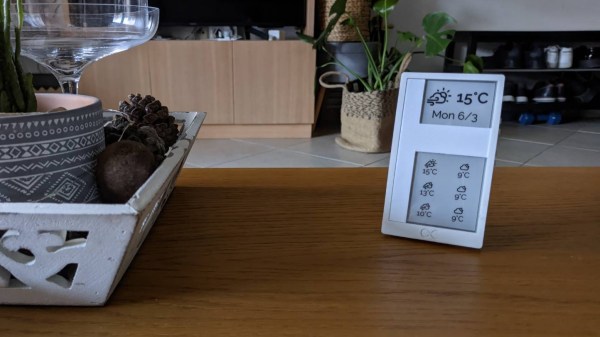
Usually, the problem comes before the solution, but for [Stavros], the opposite happened. A 4.7″ E-Ink screen with integrated battery management and ESP32 caught his eye, and he bought it and started thinking about what he wanted to do with it. The Timeframe is a sleek desk calendar based around the integrated e-ink screen.

[Stavros] found the device’s MicroPython support was a little lackluster, and often failed to draw. He found a Platform.io project that used an older but modified library for driving the e-ink display which worked quite well. However, the older library didn’t support portrait orientation or other niceties. Rather than try and create something complex in C, he moved the complexity to a server environment he knew more about. With the help of CoPilot, he got some code that would wake up the ESP32 every half hour, download an image from a server, and then display it. A Python script uses a headless browser to visit Google Calendar, resize the window, take a screenshot, and then upload it.

The hardest part of the exercise was getting authentication with Google working reliably. A white sleek 3D printed case wraps the whole affair in an aesthetically pleasing shell. So far, this has been a great story of someone building something for themselves and using their strengths. Where’s the hack?

The hack comes when [Stavros] tried squeezing his calendar into a case that was too tight and cracked the screen. Suddenly a large portion of the screen wouldn’t draw. He turned what was broken into something new by mapping out the area that didn’t draw and converting the Python to draw weather information with Pillow rather than screenshot a webpage: clever reuse and a way to make good out of a bad accident.

The code is up on GitLab, and the 3D files for the case are available on Printables. You can also find the project on Hackaday.io, as it was an entry into our recently concluded Low-Power Contest. Unfortunately, while the Timeframe is pretty power efficient, it doesn’t last as long as this calendar with a 50-year battery life.

A Solar-Powered Point-and-Shoot, Circa 1961

Try to put yourself in the place of an engineer tasked with building a camera in 1961. Your specs include making it easy to operate, giving it automatic exposure control, and, oh yeah — you can’t use batteries. How on Earth do you accomplish that? With a very clever mechanism powered by light, as it turns out.

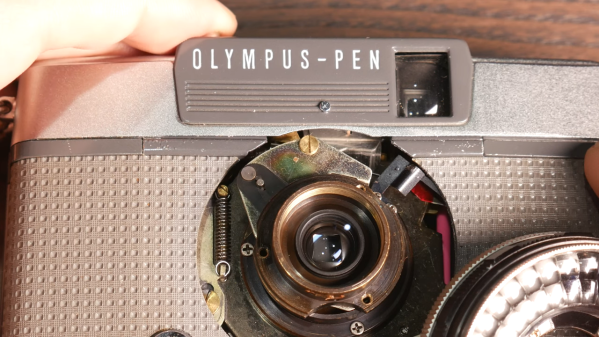
This one comes to us from [Alec Watson] over at Technology Connections on YouTube, which is a channel you really need to check out if you enjoy diving into the minutiae of the mundane. The camera in question is an Olympus Pen EES-2, which was the Japanese company’s attempt at making a mass-market 35-mm camera. To say that the camera is “solar-powered” is a bit of a stretch, as [Alec] admits — the film advance and shutter mechanism are strictly mechanical, relying on springs and things to power them. It’s all pretty standard camera stuff.

But the exposure controls are where this camera gets interesting. The lens is surrounded by a ring-shaped selenium photocell, the voltage output of which depends on the amount of light in the scene you’re photographing. That voltage drives a moving-coil meter, which waggles a needle back and forth. A series of levers and cams reads the position of the needle, which determines how far the lens aperture is allowed to open. A clever two-step cam allows the camera to use two different shutter speeds, and there’s even a mechanism to prevent exposure if there’s just not enough light. And what about that cool split-frame exposure system?

For a camera with no electronics per se, it does an impressive job of automating nearly everything. And [Alec] does a great job of making it interesting, too, as he has in the past with a deep-dive into toasters, copy protection circa 1980, and his take on jukebox heroics.

Continue reading “A Solar-Powered Point-and-Shoot, Circa 1961”

Industrial Stack Light Keeps An Eye On Prusa Mini

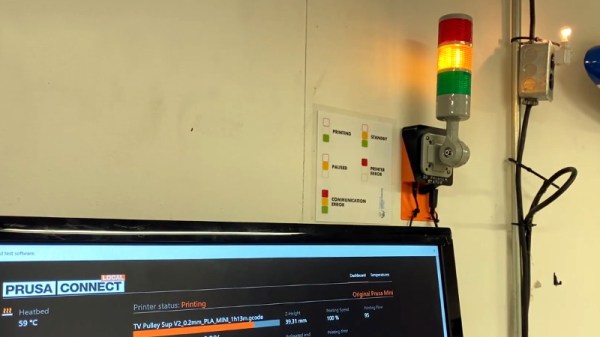
When most people want to keep tabs on what their 3D printer is up to while they’re out and about, they’ll install OctoPrint on a Pi and be done with it. But what if you’re just on the other side of the room? Inspired by the stack lights used on factory floors, [Jeff Glass] decided to add a similar system to his Prusa Mini so he could see what it’s up to at a glance.

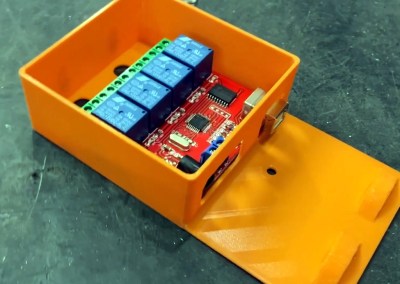
It turns out you can get these lights pretty cheaply online from the usual retailers, and as [Jeff] explains in the video after the break, driving them is about as easy as it gets. Rather than being some kind of addressable device, they generally have a single common 12 or 24 volt DC wire and ground lines for each color. With a USB controlled relay board, kicking on the appropriate light is simple from your operating system of choice.

What ended up being a bit harder was finding out what the Prusa Mini was up to. The printer offers up a simple status web page, but it has a few oddball quirks that make it difficult to scrape; such as presenting a little pop-up message that you have to manually close each time you load the page. But after spending some time with the powerful Selenium library for Python, he was able to create a script that worked its way through the UI and pulled the relevant status messages. Obviously the resulting code is Prusa specific, but the general concept would work on other printers assuming you can find a reliable way to pull the device’s current status.

After coming up with a wall mounted enclosure for the electronics that doubles as a mount for the light itself, [Jeff] can now see if his printer needs attention from clear across the room. An especially nice feature when the printer is all buttoned up inside of its enclosure.

Continue reading “Industrial Stack Light Keeps An Eye On Prusa Mini”