The Walltech Smartwatch

THP Quarterfinalist: WALLTECH Smartwatch

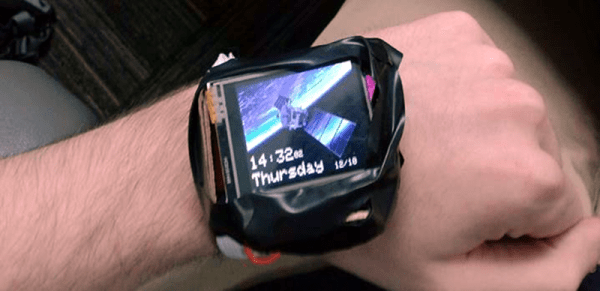
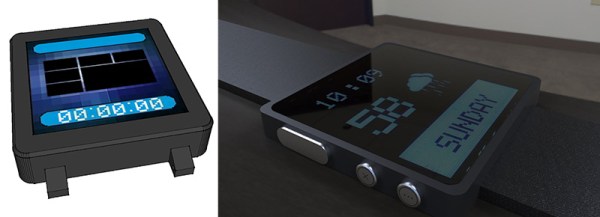
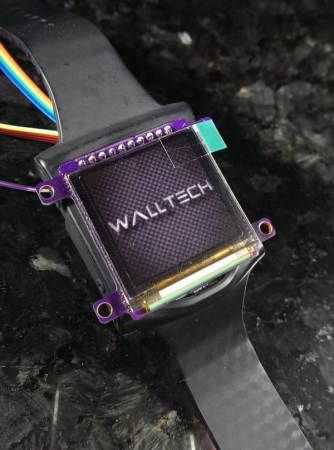
While there is lots of hype about a big company launching a new wearable product, we’re more interested in [Walltech]’s open source OLED Smartwatch. This entry into The Hackaday Prize merges a collection of sensors and an OLED screen into a wearable device that talks to your smartphone over Bluetooth Low Energy.

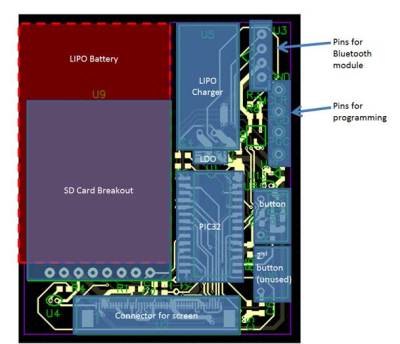
The device is based on the IMUduino BTLE development board. This tiny Arduino clone packs an inertial measurement unit (IMU), a Nordic nRF8001 Bluetooth radio, and an ATMEGA32u4 microcontroller.

The 1.5″ OLED display comes from [miker] who makes an OLED module based on the SSD1351. A STP200M 3D pedometer provides activity monitoring in a tiny package.

On the hardware side, packaging all these components into something that will fit on your wrist is quite difficult. The prototype hardware is built from mostly off the shelf components, but still manages to be watch sized.

At this point, it looks like the code is the main challenge remaining. There’s a lot of functionality that could be implemented, and [Walltech] even mentions that it’s designed to be very customizable. It even supports Android; the Apple Watch can’t do that.


SpaceWrencherThe project featured in this post is a quarterfinalist in The Hackaday Prize.

Upgrading The Battery In A Wrist PDA

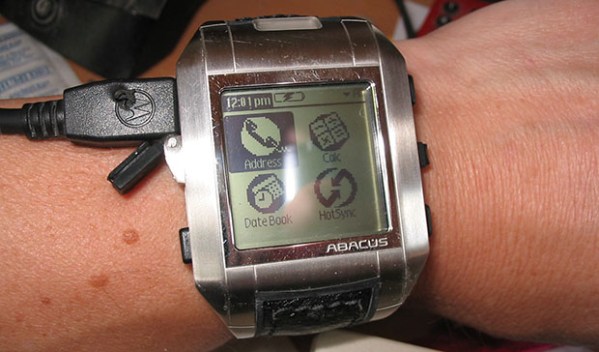
No, your eyes do not deceive you. That’s a wrist-mounted PDA. Specifically, a Fossil Wrist PDA, also known as an Abacus, that was sold from 2003 to about 2005. Yep, it’s running PalmOS. [mclien] has had this watch/PDA for a while now, and found the original 180mAh battery wasn’t cutting it anymore. He made a little modification to the watch to get a 650mAh battery in this PDA by molding a new back for it.

The original PDA used a round Lithium cell, but being ten years old, the battery technology in this smart watch is showing its years. [mclien] found two batteries (380mAh and 270mAh) that fit almost perfectly inside the battery.

The new batteries were about 3mm too thick for the existing case back, so [mclien] began by taking the old case, adding a few bits of aluminum and resin, and making a positive for a mold. Two or three layers of glass twill cloth were used to form the mold, resined up, and vacuum bagged.

After many, many attempts, [mclien] just about has the case back for this old smartwatch complete. The project build logs are actually a great read, showing exactly what doesn’t work, and are a great example of using hackaday.io as a build log, instead of just project presentation.

Fixing The Unfixable: Pebble Smartwatch Screen Replacement

[Colt] found himself with a broken Pebble, so he fixed it. The Pebble watch really ignited the smartwatch world with its record-breaking Kickstarter campaign. Working on the Pebble has proved to be frustrating experience for hardware hackers though. Ifixit’s teardown revealed the Pebble extremely difficult to repair. This isn’t due to some evil plan by the smartwatch gods to keep us from repairing our toys. It’s a problem that comes from stuffing a lot electronics into a small waterproof package. [Colt’s] problem was a bad screen. Pebble has a few known screen issues with their early models. Blinking screens, snow, and outright failed screens seemed to happen at an alarming rate as the early Kickstarter editions landed. Thankfully all those issues were corrected and replacements sent to the unlucky owners.

The actual screen used in the Pebble is a Sharp Memory LCD. Memory is an apt name as the screens actually behave as a SPI attached write only memory. Sharp sells flexible printed circuit (FPC) versions of the LCDs to aid in debugging. For space constrained designs though, an elastomeric or “zebra strip” connector is the common way to go. Alternating bands of conductive and insulating material make electrical connections between the Pebble’s circuit board and the conductive portions of the LCD glass.

[Colt] found himself with a dead screen out of warranty, so he decided to attempt a screen replacement. He found a replacement screen from Mouser, and proceeded to remove the top case of his watch. The top plastic case seems to be the hardest part of getting into a Pebble. It appears to be bonded with a glue that is stronger than the plastic itself. [Colt] broke the glass of his screen during the removal, which wasn’t a big deal as it was already dead. Prying only destroyed the top plastic, so he broke out a rotary tool which made quick work of the plastic.  The new screen worked perfectly, but had to be held in just the right position over its zebra connector. Some waterproof epoxy held it in place permanently. The next step was a new top cover. An old flip phone donated its plastic shell to the effort, and hot glue kept everything in place. [Colt] finished his work with a couple of layers of model paint. The result certainly isn’t as pretty or waterproof as the original. It is functional though, and about $120 USD cheaper than buying a new Pebble.

Continue reading “Fixing The Unfixable: Pebble Smartwatch Screen Replacement”

Hackaday Links: December 8, 2013

hackaday-links-chain

Let’s start off with some high voltage. Here’s a sweet Jacob’s Ladder build from [Robert]. The site hosting his short writeup has been up and down for us so here’s a cache link.

Speaking of high voltage, if you want to switch mains with your project [Tom] has a breakout board for cheap mechanical relays. [via Dangerous Prototypes]

[Dario] made his own version of an electronic Advent calendar [translated]. There are no numbers, you must solve the mystery of the flashing LEDs to figure out which package goes with each day.

If you ever work with lighted arcade buttons here’s a guide for swapping out the light for an RGB LED. This hack uses through-hole LEDs. We’ve actually seen a surface mount hack that includes a PCB to mimic the old bulbs.

Next time you stay overnight at an event you can give yourself the best view in the campground. This tiny little camper was mounted on a scissor lift! That first step on the way to the Porta Potty is a doozy! [via Adafruit]

[Žiga] was nice enough to demonstrate this smart-watch hack by displaying our name and logo (we love pandering!). It features the MSP-WDS430 which is a surprisingly stylish offering from Texas Instruments. In addition to analog clock hands it has an OLED display driven by the MSP430 inside.

Here’s a quick PIC-based metal detector which [Nicholas] built.

And finally, [Chet] saw the oil tank level sensor we featured this week. He built a nearly identical system earlier this year. The oil level sensor works in conjunction with the custom thermostat he built around an Android tablet.

Astrosmash Style Video Game As Sony SmartWatch Firmware

sony-smartwatch-native-video-game

Here’s a firmware hack that brings a video game to the Sony SmartWatch. It’s pretty impressive considering the limited screen real estate and the fact that it has to be shared with the touch input. But we find it equally impressive that a game of this quality followed so quickly on the heels of Sony announcing the ability to make your own firmware for the watch. The speedy development is thanks partly to the community driven effort to hack the Arduino IDE to load sketches on the watch.

The advent of this IDE hack means that taking your Arduino sketch writing abilities to this hardware now has a fairly low learning curve. And reading through [Asier Arranz’s] game code will make it even easier. He calls his game Star Wars but it reminds us more of Astrosmash. There’s a little green semicircle which is your ground-based defense vehicle. You need to fire the laser to shoot falling items out of the star-strewn night sky while also collecting power-ups that fall to the ground. Game play video is below.

Just remember, if you come up with a cool firmware app for the SmartWatch we want to hear about it.

Continue reading “Astrosmash Style Video Game As Sony SmartWatch Firmware”

Sony SmartWatch Running Arduino Sketches

sony-smartwatch-arduino-sketches

Well that didn’t take long. We just heard last week about the Sony inviting firmware hacks for their SmartWatch and here’s an early example. This image above is an animation running on the watch. It was written as an Arduino sketch which runs on a custom firmware image. [Veqtor] wrote the sketch, which is just a couple of nested loops drawing lines and circles. The real hack is in the firmware itself.

[Veqtor] took part in a workshop (translated) put on by [David Cuartielles] which invited attendees to try their Arduino coding skills on his firmware hack for the watch. It implements an Android parser, but the development is in very early stages. Right now there’s zero information in his readme file. But the root directory of the repo has a huge todo list. Dig through it and see if you can fork his code to help lend a hand.

Learn more about the SmartWatch firmware from the original announcement.

Continue reading “Sony SmartWatch Running Arduino Sketches”

HackIt: Sony Invites You To Hack Its SmartWatch Firmware

sony-smartwatch-hacking

This is Sony’s smart watch, which has been around for a while now. It’s designed for use with your Android phone, and has always included an SDK that allows app developers to interact with it. But now Sony is taking it one big step further. They’ve published everything you need to know to hack your own firmware for the SmartWatch.

The navigation scheme for that articles includes five menu items at the bottom which you’ll want to dig through. The most interesting to us was the one labeled “SmartWatch hacker guide”. It lays bare the hardware used in the watch and how it’s peripheral component connect to each other. This starts with the STM32 (ARM) microcontroller that drives the watch. It goes on to document how the screen is addressed (SPI1) including the pin to turn it on and off. The same goes for the Bluetooth, accelerometer, buzzer, and touch sensors.

Firmware is updated via USB using Device Firmware Upgrade (DFU) mode. We don’t don’t see any way to connect an on-chip debugger. We searched to see if there is a JTAG port on the circuit board and it sounds like getting the watch apart without breaking it is pretty tough.

Now that you don’t need to stick to what Sony had planned for the device, what do you want to do with your strapless wristwatch?

[Thanks Brian]