Hackaday Links: March 28, 2016

[Tom] sent this in to be filed under the ‘not a hack’ category, but it’s actually very interesting. It’s the User’s Guide for the Falcon 9 rocket. It includes all the data necessary to put your payload on a Falcon 9 and send it into space. It’s a freakin’ datasheet for a rocket.

A year ago in Japan (and last week worldwide), Nintendo released Pokkén Tournament, a Pokemon fighting game. This game has a new controller, the Pokkén Tournament Pro Pad. There were a few cost-cutting measures in the production of this game pad, and it looks like this controller was supposed to have force feedback and LEDs. If any Pokemon fans want to take this controller apart and install some LEDs and motors just to see what happens, there’s a Hackaday write up in it for you.

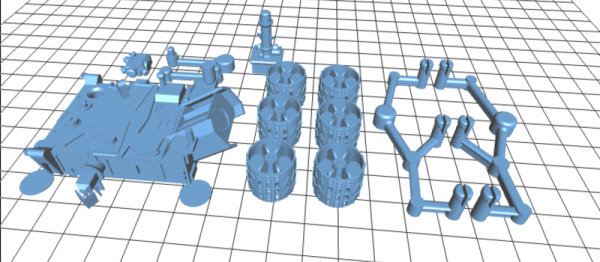
There are a lot of options for slicing 3D objects for filament-based 3D printers. Cura, Slic3r, and MatterControl are easily capable of handing all the slicing needs you’ll ever have for a filament 3D printer. For sterolithography (resin) printers, the options for slicing are limited. [skarab] just put together a new slicer for SLA that runs entirely in JavaScript. If anyone wants to turn a Raspi or BeagleBone into a network controller for a resin printer, here’s your starting point. [skarab] will be working on smoothieboard integration soon.

The STM32F4 is an extremely capable ARM microcontroller. It can do VGA at relatively high resolutions, emulate a Game Boy cartridge, and can serve as the engine control unit in a 1996 Ford Aspire. There’s a lot of computing power here, but only one true litmus test: the STM32F4 can run Doom. [floppes] built this implementation of Doom on the STM32F429 Discovery board to run off of an external USB memory stick. The frame rate is at least as good as what it was back in 1993.

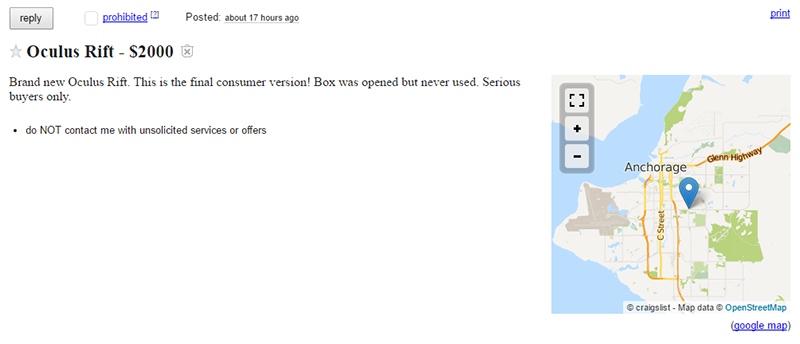
The Oculus Rift has just come to pass, but one lucky consumer got his early. The first person to preorder the Rift, [Ross Martin] of Anchorage, Alaska, got his facehugger directly from [Palmer Luckey] in a PR stunt on Saturday afternoon. Guess what [Ross] is doing with his Rift?

rift

3D Printing Atomic Force Microscopy

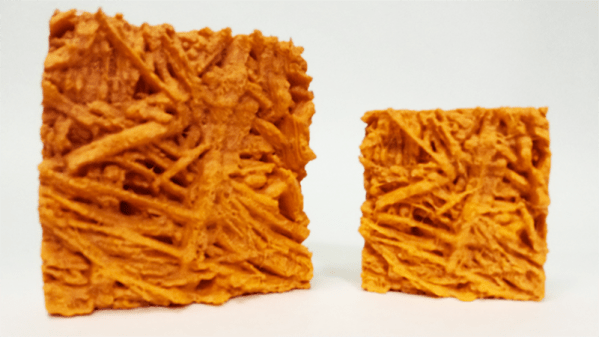
[Andres] is working with an Atomic Force Microscope, a device that drags a small needle across a surface to produce an image with incredible resolution. The AFM can produce native .STL files, and when you have that ability, what’s the obvious next step? That’s right. printing atomic force microscope images.

The AFM image above is of a hydrogel, a network of polymers that’s mostly water, but has a huge number of crosslinked polymers. After grabbing the image of a hydrogel from an Agilent 5100 AFM, [Andres] exported the STL, imported it into Blender, and upscaled it and turned it into a printable object.

If you’d like to try out this build but don’t have access to an atomic force microscope, never fear: you can build one for about $1000 from a few pieces of metal, an old CD burner, and a dozen or so consumable AFM probes. Actually, the probes are going to be what sets you back the most, so just do what they did in olden times – smash diamonds together and look through the broken pieces for a tip that’s sufficiently sharp.

A UV Lightbox For Curing Prints

With resin printers slowly making their way to hackerspaces and garages the world over, there is a growing need for a place to cure these UV resin prints. No, they don’t come out of the machine fully cured, they come out fully solid. And no, we’re not just leaving them in the sun, because that’s not how we do things around here.

[Christopher] whipped up a post-cure lightbox meant to sit underneath his Form 1 printer. It’s made of 1/2″ MDF, with adjustable feet (something the Form 1 lacks), a safety switch to keep the lights off when the door is open, and a motor to rotate the parts around the enclosure.

The light source for this lightbox is 10 meters of ultraviolet LED strips. The LEDs shine somewhere between 395-405nm, the same wavelength as the laser diode found in the Form 1 printer. Other than a bit of wiring for the LEDs, the only complicated part of the build was the motor; [Christopher] bought a 2rpm motor but was sent a 36rpm motor. The vendor was out of 2rpm motors, so a PWM controller was added.

It’s a beautiful build that shows off [Christopher]’s ability to work with MDF. It also looks great sitting underneath his printer, and all his parts are rock solid now.

Making A Speaker With Resin, Magnets, And Wire

A speaker is just about the simplest electronic component possible, just barely more complex than resistors and wire. They’re also highly variable in their properties, either in size, shape, frequency response, and impedance. Obviously, building custom speakers would be of interest to a lot of people, but there aren’t many people out there doing it. [Madaeon] is one of those people. He created a speaker from scratch, using nothing but magnets, wire, and a bit of UV curing resin.

The frame of the speaker contains a magnet, and the coil of wire is carefully attached to the 0.1mm thin speaker cone with a bit of UV curing resin. All the parts are available on Thingiverse, but you will need a UV resin printer with a low layer height to print this thing out.

The speaker was built by [madaeon] as a demonstration of what the printer he built can do. It’s a fairly standard resin-based 3D printer built around a DLP projector. It’s also cheap, and unlike some other cheap resin-based 3D printers, there’s a reasonable likelihood his will ship within the next few months.

A 3D(ollar) Scanner

Once you have a 3D printer, making copies of objects like a futuristic Xerox machine is the name of the game. There are, of course, 3D scanners available for hundreds of dollars, but [Joshua] wanted something a bit cheaper. He built his own 3D scanner for exactly $2.73 in parts, salvaging the rest from the parts bin at his local hackerspace.

[Josh]’s scanner is pretty much just a lazy suzan (that’s where he spent the money), with a stepper motor drive. A beam of laser light shines on whatever object is placed on the lazy suzan, and a USB webcam feeds the data to a computer. The build is heavily influenced from this Instructables build, but [Josh] has a few tricks up his sleeve: this is the only laser/camera 3D scanner that can solve a point cloud with the camera in any vertical position. This potentially means algorithmic calibration, and having the copied and printed object come out the same size as the original. You can check out that code on the git.

Future improvements to [Josh]’s 3D scanner include the ability to output point clouds and STLs, meaning anyone can go straight from scanning an object to slicing it for a 3D printer. That’s a lot of interesting software features for something that was basically pulled out of the trash.

Converting CTs And MRIs Into Printable Objects

People get CT and MRI scans every day, and when [Oliver] needed some medical diagnostic imaging done, he was sure to ask for the files so he could turn his skull into a printable 3D object.

[Oliver] is using three different pieces of software to turn the DICOM images he received from his radiologist into a proper 3D model. The first two, Seg3D and ImageVis3D, are developed by the University of Utah Center for Integrative Biomedical Computing. Seg3D stitches all of the 2D images from an MRI or CT scan into a proper 3D format. ImageVis3D allows [Oliver] to peel off layers of his flesh, allowing him to export a file of just his skull, or a section of his entire face. The third piece of software, MeshMixer, is just a mesh editor and could easily be replaced with MeshLab or Blender.

[Oliver] still has a lot of work to do on the model of his skull – cleaning up the meshes, removing his mandible, and possibly plugging the top of his spinal column if he would ever want to print a really, really awesome mug. All the data is there, though, ready for digital manipulation before sending it off to be printed.

Continue reading “Converting CTs And MRIs Into Printable Objects”

STL Fun: Converting Images To STL Geometry

stl image conversion

There’s been some good .STL manipulation tips in this week.

The first one is called stl_tools, and it’s a Python library to convert images or text to 3D-printable STL files. The examples shown are quite impressive, and it even does a top notch job of taking a 2D company logo into 3D! We can see this being quite handy if you need some quick 3D text, and either don’t use CAD, or really just need a one click solution. Now if only .STLs were easier to edit afterwards…

The second one is a Javascript based Leap Motion Controller STL manipulator, which lets you pick STLs and manipulate them individually with your fingers. If you happen to have a Leap, this could be a great way to show off 3D parts at a presentation or hackerspace talk, especially if you want to add a [Tony Stark] vibe to your presentation! Stick around after the break to see it in action — Now all we need are some good hologram generators…

Continue reading “STL Fun: Converting Images To STL Geometry”