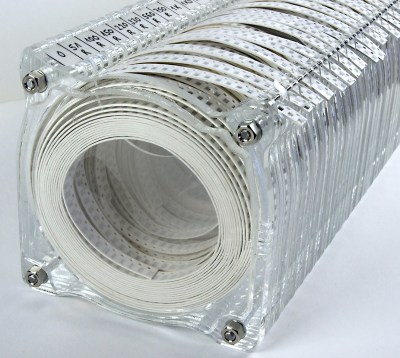
Have some plexiglas (acrylic) leftovers lying around? Well, they could be put to good use in making this SMD organizer. It comes in handy if you deal with a lot of SMD components in your work. No longer will you waste your time trying to find a 15K 1206 resistor, or that BAS85 diode… or any other component you can think of soldering on the PCB. The basic idea is fairly straightforword, which helped keep this short.
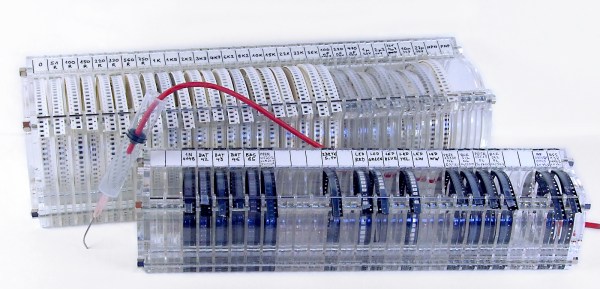
 SMD resistors are packed in thick paper tapes that don’t bend easily, and thus need larger containers than other components, which are packed mainly in flexible PE tapes. The first version of this organizer was built with a 96mm diameter space for resistors and 63mm diameter for other components, but it seems that there is no need for such large compartments. If I were to make it again, I would probably scale everything down to about 80% of it’s current size.
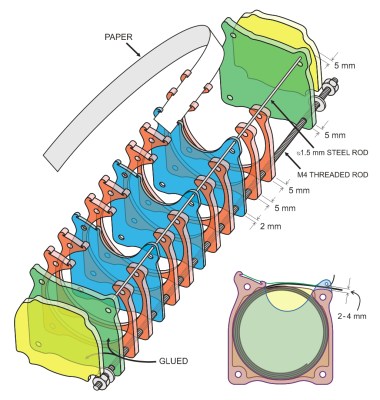
The best way to join all plexiglass parts is to use four M4 threaded rods. There is also a 1.5mm steel rod which holds SMD tape ends in place and helps to un-stick the transparent tape which covers the components. At the top of the organizer there is a notch for paper, used for components labels. Most SMD components are packed in 8mm wide tapes, making the optimal compartment width 10mm. It is not easy to cut the 10mm thick acrylic and get a neat edge – instead, you could use more layers of thin sheets to make the spacers. Using 5mm acrylic you can combine more layers for any width of tape, which contains wider components, like SMD integrated circuits. The only thing that you have to be careful about, is to keep the distance between the thin steel rod and acrylic, which is marked as “2-4mm” on the drawing. It is good if this space is just a few tenths of a millimeter wider than the thickness of SMD tapes.
 The CorelDraw file that can be used for laser cutting the acrylic parts, is available for download. If you scale the profiles, don’t forget to readjust the hole diameters and some other dimensions which have to remain intact. If you have 5mm acrylic pieces, you should probably use two layers of acrylic for every tape (red parts on the drawing). The barrier layers would be made of thin acrylic — for instance 2mm (the blue parts). Edge layers (green) are once again 5mm thick, and there are also the end pieces (yellow), glued to the previous borders and used to “round up” the whole construction and to protect your hands from the threaded rods and nuts.
While you’re building this for your bench, make a vacuum picking tool for SMDs out of a dispensing syringe with a thick needle. It’s a common trick for hackers to use an aquarium air pump, just turn the compressor unit by 180°, so that it creates vacuum instead of blowing the air outside. This process is described by R&TPreppers in the video below.
Continue reading “Clearly The Best Way To Organize SMD Parts” →


 SMD resistors are packed in thick paper tapes that don’t bend easily, and thus need larger containers than other components, which are packed mainly in flexible PE tapes. The first version of this organizer was built with a 96mm diameter space for resistors and 63mm diameter for other components, but it seems that there is no need for such large compartments. If I were to make it again, I would probably scale everything down to about 80% of it’s current size.


