Make Android’s New Power Menu Work On Your Terms

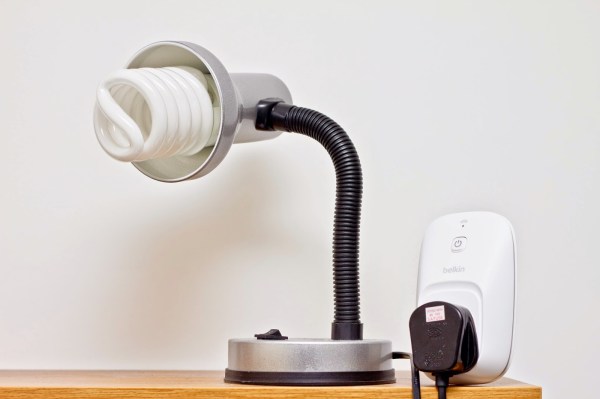
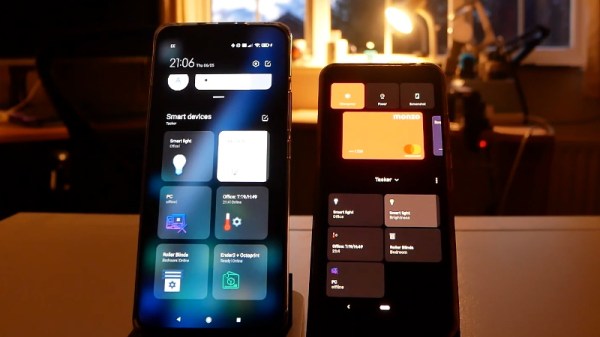
Introduced in Android 11, the power menu is a way to quickly interact with smart home gadgets without having to open their corresponding applications. Just hold the power button for a beat, and you’ll be presented with an array of interactive tiles for all the gadgets you own. Well that’s the idea, anyway.

[Mat] of “NotEnoughTech” wasn’t exactly thrilled with how this system worked out of the box, so he decided to figure out how he could create his own power menu tiles. His method naturally requires quite a bit more manual work than Google’s automatic solution, but it also offers some compelling advantages. For one thing, you can make tiles for your own DIY devices that wouldn’t be supported otherwise. It also allows you to sidestep the cloud infrastructure normally required by commercial home automation products. After all, does some server halfway across the planet really need to be consulted every time you want to turn on the kitchen light?

Adding tiles in Tasker.

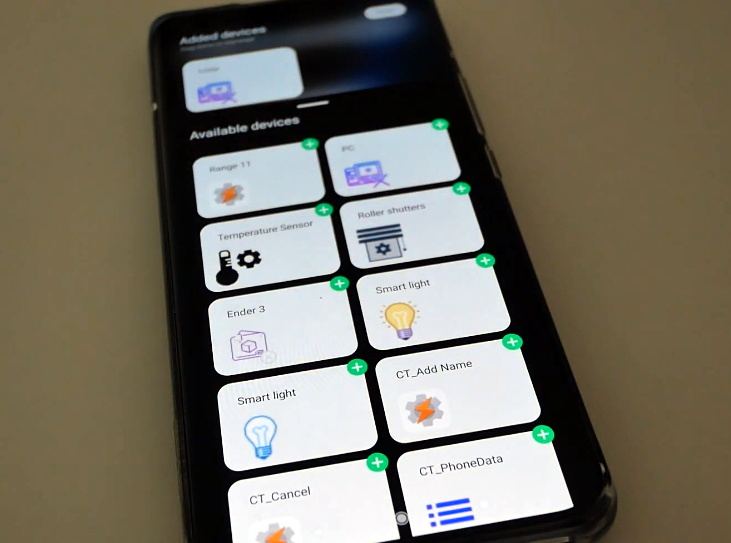
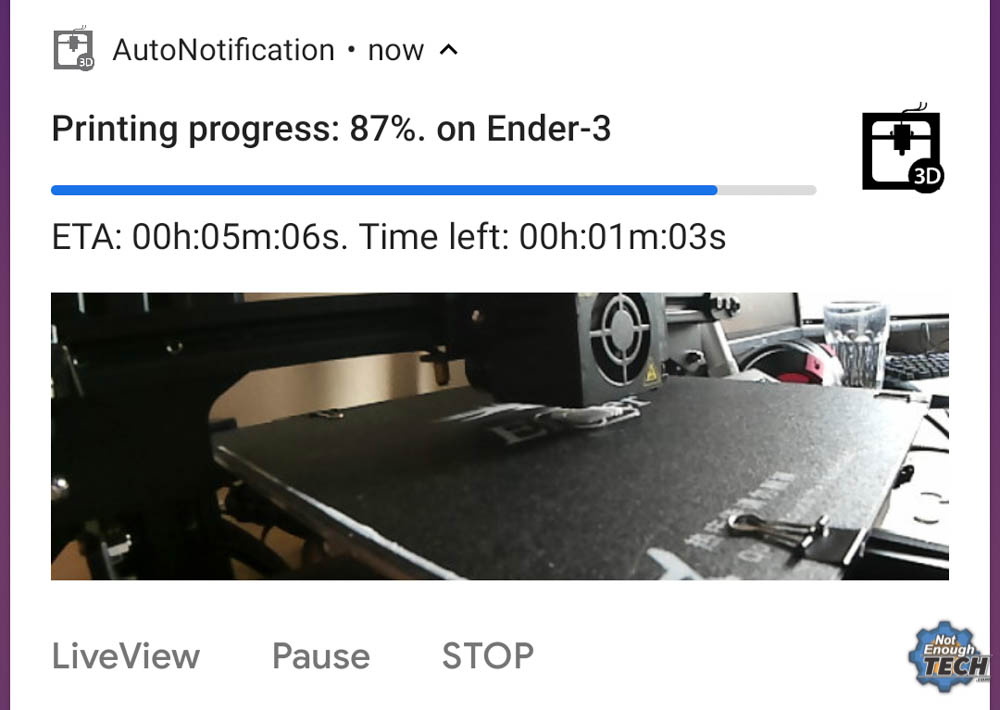
The first piece of the puzzle is Tasker, a popular automation framework for Android. It allows you to create custom tiles that will show up on Android’s power menu, complete with their own icons and brief descriptions. If you just wanted to perform tasks on the local device itself, this would be the end of the story. But assuming that you want to control devices on your network, Tasker can be configured to fire off a command to a Node-RED instance when you interact with the tiles.

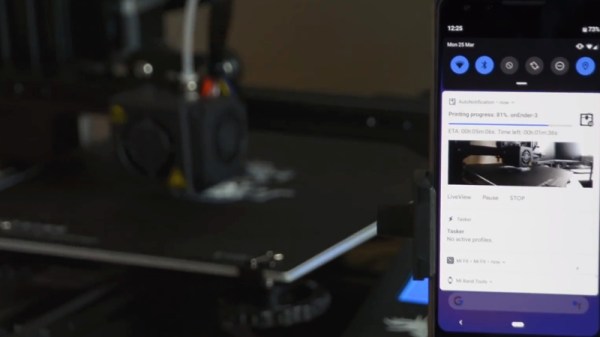
In his post, [Mat] gives a few examples of how this combination can be used to control smart devices and retrieve sensor data, but the exact implementation will depend on what you’re trying to do. If you need a bit of help getting started, our own [Mike Szczys] put together a Node-RED primer last year that can help you put this flow-based visual programming tool to work for you.

Continue reading “Make Android’s New Power Menu Work On Your Terms”

Monitor Your 3D Printer With Node-RED And Tasker

Anyone with a desktop 3D printer knows that it can be a bit nerve-wracking to leave the machine alone for any extended period of time. Unfortunately, it’s often unavoidable given how long more complicated prints can take. With big prints easily stretching beyond the 20 hour mark, at some point you’re going to need to leave the house or go to sleep. We hope, anyway.

In an effort to make his time away from his printer a bit less stressful, [Mat] from NotEnoughTECH has put together a comprehensive framework for monitoring his machine on the go. After looking at existing remote monitoring solutions, he found none gave him the level of information he was after. His system collects up an incredible number of data points about the printer’s current status and pushes it all to his Android phone as a rich notification. Best of all, he’s documented the entire system in exquisite detail for anyone else who might want to follow in his footsteps.

There’s a considerable amount of hardware and software involved in this system, and getting it up and running won’t be quite as straightforward as using some of the turn-key solutions out there. Octoprint is responsible for controlling and monitoring the printer, and [Mat] is pulling data from its API using Node-RED. That data is formatted and ultimately delivered to his Android device as a notification with Tasker. On the hardware side he’s got a Sonoff POW R2 to not only turn the printer on and off but measure its energy consumption, a USB camera to provide a live view of the printer, and a couple of Raspberry Pis to run it all.

Even if you don’t have a 3D printer, or maybe just don’t leave the house to begin with, the video [Mat] has put together after the break that shows how all the elements of this system are pulled together in Node-RED is a fascinating look at the flow-based visual programming tool. Similarly, it’s a great demonstration on how Tasker can be used to add some very slick Android notifications for your project without having to commit to developing a native application for the platform.

If you like the idea of remotely monitoring your printer but aren’t ready to dive into the deep end like [Mat], there are easier options. With a Raspberry Pi running Octoprint added to your 3D printer and one of the existing mobile monitoring and control front-ends installed, you’ll be well on the way to tackling those big prints without having to pitch a tent in the lab.

Continue reading “Monitor Your 3D Printer With Node-RED And Tasker”

A Power Switch For The Chromecast

Chromecasts are fantastic little products, they’re basically little HDMI sticks you can plug into any monitor or TV, and then stream content using your phone or computer as the controller. They are powered by a micro USB port in the back, and if you’re lucky, your TV has a port you can suck the juice off. But what if you want to turn it off while you use a different input on your TV so that your monitor will auto-sleep? You might have to build a power switch.

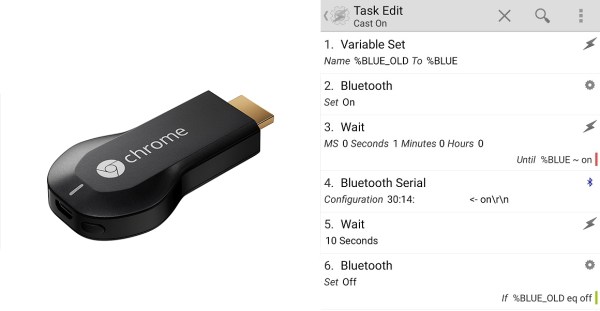
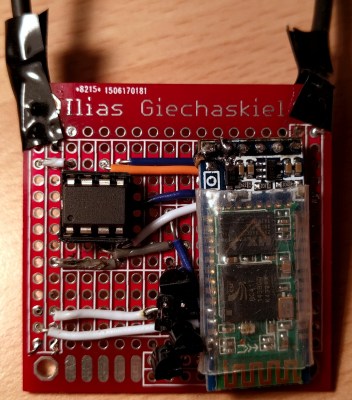
Now in all honesty, the Chromecast gets hot but the amount of power it draws when not in use is still pretty negligible compared to the draw of your TV. Every watt counts, and [Ilias] took this as an opportunity to refine his skills and combine a system using an Arduino, Bluetooth, and Android to create a robust power switch solution for the Chromecast.

The setup is rather simple. An HC-05 Bluetooth module is connected to an Attiny85, with some transistors to control a 5V power output. The Arduino takes care of a bluetooth connection and uses a serial input to control the transistor output. Finally, this is all controlled by a Tasker plugin on the Android phone, which sends serial messages via Bluetooth.

All the information you’ll need to make one yourself is available at [Ilias’] GitHub repository. For more information on the Chromecast, why not check out our review from almost three years ago — it’s getting old!

Remote Start Jeep

Okay, Google. Start The Jeep!

When [wizardpc] bought his Jeep, it came with an Avital 3100L car alarm system; but after it started going on the fritz, he needed to replace it. So he opted for a new alarm system with the same harness type — and then he decided to hack it.

When installing the new alarm system, an Avital 5103L combo unit, he realized there was an extra wire that when grounded, starts the vehicle — Avital had included the hardware upgrade before the software came out on this specific model. Score.

From there it was a pretty easy hack. All he needed was a Raspberry Pi 2, a relay board, and a few dirt simple lines of code. On the mobile end of things is a collection of hacks; he’s using Tasker with his Android phone to add a special command to Google Now. He tells Google to ‘Start the Jeep’ and after a few seconds, she turns right on.

Wouldn’t it be nice if Google would expose some hooks so that we can all add our own functionality to Google Now without doing the app-juggling  [wizardpc] used for this? If you have your own set of Google Now hacks we’d love to hear about it. Send us a tip!

Continue reading “Okay, Google. Start The Jeep!”

AlarmLamp

Prefix Your Phone Alarm With A Desk Lamp

If you are like [Gbola], then you have a hard time waking up during the winter months. Something about the fact that it’s still dark outside just makes it that much more difficult to get out of bed. [Gbola] decided to build his own solution to this problem, by gradually waking himself up with an electric light. He was able to do this using all off-the-shelf components and a bit of playing around with the Tasker Android application.

[Gbola] started out with a standard desk lamp. He replaced the light bulb with a larger bulb that simulates the color temperature of natural daylight. He then switched the lamp on and plugged it into a WeMo power switch module. A WeMo is a commercial product that attempts to make home automation accessible for consumers. This particular module allows [Gbola] to control the power to his desk lamp using his smart phone.

[Gbola] mentions that the official WeMo Android application is slow and includes no integration with Tasker. He instead decided to use the third-party WeMoWay application, which does include Tasker support. Tasker is a separate Android application that allows you to configure your device to perform a set task or series of tasks based on a context. For example you might turn your phone to silent mode when your GPS signal shows you are at work. WeMoWay allows [Gbola] to interact with his WeMo device based on any parameter he configures.

On top of all of that, [Gbola] also had to install three Tasker plugins. These were AutoAlarm, Taskkill, and WiFi Connect. He then got to work with Tasker. He configured a custom task to identify when the next alarm was configured on the phone. It then sets two custom variables, one for 20 minutes before the alarm (turn on the lamp) and one for 10 minutes after (turn it off).

[Gbola] then built a second task to actually control the lamp. This task first disconnects and reconnects to the WiFi network. [Gbola] found that the WeMoWay application is buggy and this “WiFi reset” helps to make it more reliable. It then kills the WeMoWay app and restarts it. Finally, it executes the command to toggle the state of the lamp. The project page has detailed instructions in case anyone wants to duplicate this. It seems like a relatively painless way to build your own solution for less than the cost of a specialized alarm clock lamp.