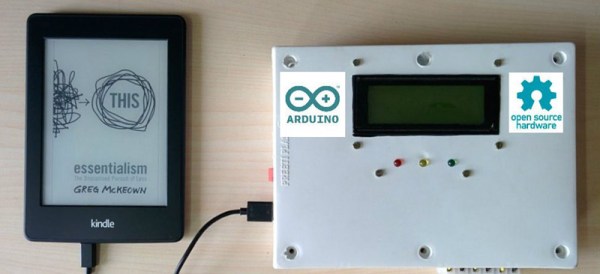
The Hackaday Prize: An Ultra Low Cost 3D Printer Controller

This isn’t a Hackaday Prize entry that will change the world, but that doesn’t mean there’s not a place for it. [vdirienzo] is building an ultra low-cost 3D printer controller for 3D printers and other CNC machine. It’s not going to change the world, but it is a rather interesting little device.

This printer controller is very minimal, with a single-sided circuit board with just enough parts and components to make this board useful. The stepper motor drivers are from Pololu, and most of the other components are stuff you could pull out of a reasonably stocked junk drawer. The microcontroller is rather interesting; it’s an Arduino Nano. Instead of the ATMega644 and ‘Mega1280 microcontrollers found on other 8-bit printer controller boards, [vdirienzo] slimmed down the Teacup firmware to fit on the ATMega328 in the Arduino Nano.

The SinapTec is not by any means the first effort to create an ultra low-cost controller board for a 3D printer that can be assembled at home. The RepRap Gen 7 electronics can be manufactured on a RepRap or small CNC mill. There’s not much to these boards – just a small, single-sided board. If you want a small, simple, and cheap controller board for a 3D printer, this is all you need.

While a cheap 3D printer controller board doesn’t really fit with the ‘change the world’ theme of The Hackaday Prize, that doesn’t mean there’s still not a place in the contest for [vdirienzo]’s entry; we have a Best Product category, with a $100k prize and a six month residency in the Hackaday Design Lab. If that’s not enough reason to build something cool – even if it won’t change the world – we don’t know what is.


The 2015 Hackaday Prize is sponsored by:

Hackaday Prize Entry: The Chocometer

Diabetes affects almost 400 million people worldwide, and complications due to diabetes – blindness, cardiovascular disease, and kidney problems – can be reduced by regular monitoring of blood glucose. The usual way of measuring blood glucose is with a pin prick of blood and a small test strip that costs about $0.30. That’s a lot of test strips and blood used by 400 million diabetics every day. Wouldn’t it be better if there was a less invasive way of measuring blood glucose?

[marcelclaro]’s project for The Hackaday Prize aims to do just that. Instead of measuring blood directly, his project will measure blood glucose by shining light through a finger or an earlobe. Using light to detect blood glucose is something that has been studied in the lab, but so far, there aren’t any products on the market that use this technique.

There are two major problems [marcel] needs to overcome to turn this project into reality. The first is simply raw data for calibration. For [marcel], this is easy; he has Type 1 diabetes, and takes four glucose measurements a day. Patient heal thyself, or something.

The second problem is getting a photosensor that’s sensitive enough. By using an InGaAs PIN diode, a current-controlled oscillator, and a digital counter, [marcel] should have a sensor that’s good enough, with electronics that are cheap enough, to create some tech that is truly game changing for a few hundred million people around the world.


The 2015 Hackaday Prize is sponsored by:

Hackaday Prize Entry: Arduino MPPT Controller

Imagine you’re building a small solar installation. The naive solution would be grabbing a solar panel from Horror Freight, getting a car battery and AC inverter, and hoping everything works. This is the dumb solution. To get the most out of a solar you need to match the voltage of the solar cell to the voltage of the battery. How do you do that? With [Debasish]’s entry for The Hackaday Prize, an Arduino MPPT Solar Charge Controller.

This Maximum Power Point Tracker uses a buck converter to step down the voltage from the solar cell to the voltage of the battery. It’s extremely efficient and every proper solar installation will need a charge controller that does something similar.

For his MPPT, [Debasish] is using an Arduino Nano for all the math, a DC to DC buck converter, and a few MOSFETs. Extremely simple, but [Debasish] is connecting the entire controller to the Internet with an ESP8266 module. It’s a great example of building something for much less than it would cost to buy the same thing, and a great example for something that has a chance at making the world a little better.


The 2015 Hackaday Prize is sponsored by:

Hackaday Prize Entry: Biopotential Signal Library

With prosthetics, EEG, and all the other builds focused on the body and medicine for this year’s Hackaday Prize, it might be a good idea to take a look at what it takes to measure the tiny electrical signals that come from the human body. Measuring brain waves or heartbeats indoors is hard; AC power frequencies easily couple to the high impedance inputs for these measurements, and the signals themselves are very, very weak. For his entry to The Hackaday Prize, [Paul Stoffregen] is building the tools to make EEG, ECG, and EMG measurements easy with cheap tools.

If the name [Stoffregen] sounds familiar, it’s because he’s the guy behind the Teensy family of microcontroller boards and several dozen extremely popular libraries for everything from displays to real time clocks. The biopotential signal library continues in [Paul]’s tradition of building very cool stuff with just code.

The hardware used in this project is TI’s ADS1294, a 24-bit ADC with either 4 or 8 channels. This chip is marketed as a medical analog front end with a little bit of ECG thrown in for good measure. [Paul] is only using the ADS1294 initially; more analog chips can be added later. It’s a great project in its own right, and when you include the potential applications of this library – everything from prosthetics to body sensors – it makes for an awesome Hackaday Prize entry.


The 2015 Hackaday Prize is sponsored by:

Hackaday Prize Entry: A Broke Hackers’ Model Train

Model railroads are the wellspring of hacker culture; the word itself comes from the MIT Tech Model Railroad Club sometime in the early 60s. These old timers at MIT had incredible resources available to them – multimillion dollar computers, vast amounts of plywood, and real metal tracks to run their trains on. [Szabolcs] doesn’t have any of this, so for his Hackaday Prize entry he’s building the Broke Hackers’ Model Train layout.

Nothing except for the most basic components in this train layout is pre-bought. The tracks are 3D printed, motor control is done through homebrew electronics, and the locomotives will be controlled through a custom protocol. It’s the apex of a hacker’s model train layout, and when you consider how much effort goes into building a normal train layout, [Szabolcs] is looking at a lot of work.

With all the work ahead of him, things haven’t exactly gone smoothly for [Szabolcs]. To print off all the parts for this project, he bought a Makibox, one of the biggest failures in the world of crowdfunded 3D printers ever. The company doesn’t exist anymore, so [Szabolcs] shelled out the cash for an i3 clone. The new printer works great and plastic parts are coming out. A little hiccup, but a great example of what it takes to put a project together for The Hackaday Prize.


The 2015 Hackaday Prize is sponsored by:

Hackaday Prize Entry: The MultiSpork

If you’re working on a mobile project – a robot, something outside, or even your car – you don’t want to bring an oscilloscope, logic analyzer, signal generator, or any other piece of equipment that should stay on the bench. For his Hackaday Prize Entry, [Pierce Nichols] is working on the electronic equivalent of a Leatherman: something small and portable that also does just enough to get by in a pinch.

The MultiSpork, as [Pierce] calls his device, is a single WiFi enabled board that’s completely portable. With the addition of a $50 Android tablet, it’s very close to a complete electronics lab in a box.

The heart of the MultiSpork is a new chip from Maxim, the MAX 11300. This chip has 20 pins that can be used as a 12-bit ADC, a 12-bit DAC, or as GPIOs. it’s a logic analyzer, signal generator, oscilloscope, and a Bus Pirate in a single chip. As far as the rest of the board goes, [Pierce] is forgoing any notion of a hardware freeze and changing the Atmel microcontroller over to a TI CC3200 chip that will be coming out soon.

[Pierce] put together a short video describing the MultiSpork; you can check that out below.


The 2015 Hackaday Prize is sponsored by:

Continue reading “Hackaday Prize Entry: The MultiSpork”

Hackaday Prize Entry: A BeagleBone Logic Analyzer

If you have a BeagleBone, you already have a lot of tools. We’ve seen them used in driving hundreds of LEDs at a very high frame rate, used as a video card for ancient computers, and as a software defined radio. For his entry to The Hackaday Prize, [Kumar] turned his BeagleBone into a 14-channel, 100Msps logic analyzer that’s good enough to debug just about all those hobby electronics projects you’re working on.

The BeagleBone is only able to have this sort of performance as a logic analyzer because of its PRUs, those fancy peripherals that make the Beagle great at blinking pins really, really fast. [Kumar] is using both PRUs in the BeagleBone for this project. PRU1 reads from the input probes, and PRU0 writes all the samples into DDR memory directly. From there, the samples are off to kernel modules and apps, either sigrok, dd, or something you coded up in Python.

Compared to the cheap logic analyzers we have today like the Salae Logic and the DSLogic, [Kumar]’s project is just as good as any commercial offering (provided you can live with 14 channels instead of 16), and because it’s based on a BeagleBone, the software is infinitely expandable.

UPDATE: After this post was written but before it was published, [Kumar] finished up a blog post on how he’s building a logic analyzer with the BeagleBone’s PRUs. It’s a true tutorial, with enough code demos to allow anyone to build their own 8-bit analyzer on a BeagleBone, and there are more updates coming.


The 2015 Hackaday Prize is sponsored by: