3D Printed Triptych Shows Trio Of AI-Generated Images

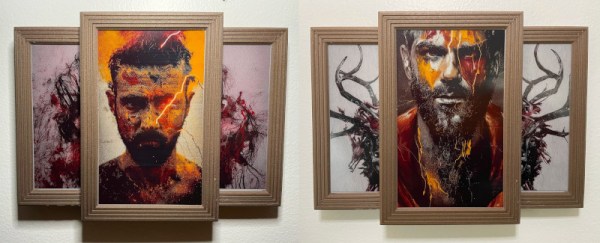
Fascinated by art generated by deep learning systems such as DALL-E and Stable Diffusion? Then perhaps a wall installation like this phenomenal e-paper Triptych created by [Zach Archer] is in your future.

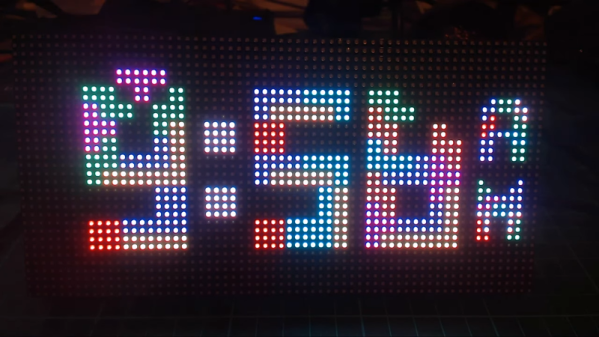
The three interlocking frames were printed out of “Walnut Wood” HTPLA from ProtoPasta, and hold a pair of 5.79 inch red/black/white displays along with a single 7.3 inch red/yellow/black/white panel from Waveshare. There are e-paper panels out there with more colors available if you wanted to go that route, but judging by the striking images [Zach] has posted, the relatively limited color palettes available on these displays doesn’t seem to be a hindrance.

Note the clever S-shaped brackets holding in the displays.

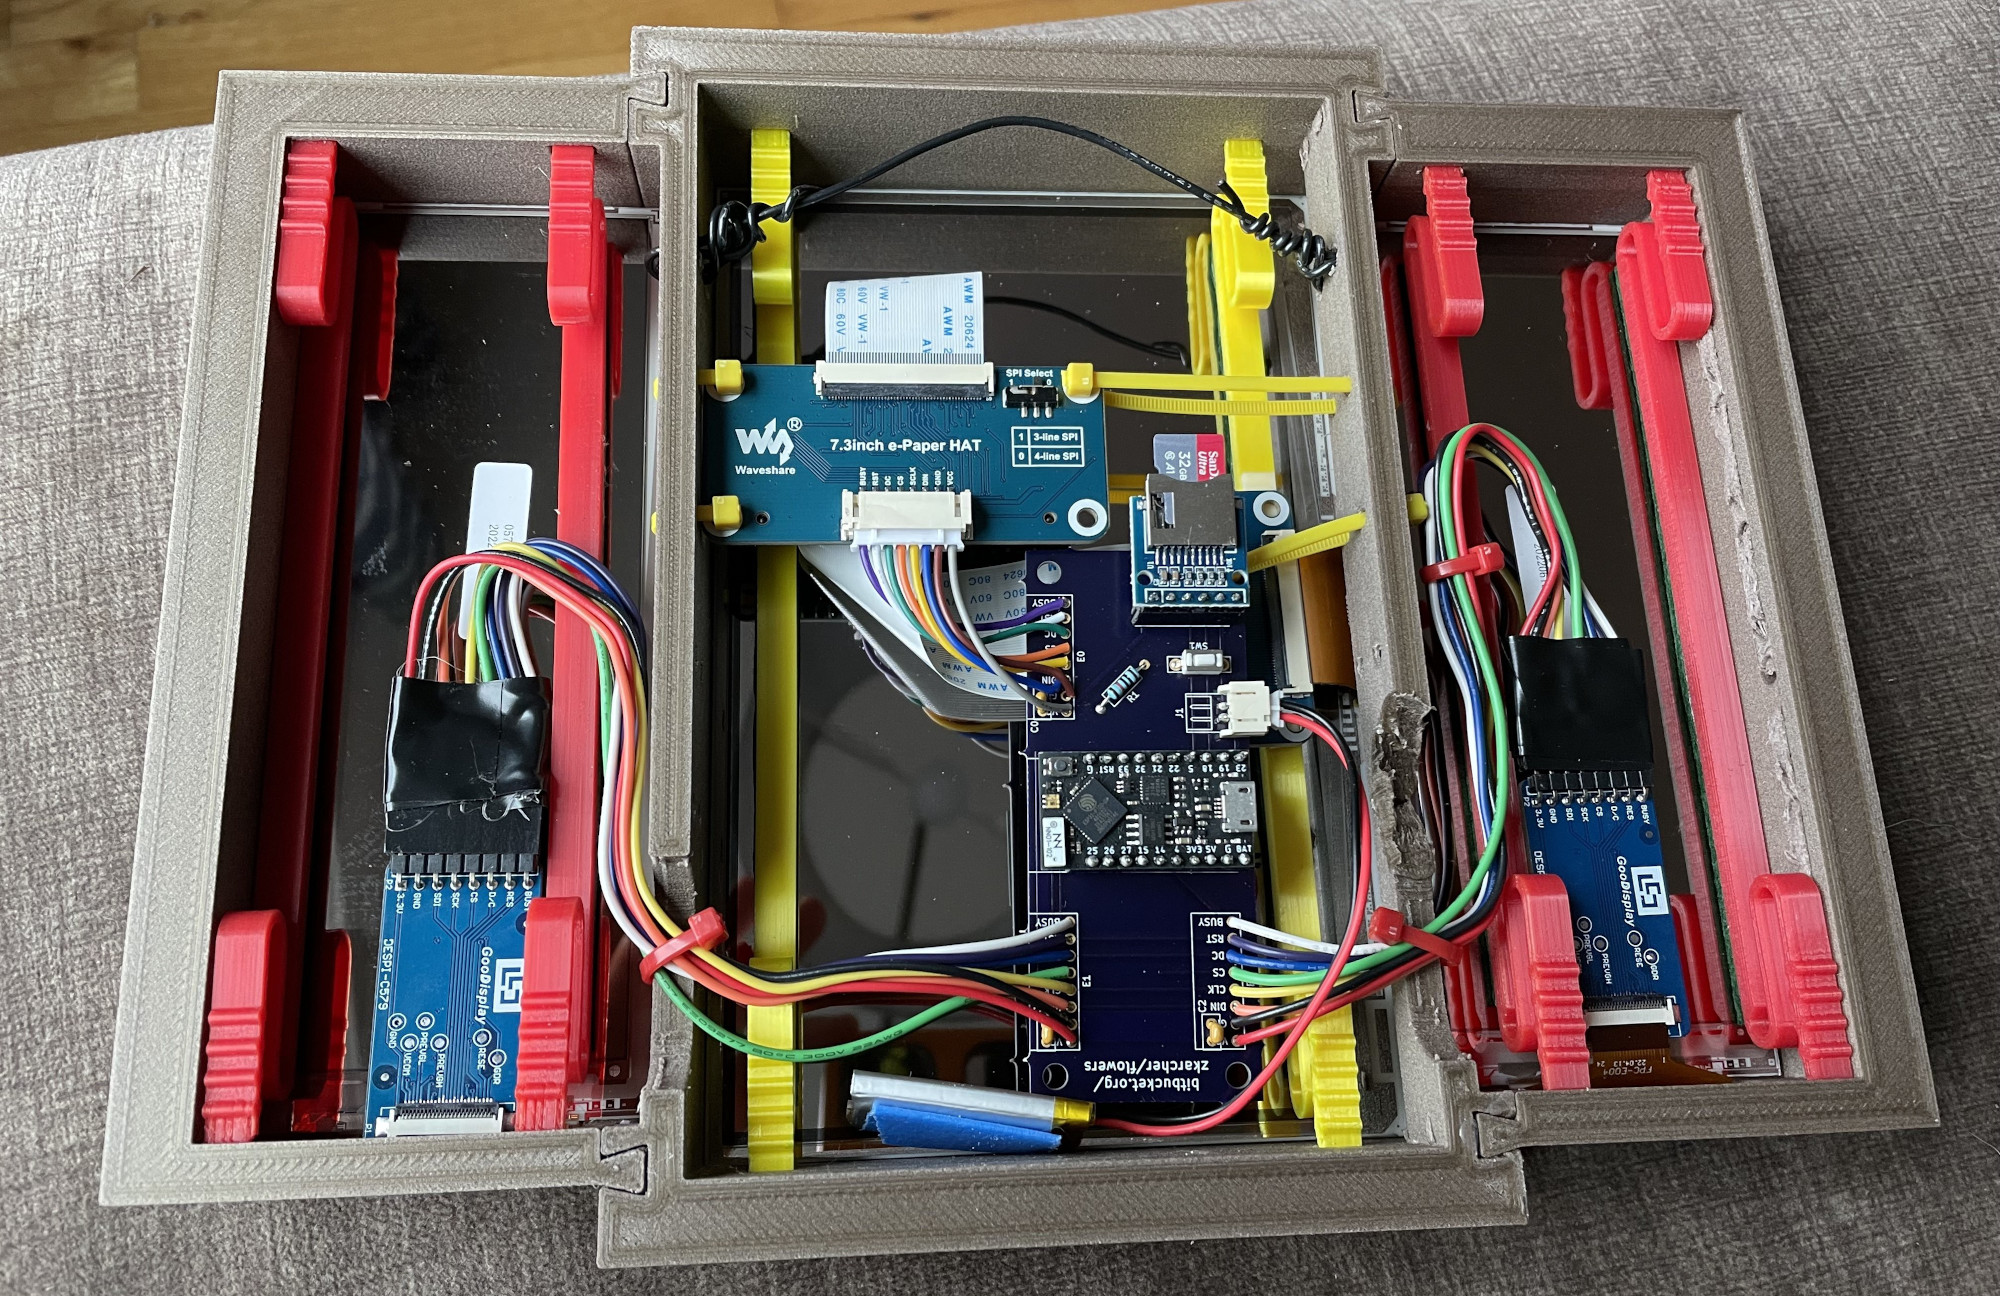
To create the images themselves, [Zach] wrote a script that would generate endless customized portraits using Stable Diffusion v1.4, and then manually selected the best to get copied over to a 32 GB micro SD card. The side images were generated on the dreamstudio.ai website, and also dumped on the card.

Every 12 hours a TinyPico ESP32 development board in the frame picks some images from the card, applies the necessary dithering and color adjustments to make them look good on the e-paper, and then updates the displays. Continue reading “3D Printed Triptych Shows Trio Of AI-Generated Images”

E-Ink Calendar Paves A Path For All

[Martin Fasani] has set out to build a beautiful low power E-Ink Calendar he can hang on his wall. But perhaps more importantly, the work he has done makes it easier for everyone in the future to have a e-ink display. Many battery-powered e-ink projects connect to some server, download a bitmap image, display the new image, and then go into a deep sleep power mode. [Martin’s] project is no different, but it uses a handy microservice that does the conversion and rendering for you.

The firmware for this ESP32/ESP32S2 based calendar is open sourced on GitHub, with a version based on the Arduino framework as well as the native ESP-IDF framework. One particularly fantastic part of the firmware is a C++ component called CalEPD that drives e-paper displays. CalEPD extends the Adafruit_GFX class and is broken out in a separate repo, making it easy to consume on other projects. Since this supports dozens of different e-paper displays, this simplifies the process of building a calendar with different screens. The firmware includes a Bluetooth setup flow from a smartphone or tablet. This means you can quickly configure how often it wakes up, what it queries, and other important features.

The hardware shown in the demo video has a 7.5″ Waveshare screen with 800 x 400 resolution nestled inside a 3D-printed shell. There is also a 5,000 mAh battery with an ESP32 TinyPICO powering the whole system. The TinyPICO was picked for its incredible deep sleep power consumption. All this fits into a frame just 11 mm thick, for which STL files are available. [Martin] continues to work on this calendar display and has recently added support for FocalTech touch panel controllers. We’re excited to see where he takes it next!

This isn’t the first e-ink display project we’ve seen but this is a great reference to build your own. If you need another good starting point, this weather display might give you that little bit of inspiration you need.

Continue reading “E-Ink Calendar Paves A Path For All”

Emulating A Bluetooth Keyboard With The ESP32

Most people associate the ESP family of microcontrollers with WiFi, which makes sense as they’ve become the solution of choice for getting your project online quickly and easily. But while the WiFi capability might be the star of the show, the ESP32 also comes equipped with Bluetooth; we just don’t see people using it nearly as often. If you’re looking to get started using Bluetooth on the ESP32, then this simple wireless macro keypad from [Brian Lough] would be a great way to get started.

From a hardware standpoint, this project is incredibly straightforward. All you need to do is connect a membrane keypad up to the GPIO pins on the ESP32. Adding in a battery is a nice touch, and you probably would want to put it into a enclosure of some sort, but as a proof of concept it doesn’t get much easier than this. In this case [Brian] is using the TinyPICO board, but your personal ESP32 variant of choice will work just as well.

The rest of the project is all software, which [Brian] walks us through in the video after the break. There’s a preexisting library for Bluetooth Human Interface Device (HID) emulation on the ESP32, but it needs to be manually installed in the Arduino IDE. From there, he demonstrates how you can build up a functioning keyboard, including tricks such as sending multiple virtual keys at once.

In the past we’ve seen the ESP32 used to create a Bluetooth game controller, but the ability to emulate a keyboard obviously offers quite a bit more flexibility. With a practical demonstration of how easy as it is to turn this low-cost microcontroller into a wireless input device, hopefully we’ll start seeing more projects that utilize the capability.

Continue reading “Emulating A Bluetooth Keyboard With The ESP32”

A Replica From WarGames, But Not The One You Think

Remember the WOPR from WarGames? The fictional supercomputer that went toe-to-toe with Matthew Broderick and his acoustic coupler was like a love letter to the blinkenlight mainframes of yesteryear, and every hacker of a certain age has secretly yearned for their own scaled down model of it. Well…that’s not what this project is.

The [Unexpected Maker] is as much a WarGames fan as any of us, but he was more interested in recreating the red alphanumeric displays that ticked along as the WOPR was trying to brute force missile launch codes. These displays, complete with their thoroughly 1980s “computer” sound effects, were used to ratchet up the tension by showing how close the supercomputer was to kicking off World War III.

The display as it appeared in the film.

Of course, most us don’t have a missile silo to install his recreated display in. So when it’s not running through one of the randomized launch code decoding sequences, the display doubles as an NTP synchronized clock. With the retro fourteen segment LEDs glowing behind the smoked acrylic front panel, we think the clock itself is pretty slick even without the movie references.

Beyond the aforementioned LEDs, [Unexpected Maker] is using a ESP32 development board of his own design called the TinyPICO. An associated audio “Shield” with an integrated buzzer provides the appropriate bleeps and bloops as the display goes through the motions. Everything is held inside of an understated 3D printed enclosure that would look great on the wall or a desk.

Once you’ve got your launch code busting LED clock going in the corner, and your illuimated DEFCON display mounted on the wall, you’ll be well on the way to completing the WarGames playset we’ve been dreaming of since 1983. The only way to lose is to not play the game! (Or something like that…)

Continue reading “A Replica From WarGames, But Not The One You Think”

A Tetris Clock

We have had no shortage of clock projects over the years, and this one is entertaining because it spells the time out using Tetris-style blocks. The project looks good and is adaptable to different displays. The code is on GitHub and it relies on a Tetris library that has been updated to handle different displays and even ASCII text.

[Brian] wanted to use an ESP8266 development board for the clock, but the library has a bug that prevents it from working, so he used an ESP32 board instead. The board, a TinyPICO, has a breakout board that works well with the display.

Continue reading “A Tetris Clock”