Mini Flickering Torch Effect Uses Neither Wires Nor Solder

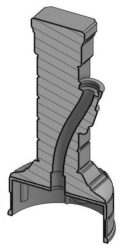
Cross section of pillar model.

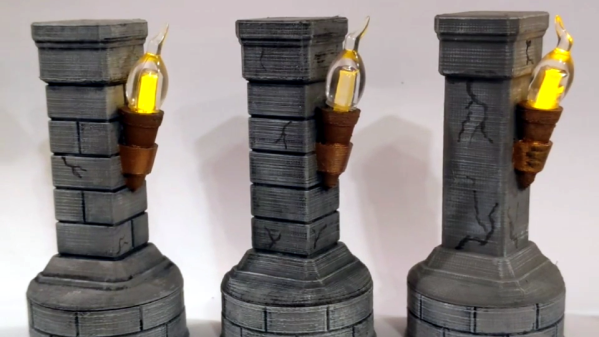
[ROBAGON] makes miniature, 3D-printable gaming terrain and features like these stone pillars with flickering torch. His model isn’t free to download (though it’s under $2 at the time of writing), but the part that impressed us was his clever way of using electric tea lights to create a flickering torch effect without needing any soldering or wiring whatsoever.

His solution was to make the base of the pillar large enough to fit an electric tea light, which uses a flickering LED to simulate a candle flame. The molded plastic “flame” is removed from the tea light and placed in the torch sconce, while the tea light itself goes into the base. A short segment of clear acrylic rod is used as a light pipe, running from the tea light’s LED to the base of the torch.

It’s a simple, effective, and economical solution that doesn’t require running or soldering a single wire and you can see it work in the brief video embedded below. Now all that’s missing for those Dungeons & Dragons sessions is this custom calculator.

Continue reading “Mini Flickering Torch Effect Uses Neither Wires Nor Solder”

Shop-Made Fixture Turns Out Dream Welds

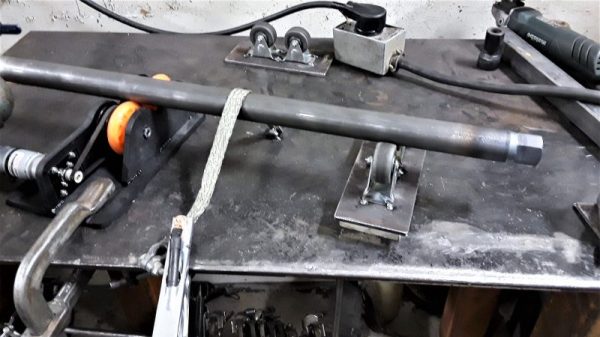
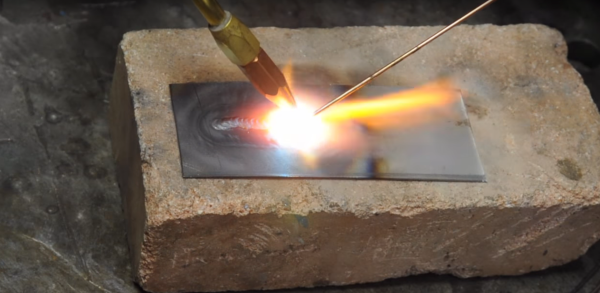
You can tell a lot about a person by the company they keep, and you can tell a lot about a craftsman by the tools and jigs he or she builds. Whether for one-off jobs or long-term use, these ad hoc tools, like this tubing rotator for a welding shop, help deliver results beyond the ordinary.

What we appreciate about [Delrin]’s tool is not how complex it is — with just a motor from an old satellite dish and a couple of scooter wheels, it’s anything but complicated. What we like is that to fabricate some steering links, each of which required three passes of TIG welding to attach a threaded bung to the end of a rod, [Delrin] took the time to build just the tool for the job. The tools slowly rotates the rod, letting the welder keep the torch in one position as the workpiece moves under it. The grounding method is also simple but clever — just a wide strap of braid draped over the rod. The result is some of the prettiest and most consistent welds we’ve seen in a while, and with an order for 28 steering links, it ought to be a huge time saver.

It may be time for a little more TIG welding love around here. Sure, we’ve covered the basics of oxy-acetylene welding, and even talked about brazing aluminum. Perhaps your humble Hackaday writer will take the plunge into a new TIG welder and report from a newbie’s perspective. You know, for science.

[via r/welding]

Plasma Cutter Jig Notches Tubing Quickly And Cleanly

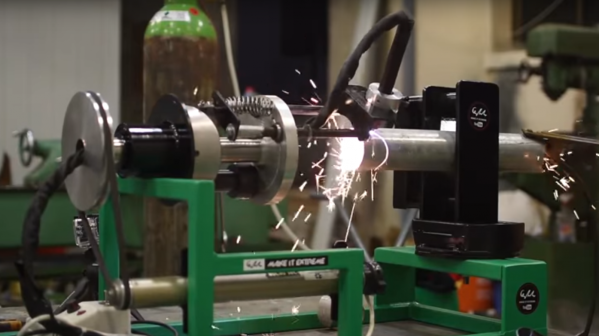
It may be [MakeItExtreme]’s most ambitious build to date. There are a lot of moving parts to this plasma cutter tubing notcher, but it ought to make a fine addition to the shop and open up a lot of fabrication possibilities.

We have to admit to a certain initial bafflement when watching the video below for the first time. We can usually see where [MakeItExtreme]’s builds are going right from the first pieces of stock that get cut, but the large tube with the pressed-in bearing had us scratching our heads. The plan soon became clear — a motorized horizontal rotary table with a hollow quill for the plasma torch leads. There’s a jig for holding the torch itself that can move in and out relative to the table. Cams made of tube sections can be bolted to a fixed platen; a cam follower rides on the cams and moves the torch in and out as the table rotates. This makes the cuts needed to properly fit tubes together — known as fish mouth cuts or saddle cuts. The cams can be removed for straight cuts, and the custom pipe vise can be adjusted to make miter cuts.

All in all a sturdy and versatile build that ought to enable tons of new projects, especially when teamed up with [MakeIt Extreme]’s recent roll bender.

Continue reading “Plasma Cutter Jig Notches Tubing Quickly And Cleanly”

Fun With Fire: Oxy-Acetylene Basics

If generations of Hollywood heist films have taught us anything, it’s that knocking off a bank vault is pretty easy. It usually starts with a guy and a stethoscope, but that never works, so the bad guys break out the cutting torch and burn their way in. But knowing how to harness that raw power means you’ve got to learn the basics of oxy-acetylene, and [This Old Tony]’s new video will get your life of crime off on the right foot.

In another well-produced video, [Tony] goes into quite a bit of detail on the mysteries of oxygen and acetylene and how to handle them without blowing yourself up. He starts with a tour of the equipment, including an interesting look at the internals of an acetylene tank — turns out the gas is stored dissolved in acetone in a porous matrix inside the tank. Working up the hoses, he covers the all-important flashback arrestors, the different styles of torches, and even the stoichiometry of hydrocarbon combustion and how adjusting the oxygen flow results in different flame types for different jobs. He shows how oxy-acetylene welding can be the poor man’s TIG, and finally satisfies that destructive urge by slicing through a piece of 3/8″ steel in under six seconds.

We’ve always wanted a decent oxy-acetylene rig, and [Tony] has convinced us that this is yet another must-have for the shop. There’s just so much you can do with them, not least of which is unsticking corroded fasteners. But if a blue wrench is out of your price range and you still want to stick metal together, you’ll want to learn how to braze aluminum with a propane torch.

Continue reading “Fun With Fire: Oxy-Acetylene Basics”

Quick And Easy Thermic Lance Is Hot Enough To Melt Rocks

Heat can be a hacker’s best friend. A little heat can help release a stubborn nut cleanly, and a lot of heat can melt a rusty bolt clean off. An oxy-acetylene torch is handy for these applications, but if you need a more portable setup, and you want enough heat to melt rocks, you might want to look into this field-expedient thermic lance.

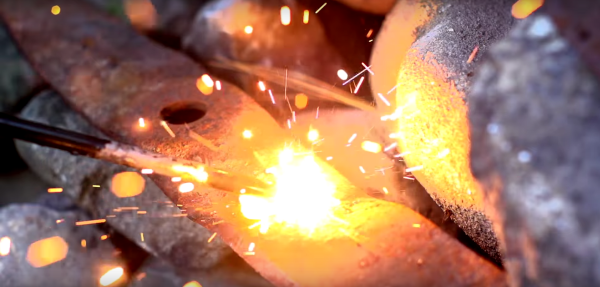
Thermic lances have been around a long time in the demolition industry, where cutting steel quickly is a common chore. Commercial thermic lances are just a bundle of steel fuel rods which are set on fire while oxygen is blown down a consumable outer tube. The resulting flame can reach up to 4500°C with impressive results. In need of a similarly destructive device, [NightHawkInLight] came up with a super-simple lance – a small disposable tank of oxygen and regulator, a length of Tygon tubing, and a piece of 5/8″ steel brake line. No need for fuel rods in this design; the brake line provides both fuel and oxygen containment. As you can see in the video below, lighting the little lance without the usual oxy-acetylene torch is no problem – a “wick” of twisted steel wool is all that’s needed to get the torch going. The results are pretty impressive on both steel and rock.

You say you’re fresh out of brake line and still need some “don’t try this at home” action? No problem at all – just hit up the pantry for the materials needed for this tinfoil and spaghetti thermic lance.

Continue reading “Quick And Easy Thermic Lance Is Hot Enough To Melt Rocks”

Hacklet 43 – Flashlight Projects

Mankind has always looked for ways to light up the night as they walk around. Fires are great for this, but they aren’t very safe or portable. Even kept safe in a lantern, an open flame is still dangerous – especially around cows.  Enter the flashlight, or torch if you’re from the other side of the pond. Since its invention in 1899, the flashlight has become a vital tool in modern society. From patrolling the dark corners of the city, to reading a book under the covers, flashlights enable us to beat back the night. The last decade or so has seen the everyday flashlight change from incandescent bulbs to LEDs as a light source. Hackers and makers were some of the first people to try out LED flashlights, and they’re still tinkering and improving them today. This weeks Hacklet focuses on some of the best flashlight projects on Hackaday.io!
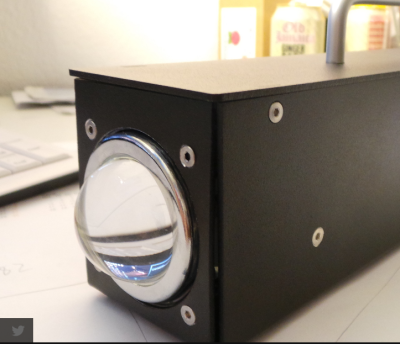
light1We start with [Norman], and the LED Flashlight V2. Norman built a flashlight around a 100 Watt LED. These LEDs used to be quite expensive, but thanks to mass production, they’ve gotten down to around $6 USD or so. Norman mounted his LED a custom aluminum case. At this power level, even LEDs get hot. An extruded aluminum heatsink and fan keeps things cool. Power is from a 6 cell LiPo battery, which powers the LED through a boost converter. It goes without saying that this flashing is incredibly bright. Even if the low-cost LEDs aren’t quite 100 Watts, they still put many automotive headlights to shame! Nice work, [Norman].
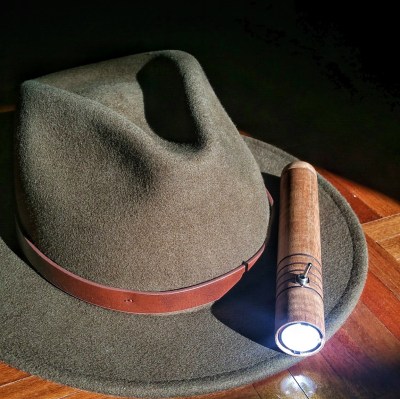
light2A tip of the fedora to [Terrence Kayne] and his Grain-Of-Light LED LIGHT. [Terrence] loves LED flashlights, be he wanted one that had a bit of old school elegance. Anyone familiar with LEDs knows CREE is one of the biggest names in the industry. [Terrence] used a CREE XM-L2 emitter for his flashlight. He coupled the LED to a reflector package from Carlco Optics. The power source is an 18650 Lithium cell, which powers a multi-mode LED driver. [Terrence] spent much of his time turning down the wooden shell and aluminum tube frame of the flashlight. His workmanship shows! Our only suggestion would be to go with a lower profile switch. The toggle [Terrence] used would have us constantly checking our pockets to make sure the flashlight hadn’t accidentally been activated.
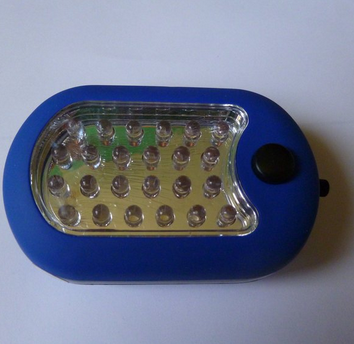
light3Harbor Freight’s flashlights are a lot like their multimeters: They generally work, but you wouldn’t want to trust your life to them. That wasn’t a problem for [Steel_9] since he needed a strobe/party light. [Steel_9] hacked a $5 “27 LED” light into a stylish strobe light. He started by cutting the power traces running to the LED array. He then added in an adjustable oscillator circuit: two BJTs and a handful of discrete components make up an astable multivibrator. A third transistor switches the LEDs. Switching a load like this with a 2N3906 probably isn’t the most efficient way to do things, but it works, and the magic smoke is still safely inside the semiconductors.  [Steel_9] built the circuit dead bug style, and was able to fit everything inside the original plastic case.  Rave on, [Steel_9]!

If you want to see more flashlight projects, check out our new list on Hackaday.io! That’s about all the time we have for this week’s Hacklet. As always, see you next week. Same hack time, same hack channel, bringing you the best of Hackaday.io!

Hack A Mag-Lite To Be Rechargeable

rechargeMaglite

Most tools sport rechargeable batteries these days, but there’s no need to toss that old flashlight: just replace the cells with rechargable ones!

[monjnoux] had a 3-cell D-sized MagLite lying around—though you could reproduce this hack with a 2 to 5 cell model—which he emptied of its regular batteries and replaced with some 11000mAh NiMHs from eBay. The original bulb was also tossed in favor of a 140-lumens LED.

After disassembling the flashlight, [monjnoux] set about installing the new parts. He replaced the original bulb with the LED, soldering it into place and securing it with hot glue. He then drilled a hole in the body of the flashlight for a DC socket. The charger he purchased is adaptive, detecting the number of cells and adjusting its voltage accordingly. It had the wrong connector, though, so [monjnoux] simply chopped off the end and soldered on a new one. For a hack that comes in at 40€, it’s definitely a cheaper alternative to the official rechargeable model: which costs 80€. And with a duration of 7 hours (though it’s unclear whether this number reflects continuous use), it likely outlasts the official model, as well.