Down The Fabrication Rabbit Hole To Build A Recumbent Bike

‘Tis the time of the year to find as many reasons as possible to shut off the smartphone and get yourself outside. [Rich Olson’s] newest excuse is a recumbent bicycle he built from at least three donor bikes. Of course we’ve seen any number of bike mods over the years (the tall bikes that integrate a ladder to climb up to the saddle have always held a special place in our hearts), but [Rich] left us a nice trail of bread crumbs on how to get into this yourself without breaking the bank.
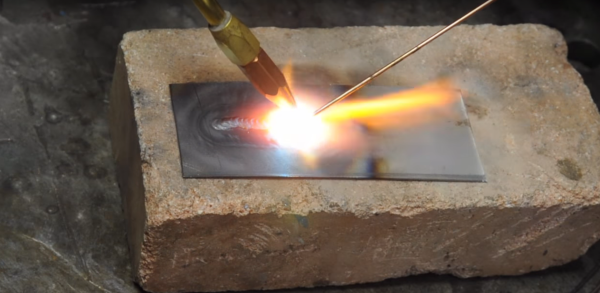
He worked from a set of open source plans, with additional instructions laid out by [Brian in Ohio] in a bicycle hacking series on the Hacker Public Radio podcast. We learn in the first installment that you can get your hands on a torch that uses oxygen and MAP gas to braze the pipe joints — a quick Duck Duck Go search turns up kits that have the torch and both gases for about eighty bucks. Ask around your neighbourhood and you’re likely to find some bike frames from the disused and broken cycles lurking in dark garage corners. That first podcast page even has images that show you how to lay out fishmouth cuts where the tubes will meet.

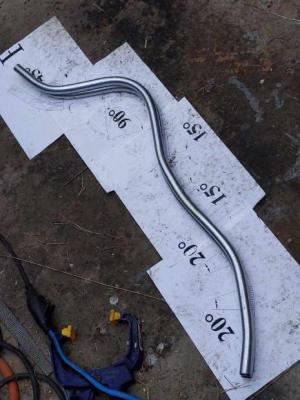
But what really grabbed our attention is the tube bending for the recumbent seat. This is a speciality part that you’re not going to be able to salvage from traditional bikes. [Rich’s] project shows off this image of a bend template and the two main rails he used from the seat; but how did he make those bends? The third episode of [Brian in Ohio’s] series covers the one simple trick that electricians don’t want you to know. Those rails are made out of electrical conduit and you can easily buy/rent/borrow a commonplace conduit bending tool which has the handy advantage of including angle guides.

You’ll find [Rich’s] video after the break which begins with a slideshow and ends with a demo ride. That lets us see the lacing on the back side of the seat fabric that keeps it taught, yet comfy in a way a standard bike saddle just can’t be.

If this still hasn’t convinced you to pick up a torch, you can also build a recumbent with a wooden frame.

Continue reading “Down The Fabrication Rabbit Hole To Build A Recumbent Bike”

So, You’ve Never Made A Spaceframe Before

It is sometimes a surprise in our community of tinkerers, builders, hackers, and makers, to find that there are other communities doing very similar things to us within their own confines, but in isolation to ours. A good example are the modified vehicle crowd. In their world there are some epic build stories and the skills and tools they take for granted would not in any way be unfamiliar to most Hackaday readers.

As part of a discussion about electric vehicles near where this is being written, someone tossed an interesting link from that quarter into the mix; a two-part treatise on building ultra-light-weight tubular frame vehicles. Or space frames, as you might know them.

You might think that making a tubular framed for a vehicle would be a straightforward enough process, but as the article explains, it contains within it a huge well of geometry and metallurgy to avoid a creation that is neither too heavy nor contains excessive weakness. Part one deals mainly with prototyping a frame, the selection of materials and joining tubes, while part two goes into more detail on fabrication. The author likes brazing which may offend the sensibilities of welding enthusiasts, but you can substitute your jointing tech of choice.

A particularly neat suggestion, one of those simple ideas that make you wish you’d thought of it yourself, is to prototype a frame in miniature with copper wire and solder to evaluate the effect of different forces upon it before you commit your final design to steel.

The articles are a few years old, but no less pertinent in the information they contain. Meanwhile if you are a spaceframe veteran, then you may have your own suggestions for the comments below. And if you’d like some tips on how not to build a spaceframe, have a look at this motorcycle.

Thank you [JHR] and [Jarkman] for the tips.

Fun With Fire: Oxy-Acetylene Basics

If generations of Hollywood heist films have taught us anything, it’s that knocking off a bank vault is pretty easy. It usually starts with a guy and a stethoscope, but that never works, so the bad guys break out the cutting torch and burn their way in. But knowing how to harness that raw power means you’ve got to learn the basics of oxy-acetylene, and [This Old Tony]’s new video will get your life of crime off on the right foot.

In another well-produced video, [Tony] goes into quite a bit of detail on the mysteries of oxygen and acetylene and how to handle them without blowing yourself up. He starts with a tour of the equipment, including an interesting look at the internals of an acetylene tank — turns out the gas is stored dissolved in acetone in a porous matrix inside the tank. Working up the hoses, he covers the all-important flashback arrestors, the different styles of torches, and even the stoichiometry of hydrocarbon combustion and how adjusting the oxygen flow results in different flame types for different jobs. He shows how oxy-acetylene welding can be the poor man’s TIG, and finally satisfies that destructive urge by slicing through a piece of 3/8″ steel in under six seconds.

We’ve always wanted a decent oxy-acetylene rig, and [Tony] has convinced us that this is yet another must-have for the shop. There’s just so much you can do with them, not least of which is unsticking corroded fasteners. But if a blue wrench is out of your price range and you still want to stick metal together, you’ll want to learn how to braze aluminum with a propane torch.

Continue reading “Fun With Fire: Oxy-Acetylene Basics”

Brazing Aluminum

Where do you stand on one of the eternal questions of metalwork: brazing, or welding? As your Hackaday writer, and the daughter of a blacksmith, it’s very much on the welding side here. Brazed joints can come apart too easily, which is why in the territory this is being written in at least, they are not permitted for the yearly vehicle roadworthiness test. If you’ve ever had to remove a brazed-on patch with an angle grinder, you’ll know which one you’d trust in a crisis.

What if the metal in question is aluminum? [George Graves] sends us a link to a forum discussion on the subject from a few years ago, and to a YouTube video which we’ve embedded below the break. Miracle brazing rods claim astounding toughness, but the world divides into those who favour TIG’s strength versus those who point to brazing’s penetration far between the surfaces of the metal to be joined. Having experimented with them a while back, we’ll admit that it’s true that aluminum brazing rods join broken parts impressively well. But yet again you won’t see this Hackaday writer riding a bike that wasn’t welded with the trusty TIG torch.

Take a look at the video, and see what you think. Even if it’s not a joint you’d stake your life on it’s still a technique that’s a useful addition to your workshop arsenal.

Continue reading “Brazing Aluminum”

The Healthy Maker: Tackling Vapors, Fumes And Heavy Metals

Fearless makers are conquering ever more fields of engineering and science, finding out that curiosity and common sense is all it takes to tackle any DIY project. Great things can be accomplished, and nothing is rocket science. Except for rocket science of course, and we’re not afraid of that either. Soldering, welding, 3D printing, and the fine art of laminating composites are skills that cannot be unlearned once mastered. Unfortunately, neither can the long-term damage caused by fumes, toxic gasses and heavy metals. Take a moment, read the material safety datasheets, and incorporate the following, simple practices and gears into your projects.

Continue reading “The Healthy Maker: Tackling Vapors, Fumes And Heavy Metals”

Oil Feed Retrofit For A CNC Mill Starting To Come Together

oil-feed-retrofit-for-cnc-mill

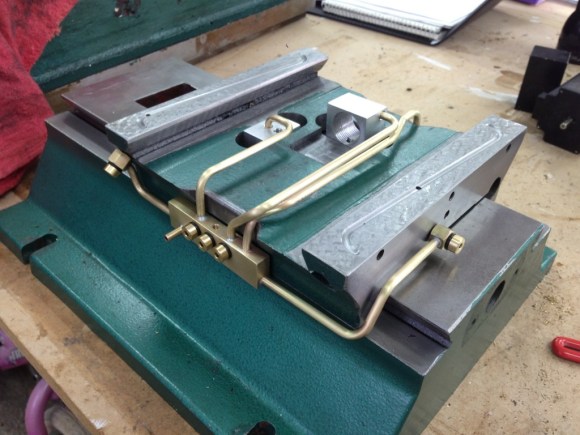
Here is the first real fruit of [Joel’s] labor on his oiling system for a CNC mill. Regular readers will remember hearing about his quest to go from a manual mill to a CNC version. As part of the overhaul he decided to add a system that can dispense oil to the different wear parts on the machine. We first looked in on the project when he showed off the pipe bender he built for the task. Now that he has that at his disposal he was able to route tubing to many of the parts.

The system starts with a central brass manifold which is pictured in the foreground. Each pipe was bent and cut to reach its destination with a minimum of wasted space. After a test fit showed good results he brazed the pieces together using silver solder. Each of the ball nuts have been drilled out so that oil will be injected onto the threads of the ball rod. Three input ports on the manifold will eventually let [Joel] connect the oil injection system via flexible tubing.