A Retro Touch Pad You Can Use On Modern Computers

As [Jan Derogee] explains in the faux-retro video after the break, drawing on classic 8-bit computers was something of a pain. The rudimentary light pens and joysticks of the 1980s allowed for free-form input, but were clumsy and awkward to use. Which is why he set out to create an ideal drawing device for the C64 using modern electronics. For the sake of completion, he also gave it a USB HID mode so it would work on somewhat more modern computers.
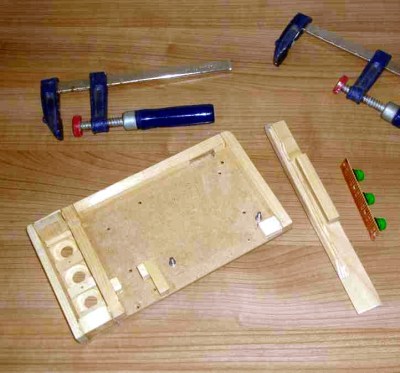
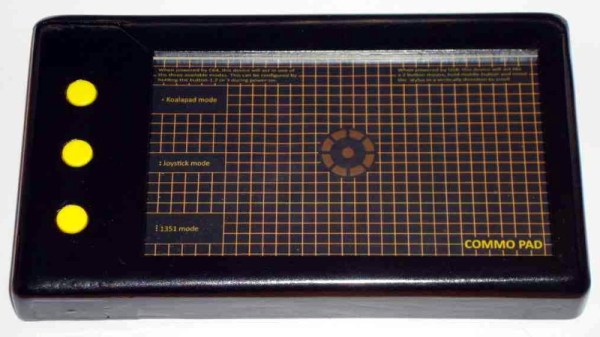
His device, which he’s calling the Commo Pad, looks like it could have been transported here directly from the 1980s, but it’s built from entirely new hardware. The case is actually made of wood that [Jan] sanded and painted to give it that chunky plastic aesthetic that we all know and love, and the retro artwork on the touch panel really goes a long way to sell the vintage vibe.

Speaking of which, the touch panel is perhaps the most interesting component of the entire build. It’s actually a resistive panel that was meant for mounting to an LCD that [Jan] has connected to an Arduino. All he had to do was provide a stable frame for it and print out some art work to slide in behind it.

The Arduino and associated electronics allow the Commo Pad to be picked up by the C64 as either a joystick or mouse, which means it doesn’t need any custom software on the computer side to function. Similarly, it can also mimic a USB mouse if you want to plug it into something made a bit later than 1982. Should you be so inclined to make it wireless, the addition of a Bluetooth seems like it would be relatively trivial.

If the Commo Pad doesn’t have enough of a retro-futuristic vibe for your tastes, we recently covered a custom optical touch panel that looked like it could double as a prop from Blade Runner which might do the trick.

Continue reading “A Retro Touch Pad You Can Use On Modern Computers”

Arduino-controlled MIDI Sequencer

am808vx3-arduino-synth

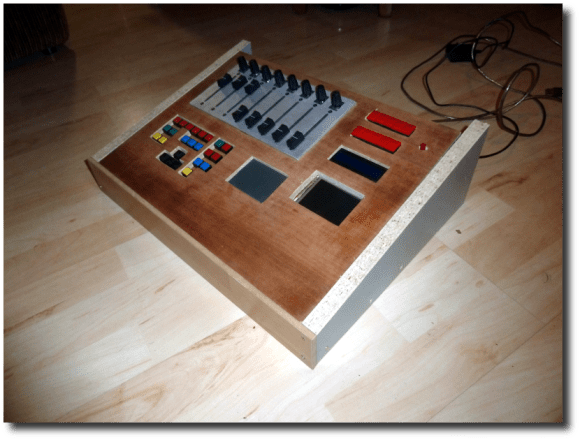
[Christian] wrote in to tell us about his third-generation Arduino MIDI sequencer (translated) called the AM808 VX3. He had already laid a strong base for the project in his previous versions. But the user interface was still frustrating at times and that’s where this version comes in. it features a nice clean dashboard like interface, but also includes a configurable virtual interface.

The obvious components seen above include the slider and potentiometer band, as well as the repository of buttons mounted below that. But in the center of the board is a touchpad which [Christian] pulled out of an old Laptop. It interfaces as a PS2 device which makes it pretty simple to use in conjunction with the Arduino. But that’s not the only touch-enabled input device. The rectangle to the right of the touch pad is an LCD screen with a touch overlay. As you can see (and hear) in the clip after the break, the touch screen made it possible for him to rework the controls until they became simple and intuitive.

Continue reading “Arduino-controlled MIDI Sequencer”

10gui: Multi-touch For All Ten Digits

10gui-multitouch-for-10-digits

The race for the next revolutionary input design is an ongoing event. [Clayton Miller’s] newest offering in the contest is a multitouch concept that separates the display from the screen and is meant to utilize all fingers. His video explanation includes a description of the physical input device, a software implementation, and a demonstration of how a finished system will work. After the break we’ll look at the hardware, the software, and the concept video. Continue reading “10gui: Multi-touch For All Ten Digits”

Touchpad + Arduino

[youtube=http://www.youtube.com/watch?v=qt_VmJljmKU]

[Jani] directed us to his tutorial on making a laptop touchpad work with an Arduino. After seeing the recent post on touch pad and VFD hacking, he couldn’t resist finding one of these to play with. He shows us how to connect it all up and offers two methods of using the data from it. The first method is to determine the direction of finger travel and the second, shown above, is to use it more like the volume control on an iPod. Source code for both is available on his site.

Knit Touchpad

[Plusea] made her own touchpad using some anti-static gloves and an Arduino. This proof of concept is fairly small, but the system could be scaled quite large if you could find the fabric. She cut apart the anti-static glove, mounted it and wired it to the Arduino. A special piece is made to fit over the finger that is also wired to the Arduino. The location of where she touches is determined by the resistance between the finger and each corner. Watch the video on the instructable to see how it measures.

She mentions that there are a few different ways to build it, some which would not require anything on your finger, but would use another piece mounted behind the touchpad. The method she is currently using though, would allow for the fabrick to be any size or shape, even molded around something.

Interactive Globe Display


[ERASME] built this interactive globe interface for an exhibit on Inuit people and their land. The goal was to have a tactile input device to Google Earth data. The unit is composed of a half globe for location selection, a touch pad for layer selection, and a Wiimote for view changes.They had to develop their own driving application for Google Earth as none exists for Linux. The software, called KeyEvents takes inputs from all the devices and mimics keyboard and mouse control in Google Earth.

There is much more information on how they got the pieces to work together, as well as some videos in french showing the device working. One thing that stands out though is that they decided to use direct association on their Wiimote, thus stopping rogue Wiimotes from gaining control. Who would carry a Wiimote around just to hijack public displays? We would.

[thanks Leucos]