Retrotechtacular: Teleprinter Tour, Teardown

This week, we’re taking the wayback machine to 1940 for an informative, fast-paced look at the teleprinter. At the telegram office’s counter, [Mary] recites her well-wishes to the clerk. He fills out a form, stuffs it into a small canister, and sends it whooshing through a tube down to the instrument room. Here, an operator types up the telegram on a fascinating electro-mechanical device known as a teleprinter, and [Mary]’s congratulatory offering is transmitted over wires to her friend’s local telegraph office hundreds of miles away.

We see that the teleprinter is a transceiver that mechanically converts the operator’s key presses into a 5-digit binary code. For example, ‘y’ = 10101. This code is then transmitted as electrical pulses to teleprinters at distant offices, where they are translated back into alphanumerical data. This film does a fantastic job of explaining the methods by which all of this occurs and does so with an abstracted, color-coded model of the teleprinter’s innards.

The conversion from operator input to binary output is explained first, followed by the mechanical translation back to text on the receiving end. Here, it is typed out on a skinny paper tape by the type wheel shown above. Telegraphists in the receiving offices of this era cut and pasted the tape on a blank telegram in the form of meaningful prose. Finally, it is delivered to its intended recipient by a cheeky lad on a motorbike.

Continue reading “Retrotechtacular: Teleprinter Tour, Teardown”

Open Source Software Defined Radio Transceiver

SDR

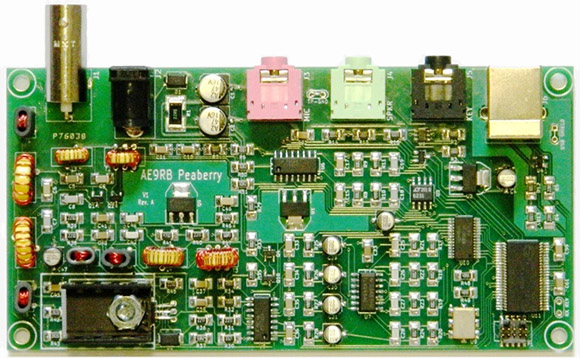
As the year draws to a close, we must look back and look at the advances in amateur radio this year. The RTL-SDR tuner hack, a USB TV Tuner to create a software defined radio receiver, is one of the greatest hacks of the last 12 months and a great justification for 2012 being the year of software defined radio receivers. 2013 is shaping up to have even more advances in the state of software defined radio. This time we’ll be transmitting as well, possibly with [AE9RB]’s Peaberry SDR transceiver.

The Peaberry SDR transceiver is a kit to both transmit and receive on every HAM band between 160 meters (1.8 MHz) to 17 meters (18 MHz). It does this through a USB interface and a 48kHz, 24-bit interface that is (or will shortly be) compatible with all the major SDR interfaces.

While the Peaberry SDR requires an amateur radio license to operate, we can’t wait to see what else will be coming to the software defined radio scene in the next year.

Thanks [Zach] for sending this one in.

Designing A Smarter RF Transceiver

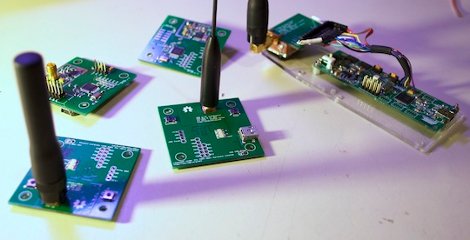
Two  months ago we featured a transceiver based on the Microchip MRF49XA, and a lot of feedback was sent to [hpux735] requesting that some brains be added onto the system. [hpux735] decided that if he was going to do it, might as well go the distance and make a make a native USB transceiver.

The prototype model is designed for use with the Atmel AT90USBKey, and uses the LUFA USB framework. The protocol and packet format was revised, and a Hamming Code implementation was built using look-up tables to give error control. Finally once the prototype was ready to go [hpux735] created some awesome little PCB’s that contain the AVR, radio, antenna hookups, and blinky lights (no project is complete without blinky lights) are all ready to go when you are.

This project has come quite a long way, covers 3 blog pages, uses a fair bit of ribbon cable, but you just got to love when a plan comes together.

Designing An RF Transceiver

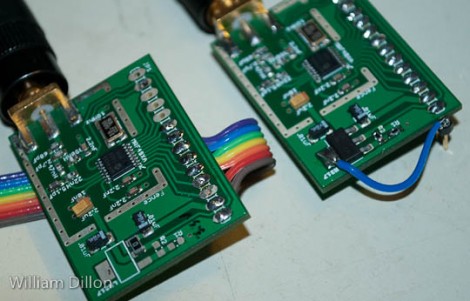
[William Dillon] is finishing up his degree. His final project as a student was to design an RF transceiver. He decided to work with the Microchip MRF49XA, which runs around $3 but will cost you $20 if you want it in a ready-to-use module. He didn’t find a lot of info on the Internet about communicating with these chips so he’s shared his design, code, and board files. If you’re ever wanted to delve into RF design this is a good primer. [William] talks about building around the example circuit from the datasheet but also includes a discussion of the calculations he made in working with the 434 MHz band, and an AVR-based library for using his module.

RF Modem + 250mW Amplifier

rf

[Trax] sent in his writeup on this RF modem with built in 250mW amplifier. The original power of the RF transceiver was around 10mW, his final results after testing were nearly 250mW. He was able to to easily transmit data over 1000 meters using his test setup. He states that he was actually able to achieve this without an antenna on the receiving side. That’s pretty impressive performance. It’s also worth noting that he soldered all of the components in place using a home clothing iron and some soldering paste. That must have been fairly tedious.

FM Stereo Transmitter

Reader [Mike Y] responded to our “What are you working on?” post  with his stereo FM transmitter project. If you’ve ever used an FM transmitter for your portable audio, you know that even the best consumer level ones can be difficult to make sound decent.

He obtained an NS73M FM Transmitter module from Niigata Seimitsu Company, but it required a controller to handle pre-emphasis, modulation level, frequency, and power level. He decided on an Arduino which would also control his LCD.

His results were quite good, with decent range and superb audio quality. His total cost thus far is $35, but he still needs to put it in an enclosure. You can find complete schematics as well as source code and helpful tips on his site.  You may also want to check out the regulations on broadcasting(pdf) as well.