Nokia LCD Goes Transparent For Hands-Free Reminders

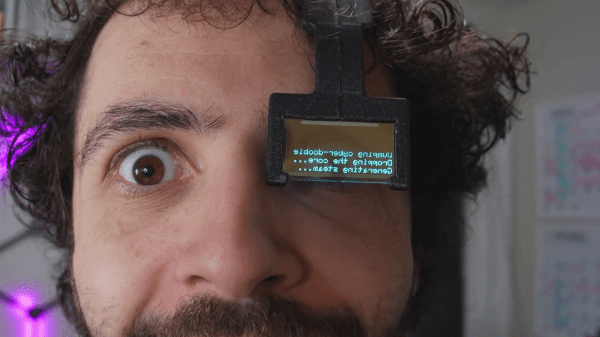
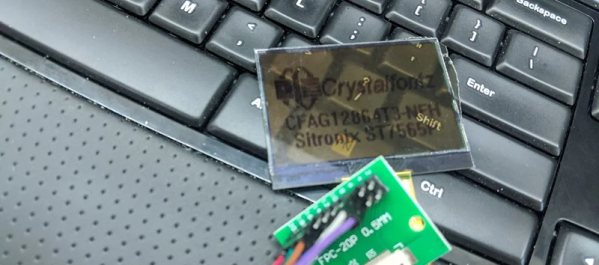
These days everyone’s excited about transparent OLED panels, but where’s the love for the classic Nokia 5110 LCD? As the prolific [Nick Bild] demonstrates in his latest creation, all you’ve got to do is peel the backing off the the late 90s era display, and you’ve got yourself a see-through cyberpunk screen for a couple bucks.
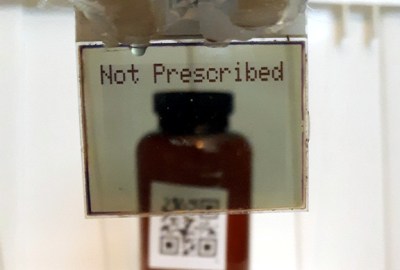
View through the modified LCD.

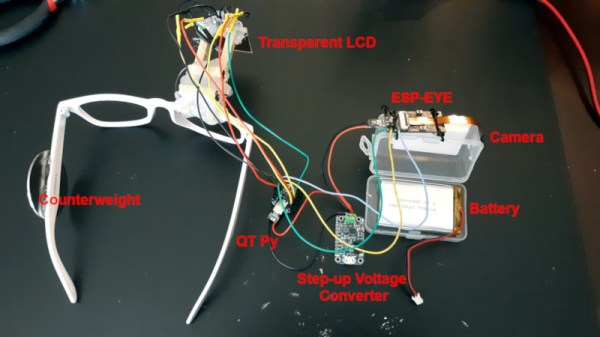
In this case, [Nick] has attached the modified display to a pair of frames, and used an Adafruit QT Py microcontroller to connect it to the ESP32 powered ESP-EYE development board and OV2640 camera module. This lets him detect QR codes within the wearer’s field of vision and run a TensorFlow Lite neural network right on the hardware. Power is provided by a 2000 mAh LiPo battery running through an Adafruit PowerBoost 500.

The project, intended to provide augmented reality reminders for medical professionals, uses the QR codes to look up patient and medication information. Right now the neural network is being used to detect when the wearer has washed their hands, but obviously the training model could be switched out for something different as needed. By combining these information sources, the wearable can do things like warn the physician if a patient is allergic to the medication they’re currently looking at.

Relevant information and warnings are displayed on the Nokia LCD, which has been placed far enough away from the eye that the user can actually read the text; an important design consideration that [Zach Freedman] demonstrated with his (intentionally) illegible wearable display a few weeks back. That does make the design a bit…ungainly, but at least you don’t have to worry about hand-cutting your optics

Why You Can’t Make A Wearable Display With A Transparent OLED

After seeing the cheap transparent OLED displays that have recently hit the market, you might have thought of using them as an affordable way to build your own wearable display. To save you the inevitable disappointment that would result from such a build, [Zack Freedman] took it upon himself to test out the idea, and show why transparent wearable displays are a harder than it looks.

He put together a headband with integrated microcontroller that holds the transparent OLED over the user’s eye, but unfortunately, anything shown on the display ends up being more or less invisible to the wearer. As [Zack] explains in the video after the break, the human eye is physically incapable of focusing on any object at  such a short distance. Contrary to what many people might think, the hard part of wearable displays is not in the display itself, but rather the optics.  For a wearable display to work, all the light beams from the display need to be focused into your eyeball by lenses and or reflectors, without distorting your view of everything beyond the lens. This requires, lightweight and distortion-free collimators and beam splitters, which are expensive and hard to make.

While these transparent OLEDs might not make practical heads-up displays, they are still a cool part for projects like a volumetric display. It’s certainly possible to build your own smart glasses or augmented reality glasses, you just need to focus on getting the optics right.

Transparent LCD Makes Everything Look Futuristic

According to [Kelsey], transparent displays are guaranteed to make “everything feel like the future.” Unfortunately they’re hard to find, and the ones typically available are OLED and can’t make solid black colors. But as luck would have it, it’s possible to repurpose a common LCD to be sort of transparent.

A LCD uses nematic crystals that can polarize light, with the amount of polarization changing based on the electric field applied to the crystal. Light enters the front of the panel through a polarizing film, passes through the display, and then bounces off a reflective back coating. The display itself usually polarizes light in a way that matches the front polarizer. That means if you do nothing you get reflected light. However, if a part of the LCD gets an electric field, it will repolarize in such a way as to block the reflected light making the display look black in that area.

[Kelsey’s] trick is to peel off the reflector and replace it with polarizing film taken from another display. The new polarizer needs to be bigger than the display for one reason: you need to match the polarizing angle of the front film with the new back film. That means if the new film is exactly the right size, it won’t be able to rotate without leaving gaps. By starting with a larger piece, you’ll be able to rotate for maximum transparency before you stick it on.

We’ve seen some homemade transparent numeric displays. The transparent wood, though, has usually left something to be desired.

A Transparent 7-Segment Display

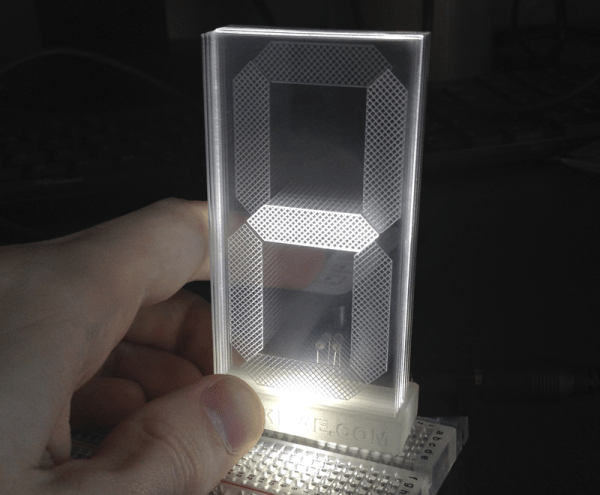
Though [Connor] labels it as a work in progress, we’re pretty impressed with how polished his transparent 7-segment display looks. It’s also deceptively simple.

The build uses a stack of seven different acrylic panes, one in front of the other, each with a different segment engraved onto its face. The assembly of panes sits on a small mount which is placed over seven rows of LEDs, with 5 LEDs per row. [Connor] left an air gap between each of the seven individual acrylic panes to clearly distinguish which was lit and to match the separation of the LED rows. To display a number, he simply illuminates the appropriate LED rows, which scatter light across the engraved part without spilling over into another pane.

You can find a brief overview and some schematics on [Connor’s] website, and stick around for the video demonstration below. We’ve featured [Connor’s] work before; if you missed his LCD data transfer hack you should check it out!

Continue reading “A Transparent 7-Segment Display”

Geometry Class Just Got Augmented

ruler

Just about every engineer needs to take a drawing class, but until now we surprisingly haven’t seen electronics thrown into rulers, t-squares, and lead holders. [Anirudh] decided to change that with Glassified. It’s a transparent display embedded in a ruler that is able to capture hand drawn lines. These physical lines can be interacted with or measured, turning a ruler into a bridge between a paper drawing and a digital environment.

For the display, [Anirudh] mounted a transparent TOLED display with a digitizer input into a ruler. The digitizer captures the pen strokes underneath the ruler, and is able to interact with the physical lines, either to calculate the length and angle of lines, or just to bounce a digital ball inside a hand-drawn polygon.

There’s no word on how this display is being driven, or what kind of code is running on it. [Anirudh] said he will have some schematics and code available up on his website soon (it’s a 404 right now).