World Maker Faire: The New Ultimaker

Ult

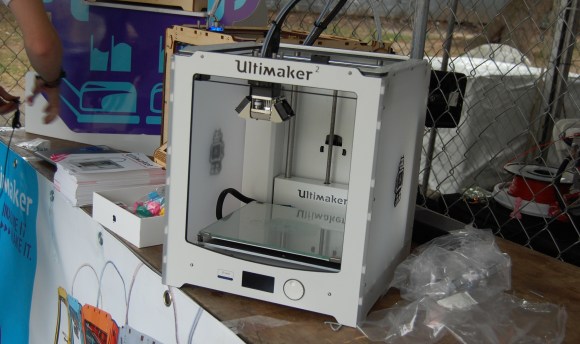
Just as the the gates opened at the World Maker Faire in New York City the skies opened, sending everyone underneath the tents and pavilians on the faire grounds. Luckily, I was able to check out the new Ultimaker before that happened, and only a day after it was officially announced.

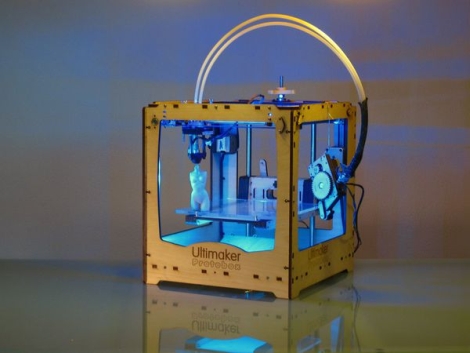
Compared to the older laser-cut Ultimaker, the Ultimaker 2 is much, much cleaner that’s made more for designers and architects instead of students, hackerspaces and tinkerers. There are a few new additions to the Ultimaker 2 – OLED display, heated bed, and a larger build volume. Basically, if you want Ultimaker quality without a lot of futzing around, go with the Ultimaker 2.

Ultimaker will be shipping a pre-assembled version for €1.895,00, with a kit version to follow shortly. As always, the Ultimaker 2 is open source, and no, this doesn’t mean an end to the classic Ultimaker.

An Interview With [David] Of Ultimaker

cura

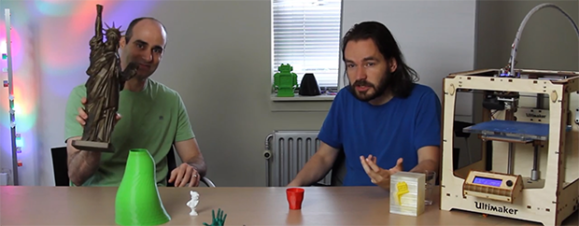
After interviewing the creator of Slic3r and the folks at Shapeways, [Andrew] is back again with his adventures in 3D printer videography and an interview with [David Braam] of Ultimaker

About a year ago, [David] looked at the state of the art in 3D printer control and Replicator G. While Replicator G, along with Pronterface and Repetier-Host both convert 3D models into G-code files as well as control the printer while its squeezing plastic out onto a bed. [David] thought the current state of these RepRap host programs were janky at best, and certainly not the best user experience for any home fabricator. This lead him to create Cura, a very slick and vastly improved piece of host software for the Ultimaker.

Cura isn’t just a fancy front end on an already existing slicer engine; [David] created his own slicing algorithm to turn .STL files into G-code that’s immensely faster than skeinforge. Where skeinforge could take an hour to slice a complex model, Cura does the same job in minutes.

There are also a bunch of cool features available in Cura: you can rotate any part before sending it to the printer, as well as pulling voxels directly from your Minecraft world and sending them to your printer. Very, very cool stuff, and if you’re running a Ultimaker or any other RepRap, you might want to check it out.

Continue reading “An Interview With [David] Of Ultimaker”

An Automat Of Wireless 3D Printers

vending

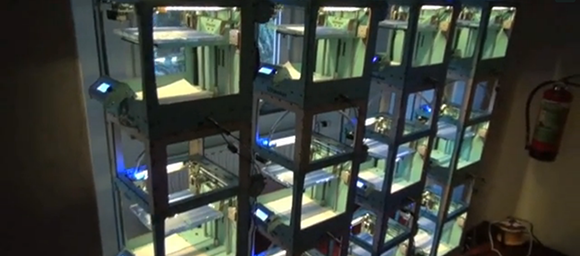
There’s a lot of really cool 3D printer stuff happening in the fashion district of NYC this month. It’s called 3DEA, and shows off  the awesomeness of Shapeways, Ultimaker, and the Up! 3D printer to all the fashionistas, trend setters, and the caliphate of coolness that is midtown Manhattan. The folks at Ultimaker wanted to bring something awesome to this exposition and came up with the Vendingwall: a wall of 3D printers connected into a vending machine able to print multiple objects at once.

Ultimaker has made a name for themselves as the top open source 3D printer manufacturer with absolutely impressive build quality and even a 20-foot-high printer able to manufacture entire rooms. The Vendingwall is their next step in the commercialization of 3D printers; all you need to do to create your own 3D printed object is walk up to the Vendingwall, order a print, and later retrieve from one of the many Ultimakers.

To control these ranks of Ultimakers, a piece of software runs on a wireless router loaded up with OpenWRT. From there, the router serves up a website powered by JQuery-mobile for all the Android and iDevices at the 3DEA open house, turning a wall of 3D printers into a vending machine reminiscent of the automats of yore.

Continue reading “An Automat Of Wireless 3D Printers”

Ginormous Ultimaker Can Print Slightly Smaller Ultimakers

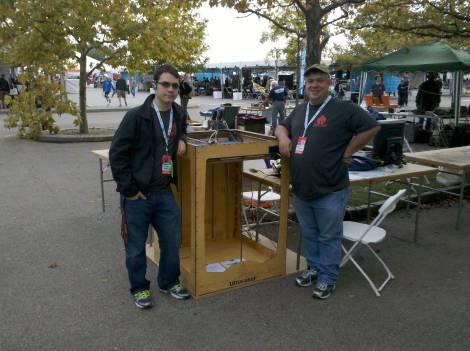
[bwattendorf] showed off his Gigimaker, a huge version of a Ultimaker at the Maker Faire this weekend.

It’s got a print area 2.5 feet square and 3.5 feet high. Currently, the team is using the machine to print off parts for smaller desktop-sized 3D printers, but theoretically this printer could be used to print life-sized companion cubes or full sized [Nefertiti] busts.

If you’d like to build your own giant Ultimaker, grab a few sheets of plywood and grab the git repo for the Gigimaker.

Printing Mounting Boards And Boxes For Hobby Projects

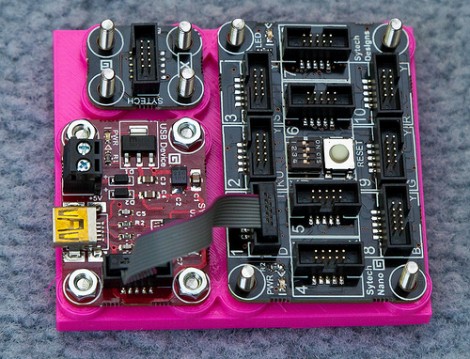
That’s a great base board for these Gadgeteer components. [Rob Miles] has been designing and printing mounting boards and enclosures for several of his projects. He just got into printing parts with the Ultimaker last week, and we’d say he’s found his stride. The board pictured here features nubs that act as stand-offs, and on the underside there are countersunk spaces for the bolt heads used as fasteners.

He started designing with Autodesk 123D but the interface didn’t really suit his working style. He switched over to FreeCAD and that experience fit him like a glove. He starts out with the sketch view to draw his parts, then extrudes that into the 3D model for further refinement before having the printer turn the digital into the real. This is the third board he produced in just one day of experimenting, but he is also showing off an enclosure he made for his thermal printer.

If you’re not working with boards that have nice mounting holes like these, don’t fret. We’ve seen 3d printed mounting systems that cradle the board, like these Raspberry Pi enclosures.

[Thanks Peter]

Ultimaker Quality FAQ Is Like Porn For 3D Printers

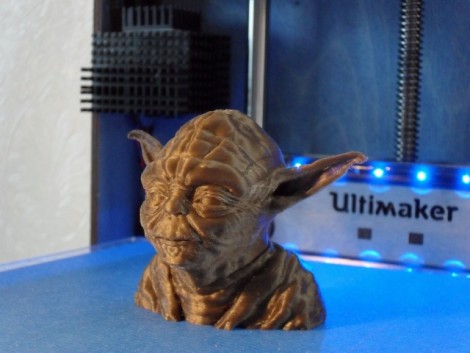
Do you think it’s not really possible to get amazing resolution from extruder-based 3D printers? You’re wrong, and this post about the attainable quality of prints on the Ultimaker proves it. The Yoda bust seen above was printed with a layer thickness of 0.02mm. This is a hack in itself because this process actually used two different layer thicknesses. The interior of the print, which you can’t see, but serves as a support mechanism for the object was printed at 0.04mm, with just the visible perimeter printed in the smaller thickness. That trickery is just fine with us if this is the result.

[Dave Durrant] discusses the press the Ultimaker has received, which mostly focused on the relatively fast printing process this hardware uses. But he didn’t think the story of the quality you can get with the device was being told. So he put out a call on the mailing list to send in pictures of high-quality 3D prints and he wasn’t disappointed by the response. You’ll see images of busts, bodies, gears, animals, and art pieces. There’s information about how they were printed, but even those not interested in the particulars will appreciate the macro photography that gives you an up-close look at how far we’ve come with these table-top rapid prototyping machines.

[Thanks Taylor]

Incredibly Fast 3D Printing With The Ultimaker

ultimaker_3d_printer

There’s a new 3d printer on the block, and hot damn is it fast!

Hailing from the Netherlands, the Ultimaker 3D Printer has finally hit US shores, and aims to give the MakerBot a run for its money. The Ultimaker was designed by Utrecht Fab Lab manager [Siert Wijnia] along with two frequent lab patrons, [Erik DeBruijn and Martijn Elserman]. The trio were big fans of the MakerBot, but they wanted to make a better 3D printer.

And make a better printer, they did.

The Ultimaker can print using Either ABS or PLA plastic just like the MakerBot, but it is several magnitudes faster than its predecessor. While the MakerBot utilizes a moving build platform, the Ultimaker has a print head that can move along three axes. The moving print head, along with offset motors which are mounted on the printer’s frame allow the Ultimaker to build taller object than the MakerBot, at higher speeds.

That’s not to say that the MakerBot is bad in any way – rather, the presence of a new kid on the block shows how the evolution and progression of open source design benefits us all.

Keep reading to see a video of the Ultimaker in action, you won’t regret it!

Continue reading “Incredibly Fast 3D Printing With The Ultimaker”