Wall of video games

Consoles, Consoles On The Wall, Can Alexa Help Me Play Them All?

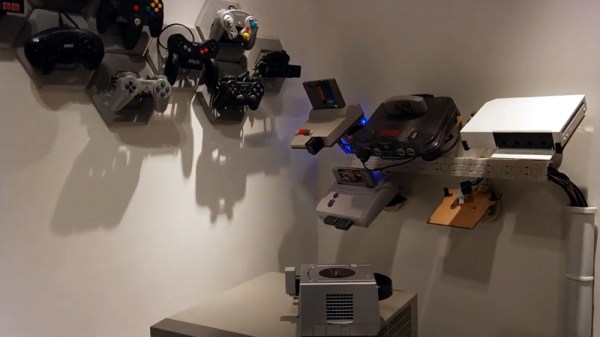
If you’ve got a collection of classic game consoles, finding the space to set them all up can be a challenge. But the bigger problem is figuring out how to hook them all up to a TV that, at best, might only have two or three inputs. [odelot] recently wrote in to tell us how he solved both problems with his voice-controlled wall of gaming history.

To mount the systems to the wall, [odelot] designed and printed angled brackets that attach to specially shaped pieces of 3 mm MDF. They do a pretty good job of holding the systems at a visually interesting angle while making themselves scarce, with only the notoriously slick-bottomed Wii needing some extra clips on the front to keep it from sliding off. He also printed up a series of blocks and pipes, no doubt a reference to Mario Bros., to hold the power and video cables for each system.
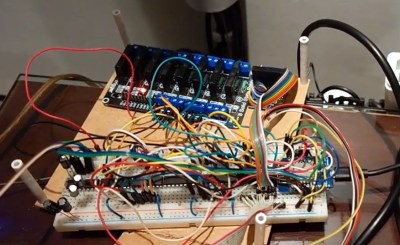
Prototype version of electronics on breadboardAs to connecting them all up to his TV, [odelot] picked up an eight-device Extron VGA switch that features a serial port for remote control. After getting all the systems adapted over to the appropriate video standard, he then wired an ESP8266 to the switch and wrote some code that ties it into Amazon’s Alexa voice assistant.

By just saying the name of the system he wants to play, the microcontroller will flick the switch over to the appropriate input and turn on a ring of blue LEDs under the appropriate shelf to signify which console has been selected. There’s even an array of solid state relays that will eventually control the mains power going to each system, though [odelot] hasn’t fully implemented it yet. Currently the electronics for this project live on a fairly packed breadboard, but it looks like he’s in the early stages of designing a proper PCB to clean it all up.

Not content to simply control a commercial A/V switch? In the past we’ve seen truly dedicated console collectors design their own custom switches from the ground up, complete with a display to show the currently selected system’s logo.

Continue reading “Consoles, Consoles On The Wall, Can Alexa Help Me Play Them All?”

Custom Built 12-Port A/V Switch Keeps CRT Well Fed

Classic gaming aficionados who prefer to play on real hardware know the struggle of getting their decades-old consoles connected to a modern TV. Which is why many gamers chose to keep a contemporary CRT TV around for when they want to take a walk down memory lane. Unfortunately those old TVs usually didn’t offer more than a few A/V ports on the back, so you’ll probably need to invest in a A/V switch to keep them all hooked up at once.

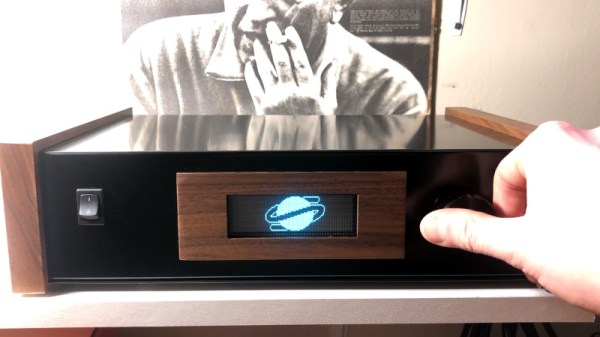
That’s the situation [Thomas Sowell] found himself in, except he couldn’t find one with enough ports. Rather than chain switches together, he decided to build his own custom 12-port console selector. With an integrated amplifier to keep everything looking sharp, a handsome walnut and metal enclosure, and a slick graphical interface that shows the logo of the currently selected console on a Vacuum Fluorescent Display (VFD), the final product is a classic gamer’s dream come true.

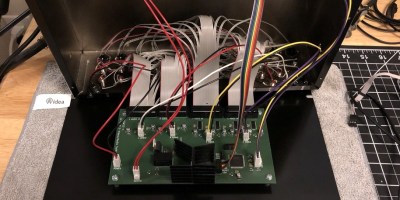
A peek under the hood.

To switch the audio [Thomas] is using a pair of ADG1606 16-channel analog multiplexers, while video is shuffled around with four MAX4315 8-channel video multiplexer-amplifiers. The math might seem a bit off at first, but he’s using one ADG1606 for each stereo channel and since the switch is for S-Video, each device has a luminance and color signal that needs to be handled separately. The multiplexers are flipped with a ATmega2561 microcontroller, which is also responsible for reading user input from a rotary encoder on the front of the case and displaying the appropriate console logo on the 140×32 Noritake VFD.

You may be surprised to find that [Thomas] considered himself an electronics beginner when he started this project, and that this is only the second PCB he’s ever designed. Was this a bold second project? Sure. But it also speaks to how far DIY electronics has come over the last years. Powerful open source tools, modular components, and of course a community of creative folks willing to share their knowledge and designs, has gone a long way towards redefining whats possible for the individual hacker and maker.

Continue reading “Custom Built 12-Port A/V Switch Keeps CRT Well Fed”

Taking Over The Amazing Control Panel Of A Vintage Video Switcher

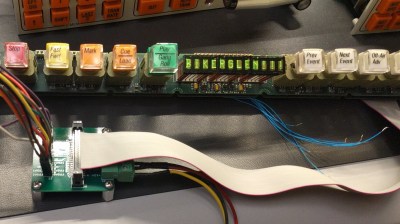
Where does he get such wonderful toys? [Glenn] snagged parts of a Grass Valley Kalypso 4-M/E video mixer switcher control surface from eBay and since been reverse engineering the button and display modules to bend them to his will. The hardware dates back to the turn of the century and the two modules would have been laid out with up to a few dozen others to complete a video mixing switcher console.

[Glenn’s] previous adventures delved into a strip of ten backlit buttons and gives us a close look at each of the keyswitches and the technique he used to pull together his own pinout and schematic of that strip. But things get a lot hairier this time around. The long strip seen above is a “machine control plane” module and includes a dozen addressible character displays, driven by a combination of microcontrollers and FPGAs. The square panel is a “Crosspoint Switch Matrix” module include eight individual 32 x 32 LCDs drive by three dedicated ICs that can display in red, green, or amber.

[Glen] used an STM8 Nucleo 64 to interface with the panels and wrote a bit of code to help map out what each pin on each machine control plane connector might do. He was able to stream out some packets from the plane that changed as he pressed buttons, and ended up feeding back a brute-force of that packet format to figure out the LED display protocols.

But the LCDs on the crosspoint switch were a more difficult nut to crack. He ended up going back to the original source of the equipment (eBay) to get a working control unit that he could sniff. He laid out a man-in-the-middle board that has a connector on either side with a pin header in the middle for his logic analyzer. As with most LCDs, the secret sauce was the initialization sequence — an almost impossible thing to brute force, yet exceedingly simple to sniff when you have a working system. So far he has them running under USB control, and if you are lucky enough to have some of this gear in your parts box, [Glen] has painstakingly recorded all of the details you need to get them up and running.

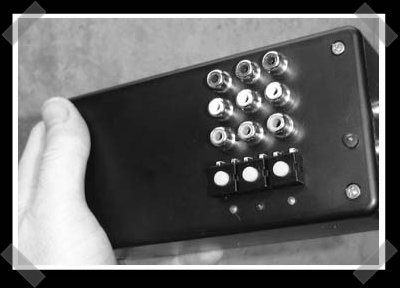
DIY A/V Switch


I knew this was coming out, but [mike] was kind enough to remind me. [Ben Heckendorn]’s latest How-To is up on engadget. He provides a method of building your own A/V switch with as many inputs as you want, cheap. Each input uses a $.50 bus switch – literally, you could build one with 20 inputs if you really wanted to. (add some shielding if you do) If you’ve got too many game consoles, this might be your ticket. You can probably use the same trick to build a component video switch if HD’s your thing.