Use PicoGlitcher For Voltage Glitching Attacks

We see a fair few glitcher projects, especially the simpler voltage glitchers. Still, quite often due to their relative simplicity, they’re little more than a microcontroller board and a few components hanging off some wires. PicoGlitcher by Hackaday.IO user [Matthias Kesenheimer] is a simple voltage glitcher which aims to make the hardware setup a little more robust without getting caught up in the complexities of other techniques. Based on the Raspberry Pico (obviously!), the board has sufficient niceties to simplify glitching attacks in various situations, providing controllable host power if required.

A pair of 74LVC8T245 (according to the provided BoM) level shifters allow connecting to targets at voltages from 1.8 V to 5 V if powered by PicoGlitcher or anything in spec for the ‘245 if target power is being used. In addition to the expected RESET and TRIGGER signals, spare GPIOs are brought out to a header for whatever purpose is needed to control a particular attack. If a programmed reset doesn’t get the job done, the target power is provided via a TPS2041 load switch to enable cold starts. The final part of the interface is an analog input provided by an SMA connector.

The glitching signal is also brought out to an SMA connector via a pair of transistors; an IRLML2502 NMOS performs ‘low power’ glitching by momentarily connecting the glitch output to ground. This ‘crowbarring’ causes a rapid dip in supply voltage and upsets the target, hopefully in a helpful way. An IRF7807 ‘NMOS device provides a higher power option, which can handle pulse loads of up to 66A. Which transistor you select in the Findus glitching toolchain depends on the type of load connected, particularly the amount of decoupling capacitance that needs to be discharged. For boards with heavier decoupling, use the beefy IRF7807 and accept the glitch won’t be as sharp as you’d like. For other hardware, the faster, smaller device is sufficient.

The software to drive PicoGlitcher and the hardware design files for KiCAD are provided on the project GitHub page. There also appears to be an Eagle project in there. You can’t have too much hardware documentation! For the software, check out the documentation for a quick overview of how it all works and some nice examples against some targets known to be susceptible to this type of attack.

For a cheap way to glitch an STM8, you can just use a pile of wires. But for something a bit more complicated, such as a Starlink user terminal, you need something a bit more robust. Finally, voltage glitching doesn’t always work, so the next tool you can reach for is a picoEMP.

Continue reading “Use PicoGlitcher For Voltage Glitching Attacks”

To the left, a breadboard with the ATMega328P being attacked. To the right, the project's display showing multiple ;) smiley faces, indicating that the attack has completed successfully.

Glitching An ATMega328P Has Never Been Simpler

Did you know just how easily you can glitch microcontrollers? It’s so easy, you really have no excuse for not having tried it out yet. Look, [lord feistel] is doing glitching attacks on an ATMega328P! All you need is an Arduino board with its few SMD capacitors removed or a bare 328P chip, a FET, and some sort of MCU to drive it. All of these are extremely generic components, and you can quickly breadboard them, following [lord feistel]’s guide on GitHub.

In the proof-of-concept, you can connect a HD44780 display to the chip, and have the victim MCU output digits onto the display in an infinite loop. Inside of the loop is a command to output a smiley face – but the command is never reachable, because the counter is reset in an if right before it. By glitching the ATMega’s power input, you can skip the if and witness the ;) on your display; it is that simple.

What are you waiting for? Breadboard it up and see for yourself, this might be the method that you hack your next device and make it do your bidding. If the FET-and-MCU glitching starts to fail you at some point, there’s fancier tools you can use, like the ChipWhisperer. As for practical examples, [scanlime]’s elegant glitching-powered firmware hack is hard to forget.

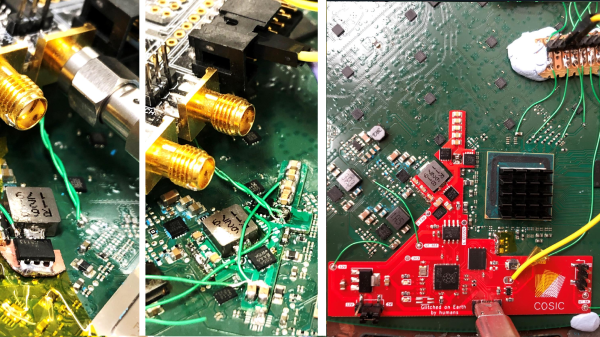
side by side, showing hardware experiments with capacitor gating through FETs, an initial revision of the modchip board with some fixes, and a newer, final, clean revision.

A Modchip To Root Starlink User Terminals Through Voltage Glitching

A modchip is a small PCB that mounts directly on a larger board, tapping into points on that board to make it do something it wasn’t meant to do. We’ve typically seen modchips used with gaming consoles of yore, bypassing DRM protections in a way that a software hacks couldn’t quite do. As software complexity and therefore attack surface increased on newer consoles, software hacks have taken the stage. However, on more integrated pieces of hardware, we’ll still want to return to the old methods – and that’s what this modchip-based hack of a Starlink terminal brings us.

[Lennert Wouters]’ team has been poking and prodding at the Starlink User Terminal, trying to get root access, and needed to bypass the ARM Trusted Firmware boot-time integrity checks. The terminal’s PCB is satellite-dish-sized, so things like laser fault injection are hard to set up – hence, they went the voltage injection route. Much poking and prodding later, they developed a way to reliably glitch the CPU into verifying a faulty firmware, and got to a root shell – the journey described in a BlackHat talk embedded below. Continue reading “A Modchip To Root Starlink User Terminals Through Voltage Glitching”

ESP32 Turned Handy SWD Flasher For NRF52 Chips

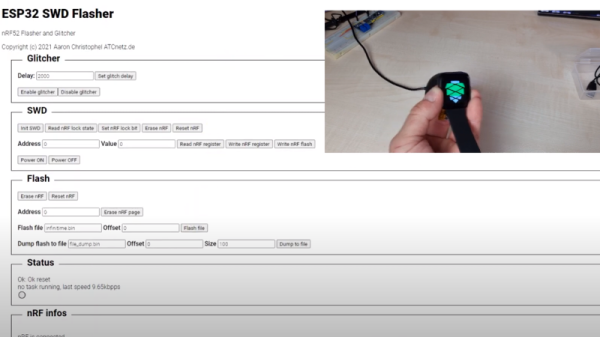
Got an nRF52 or nRF51 device you need to flash? Got an ESP32 laying around collecting dust? If so, then firmware hacking extraordinaire [Aaron Christophel] has the open source code you need. His new project allows the affordable WiFi-enabled microcontroller to read and write to the internal flash of Nordic nRF52 series chips via their SWD interface. As long as you’ve got some jumper wires and a web browser, you’re good to go.

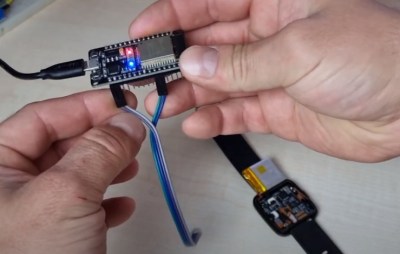
In the first video below [Aaron] demonstrates the technique with the PineTime smartwatch, but the process will be more or less the same regardless of what your target device is. Just connect the CLK and DIO lines to pins GPIO 21 and GPIO 19 of the ESP32, point your web browser to its address on the local network, and you’ll be presented with a straightforward user interface for reading and writing the chip’s flash.

As demonstrated in the second video, with a few more wires and a MOSFET, the ESP32 firmware is also able to perform a power glitch exploit on the chip that will allow you to read the contents of its flash even if the APPROTECT feature has been enabled. [Aaron] isn’t taking any credit for this technique though, pointing instead to the research performed by [LimitedResults] to explain the nuts and bolts of the attack.

We’re always excited when a message from [Aaron] hits the inbox, since more often that not it means another device has received an open source firmware replacement. From his earlier work with cheap fitness trackers to his wildly successful Bluetooth environmental sensor hacking, we don’t think this guy has ever seen a stock firmware that he didn’t want to immediately send to /dev/null.

Continue reading “ESP32 Turned Handy SWD Flasher For NRF52 Chips”

Hacking Hardware Bitcoin Wallets: Extracting The Cryptographic Seed From A Trezor

It’s long been common wisdom that one of the safest places to keep your cryptocurrency holdings is in a hardware wallet. These are small, portable devices that encrypt your keys and offer a bit more peace of mind than holding your coins in a soft or web wallet.

But of course, as we know, nothing is totally secure.

And we were reminded of this fact by Kraken Security Labs, when they showed us how they bypassed all of the safeguards in a popular wallet, the Trezor, to dump and decrypt it’s seed.

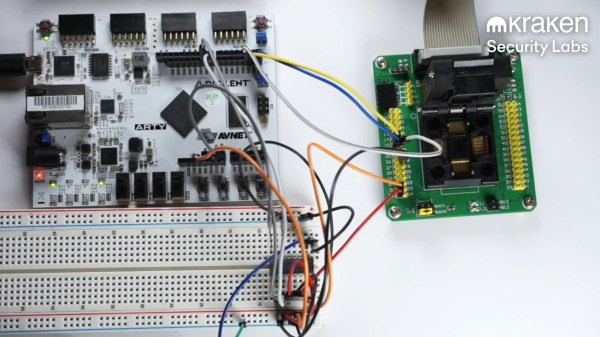
It’s worth noting that the hack does require physical access to the wallet — albeit only about fifteen minutes worth. And by “physical access” we mean that the hack leaves the device thoroughly mutilated. The Kraken team started by desoldering the heart of the wallet, a STM32 processor. They then dropped it into a socket on an interface board, and got to glitching.

The hack relies on an attack known as voltage glitching. Essentially, at a precisely-timed moment during the device’s boot sequence, the supply voltage is fluctuated. This enables the chip’s factory bootloader, which can read out the contents of it’s onboard flash memory. The memory is read-protected, but can be accessed 256 bytes at a time through a second voltage glitch. Neither of these attacks work 100% of the time, so if the device fails to boot or the memory remains locked, the FPGA performing the attacks simply tries again. After enough iterations, the Kraken team was able to fully dump the chip’s flash memory.

Continue reading “Hacking Hardware Bitcoin Wallets: Extracting The Cryptographic Seed From A Trezor”