Inspecting a SIM card via MTM

Diving The Depths Of Ma Bell

The modern smartphone is a marvel of sensors, radios, inputs, outputs, and processing power. In particular, some of those radios, such as WiFi and cellular, have grown fiendishly complex over the years. Even when that complexity is compressed down for the user into the one-dimensional space of the signal strength bars at the top of your phone. So when [David Burgess] was asked to look at some cellphone records of text messages and figure out where some of the more mysterious messages were coming from, it led him down a rabbit hole into the dark arts behind the glowing phone screen.

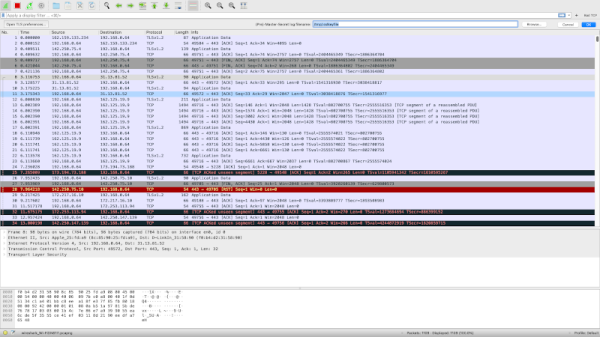
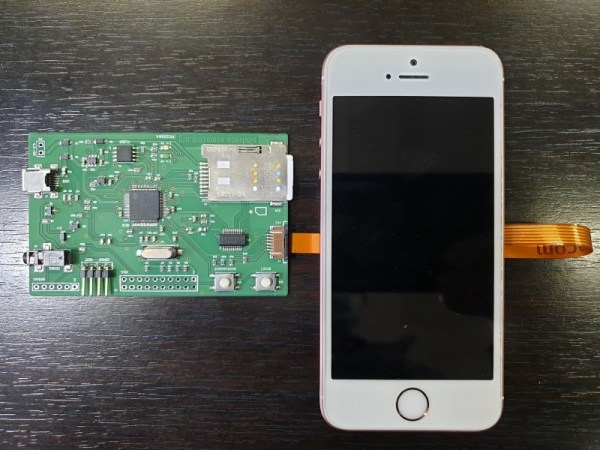
The number in question was 1111340002, sent by a phone connected to AT&T at the time, and was crucial for a legal case around distracted driving. [David’s] tools in his investigation were YateBTS (a cellular network simulator), SimTrace2 (pictured above), and old reliable Wireshark. Since the number isn’t a specific phone number and is not reachable from the public phone network, it must be a unique number inside AT&T processed by one particular AT&T SMSC (Short Message service center). The SMSC in question is in Atlanta and isn’t a typical texting center, so it must have some particular purpose. The message’s payload is raw binary rather than text, and [David] has done a pretty good job of decoding the majority of the format.

The most exciting revelation in this journey is that the phone (in the traditional sense) does not send this message. The processor on the phone does not know this message and executes no code to send it. Instead, the SIM card itself sends it. The SIM card is connected directly to the baseband processor on the phone, and the baseband polls the sim every so often, asking for any commands. One of those commands is an SMS (though many other commands have worrying consequences).

The SMS that [David] was chasing is triggered whenever a SIM detects a new IMEI, and the message lets the network know what about the previous and current IMEI. However, in the case of this message, it was unlikely that the SIM changed phones, so what happened? After some additional lab work and the deposition of an AT&T employee, [David] showed that a baseband firmware update would also trigger this SMS.

It’s a fascinating journey into the fragmented world of a smartphone’s minds and [David] does a fantastic job on the writeup. If you’re interested in sniffing wireless accessories, you will enjoy this soundbar’s wireless protocol laid bare.

Hacker Spends A Few Cycles Upgrading An Under-Desk Bike

Pandemic got you way behind on your exercise goals? Us too. But not [codaris] who bought an under-desk bike to get in a bit of cycling while banging away on the keyboard. The only bad thing about this bike is the accompanying app — it’s all-around weak and requires too many steps just to get to peddlin’. It pays to know thyself, and [codaris] knows that this will be a major de-motivator and made a desktop app that does it all, including/starting up as soon as the pedals start spinning.

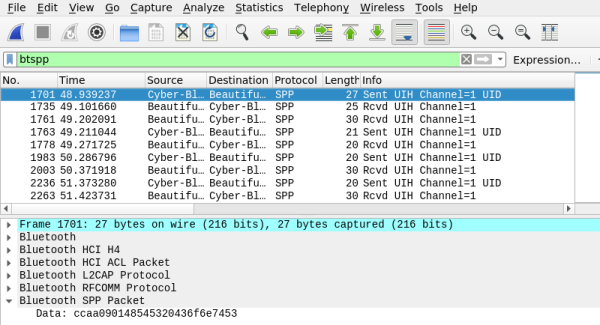
[codaris] built a Windows application that displays workout data in real time and then saves the stats in a SQLite database after the pedaling stops. It took a fair amount of work to get there, logging the Bluetooth traffic during a ride and comparing that with Wireshark output from a live session to decode the communication between the bike and the app. Turns out there are six commands total, and [codaris] really only needs three — Connect, Start Workout, and Continue Workout.

The app displays the elapsed workout time, speed, distance traveled, and the current RPM. We love that it starts logging and displaying data as soon as [codaris] starts pedaling, because that would be a major goal for us, too.

There’s more than one way to hack a bike. [codaris] was inspired by [ptx2]’s excellent work to un-brick a much more expensive bike with a Raspberry Pi.

Thanks for the tip, [Jhart99]!

Soundbar Bested By Virtual Android Bluetooth Sniffer

Out of the box, the Yamaha YAS-207 soundbar can be remotely controlled over Bluetooth, but only when using a dedicated application on iOS or Android. Users who want to command their hardware with their computer, or any other Bluetooth device for that matter, are left out in the cold. Or at least they were, before [Wejn] got on the case.

To capture the communication between the soundbar and the application, [Wejn] first installed Android-x86 in a virtual machine on his computer and then enabled the “Bluetooth HCI snoop log” within Developer Settings. From there, a netcat command running on the virtual Android device continually sent the contents of the btsnoop_hci.log file out to Wireshark on his Linux desktop. As he hit buttons in the Yamaha application, he could watch the data come in live. We’ve seen plenty of people use Android’s integrated Bluetooth packet capture in the past, but never quite like this. It’s certainly a tip worth mentally filing away for the future.

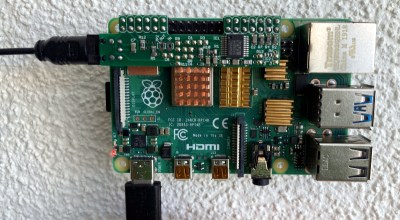
The Pi can now control the TOSLINK connected speakers.

From there, things move pretty quickly. [Wejn] is able to determine that the devices are communicating over a virtual serial port, and starts identifying individual command and response packets. It turns out the commands closely mirror the NEC IR codes that he’d previously decoded on a whim, which helped clear things up. Once the checksum was sorted out, writing some code that can talk to the soundbar from his Raspberry Pi media player was the next logical step.

[Wejn] combined this with the Shairport Sync project, which lets the Raspberry Pi turn on the speaker and switch the input over when he wants to stream AirPlay from his phone. But of course, the same technique could be applied to whatever source of digital audio captures your fancy.

This is one of those posts you should really read in its entirety to truly appreciate. While every device is going to be different, the basic principles and workflow that [Wejn] demonstrates in this project will absolutely be useful in your own reverse engineering adventures. If you’re more of a visual learner, we recently covered a series of YouTube tutorials that cover sniffing BLE devices that’s not to be missed as well.

Linux Fu: A Little Bit Of (Network) History Repeating Itself

These days, embedded systems often have networks and that can make them significantly more complex. Networks are usually pretty nondeterministic and there are a variety of oddball conditions. For example, when your public-access pick and place machine gets written up on Hackaday and you suddenly get a 50X surge in traffic, how does your network stack handle it? While there’s no silver bullet for network testing, there are some tricks that can make it easier and one of those is the tcpreplay utilities that allow you to record complex network traffic and then play it back in a variety of ways. This has many benefits, especially if you manage to capture that one thing that triggers bad behavior sporadically. Being able to play it back on demand can speed up diagnostics considerably.

General Idea

You probably know that tcpdump allows you to grab packet captures from a network interface and save them to a file. If you prefer a GUI, you probably use Wireshark, which uses the same underlying library (libpcap) to grab the data. In fact, you can capture data using tcpdump and look at it with Wireshark, although there are other tools like tcptrace or Ngrep that can work with the output, also.

While the output of the command can be a little cryptic without tool support, a program called tcpreplay can take that data and feed it back in a variety of ways. Of course, you can modify the file first — there are tools to make that easier and — if you need to — you can craft your own network traffic by hand or using one of a variety of tools. This process is often called “packet crafting.”

Continue reading “Linux Fu: A Little Bit Of (Network) History Repeating Itself”

A Crash Course On Sniffing Bluetooth Low Energy

Bluetooth Low Energy (BLE) is everywhere these days. If you fire up a scanner on your phone and walk around the neighborhood, we’d be willing to bet you’d pick up dozens if not hundreds of devices. By extension, from fitness bands to light bulbs, it’s equally likely that you’re going to want to talk to some of these BLE gadgets at some point. But how?

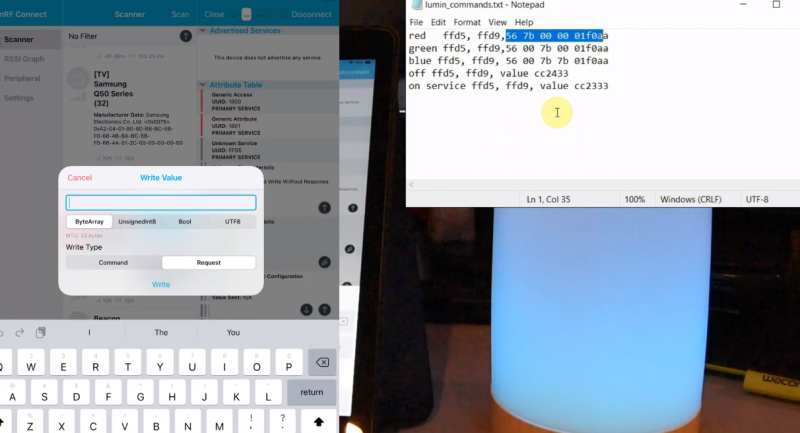
Well, watching this three part video series from [Stuart Patterson] would be a good start. He covers how to get a cheap nRF52480 BLE dongle configured for sniffing, pulling the packets out of the air with Wireshark, and perhaps most crucially, how to duplicate the commands coming from a device’s companion application on the ESP32.

Testing out the sniffed commands.

The first video in the series is focused on getting a Windows box setup for BLE sniffing, so readers who aren’t currently living under Microsoft’s boot heel may want to skip ahead to the second installment. That’s where things really start heating up, as [Stuart] demonstrates how you can intercept commands being sent to the target device.

It’s worth noting that little attempt is made to actually decode what the commands mean. In this particular application, it’s enough to simply replay the commands using the ESP32’s BLE hardware, which is explained in the third video. Obviously this technique might not work on more advanced devices, but it should still give you a solid base to work from.

In the end, [Stuart] takes an LED lamp that could only be controlled with a smartphone application and turns it into something he can talk to on his own terms. Once the ESP32 can send commands to the lamp, it only takes a bit more code to spin up a web interface or REST API so you can control the device from your computer or other gadget on the network. While naturally the finer points will differ, this same overall workflow should allow you to get control of whatever BLE gizmo you’ve got your eye on.

Continue reading “A Crash Course On Sniffing Bluetooth Low Energy”

Arduino Serial Vs SerialUSB

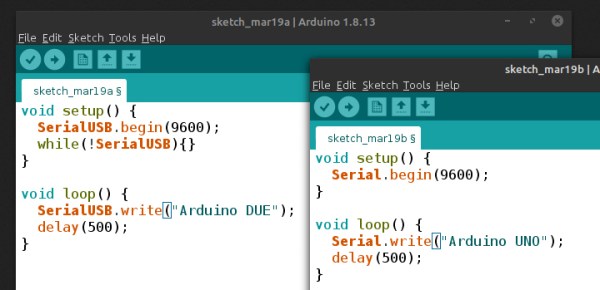
[Andrew] wonders why the SerialUSB() function on the Cortex M3-based Arduino Due is so much faster than Serial() on the Uno or Nano, and shares his observations in this short video. He sets up an experiment with a simple sketch on both boards and uses Wireshark to evaluate the results.

Data is sent in the USB packets in groups of four characters on the ATmega-based boards, but the entire string is put in a packet on the Due board. If you look under the hood, the answer is hiding in plain sight. While the Arduino family of boards connect to your computer using a USB virtual serial port, the ATmega ones have an actual serial connection on-board. For instance, on the Nano there is an FT232RL between the USB connector and the microprocessor (on an Arduino Uno board, a small ATMEGA8U2 is used instead of an FTDI chip, but the concept is the same). On the Arduino Due, the USB connects directly to the SAM3X8E processor.

This concept doesn’t apply only to Arduino boards, of course. On any serial connection between two computers, when a virtual USB device is used on both sides of the link (no actual serial signals involved), the serial baud rate is a fictional thing — data transfer speeds depends on USB alone. We are curious why the packets contain four characters in [Andrew]’s ATmega Wireshark captures — why not 1, 2, or 10? Is this something that can be controlled by the programmer, or is it fixed by the protocol and/or the FTDI chip? If you have the answer, let us know in the comments below. Continue reading “Arduino Serial Vs SerialUSB”

Exotic Device Gets Linux Support Via Wireshark And Rust

What can you do if you have a nice piece of hardware that kinda works out of the box, but doesn’t have support for your operating system to get the full functionality out of it? [Harry Gill] found himself in such a situation with a new all-in-one (AIO) water cooling system. It didn’t technically require any operating system interaction to perform its main task, but things like settings adjustments or reading back statistics were only possible with Windows. He thought it would be nice to have those features in Linux as well, and as the communication is done via USB, figured the obvious solution is to reverse engineer the protocol and simply replicate it.

His first step was to set up a dual boot system (his attempts at running the software in a VM didn’t go very well) which allowed him to capture the USB traffic with Wireshark and USBPcap. Then it would simply be a matter of analyzing the captures and writing some Linux software to make sense of the data. The go-to library for USB tasks would be libusb, which has bindings for plenty of languages, but as an avid Rust user, that choice was never really an issue anyway.

How to actually make use of the captured data was an entirely different story though, and without documentation or much help from the vendor, [Harry] resorted to good old trial and error to find out which byte does what. Eventually he succeeded and was able to get the additional features he wanted supported in Linux — check out the final code in the GitHub repository if you’re curious what this looks like in Rust.

Capturing the USB communication with Wireshark seems generally a great way to port unsupported features to Linux, as we’ve seen earlier with an RGB keyboard and the VGA frame grabber that inspired it. If you want to dig deeper into the subject, [Harry] listed a few resources regarding USB in general, but there’s plenty more to explore with reverse engineering USB.