A Graphics Card For A Homebrew Computer

One of [aepharta]’s ‘before I die’ projects is a homebrew computer. Not just any computer, mind you, but a fabulous Z80 machine, complete with video out. HDMI and DisplayPort would require far too much of this tiny, 80s-era computer, and it’s getting hard to buy a composite monitor. This meant it was time to build a VGA video card from some parts salvaged from old equipment.

When it comes to ancient computers, VGA has fairly demanding requirements; the slowest standard pixel clock is 25.175 MHz, an order of magnitude faster than the CPU clock in early 80s computers. Memory is also an issue, with a 640×480, 4-color image requiring 153600 bytes, or about a quarter of the 640k ‘that should be enough for anybody.’

To cut down on the memory requirements and make everything a nice round in base-2 numbers, [aepharta] decided on a resolution of 512×384. This means about 100k of memory would be required when using 16 colors, and only about 24 kB for monochrome.

The circuit was built from some old programmable logic ICs pulled from a Cisco router. The circuit could have been built from discrete logic chips, but this was much, much simpler. Wiring everything up, [aepharta] got the timing right and was eventually able to put an image on a screen.

After a few minutes, though, the image started wobbling. [aepharta] put his finger on one of the GALs and noticed it was exceptionally hot. A heatsink stopped the wobbling for a few minutes, and a fan stopped it completely. Yes, it’s a 1980s-era graphics card that requires a fan. The card draws about 3W, or about two percent of a modern, high-end graphics card.

A Z80 Retro Microcomputer For The Papilio Pro FPGA Board

z80

[Will] wrote a 128MHz Z80-based retro microcomputer which runs on a Papilio Pro board. For those who don’t know, the latter is built around a Spartan-6 LX9 FPGA so you may imagine that much work was required to implement all the computer features in VHDL. The T80 CPU core was taken from opencores, the SDRAM controller was imported from Mike Field’s work but [Will] implemented several additional functions on his own:

– a 4KB paged Memory Management Unit to translate the 16-bit (64KB) logical address space into a 26-bit (64MB) physical address space.

– a 16KB direct mapped cache to hide the SDRAM latency, using the FPGA internal block RAM

– a UART interface for external communications

He also ported CP/M-2.2, MP/M-II and UZI (a UNIX system) to the computer. His project is completely open-source and all the source code can be downloaded at the end of [Will]’s write up.

Thanks [hamster] for the tip.

Prophet 600: A Classic Synthesizer Gets Processor Upgrade

proph-600

We love classic synthesizers here at Hackaday. So does [gligli], but he didn’t like the processor limitations of the Prophet 600. That’s why he’s given it a new brain in the form of a Teensy++. The Sequential Circuits Prophet 600 was a big deal when it was released back in 1982/1983. The 600 was the first commercially available synthesizer to include a MIDI interface. The original design of the 600 could be called a hybrid. A Zilog Z80 microprocessor controlled modular analog voice chips. The Z80 was a bit stressed in this configuration though, and a few limitations were evident. An 8 bit processor just wasn’t quite enough for software driven envelopes and a Low Frequency Oscillator (LFO) control. This was further exacerbated by the fact that everything was driven through a 14 bit DAC.

[gligli] discovered most of the limitations in the 600 were due to the processor. By beefing up the processing power he could really unlock the potential within 600. Since he didn’t actually have a Prophet 600, he started with the schematic. [gligli] created a PC based emulator for the digital circuits, learning the whole system as he worked. With that phase complete, [gligli] bought a used Prophet and started hacking. The Teensy++ required a few hardware mods to fill the Z80’s shoes, including cutting off a pin and adding a few jumper wires. We really like the fact that no changes to the Prophet 600 itself are required. Pull out the Teensy++, drop in the Z80, and you’re ready to party like it’s 1982 again.

The new processor interfaces directly with the Z80’s 8 bit bus. Since the AVR on the Teensy has built-in RAM and ROM, it simply ignores the ROM and RAM address spaces of the original system. Interfacing a fast micro with older parts like an 8253 timer and a 68B50 UART does have its pitfalls though. The system bus had to run slow enough to not violate timing requirements of the various peripheral chips. To handle this, [gligli] added a number of wait statements in his firmware. Once the system was working, [gligli] was free to start adding new features. He began by smoothing out the stepped envelope and filter generators, as well as adding new exponential modes. From there he added new keyboard polyphony modes as well as pitch and mod wheel changes. The full lineup of new features are listed in the instruction manual (PDF link). Since this is an open source project, adding a feature is as simple as cracking open your favorite editor and writing it up.

Continue reading “Prophet 600: A Classic Synthesizer Gets Processor Upgrade”

A Pick-And-Mix FPGA Retrocomputer

Logo

Cheap FPGA boards are readily available, as are VHDL implementations of classic CPUs like the 6502, 6809, and Z80. Up until now, we haven’t seen anyone take these two parts and combine them into a complete system that turns an FPGA board into a complete 8-bit retrocomputer. Thanks to [Grant]’s work, it’s now possible to do just that (server on fire, here’s a google cache) with a $30 FPGA board and a handful of parts.

In its full configuration, the Multicomp, as [Grant] calls his project, includes either a 6502, 6809, Z80, or (in the future) a 6800 CPU. Video options include either monochrome RCA, RGB VGA, or RGB via SCART. This, along an SD card interface, a PS2 keyboard, and the ability to connect an external 128kB RAM chip (64k available) means it’s a piece of cake to build a proper and complete portable retrocomputer.

What’s extremely interesting about [Grant]’s project is the fact the data and address lines are fully exposed on the FPGA board. This means it’s possible to add whatever circuit you’d like to whatever retrocomputer you can imagine; if you want a few NES gamepads, an IDE interface, or you’d like to design your own primitive video card, it’s just a matter of designing a circuit and writing some assembly.

If you’d like to build your own, search “EP2C5T144C8N” on the usual sites, grab a few resistors and connectors, and take a look at [Grant]’s documentation and upcoming examples.

Via 6502.org forums

Hackaday Links: February 16, 2014

hackaday-links-chain

[Moogle] wrote in to see if anyone can figure out why his unused electrolytic capacitors are popping. This is the behavior you see in populated caps whose electrolyte dries out. But these are still in his parts bin. Anyone know why they would pop when going unused?

We see a lot of BIOS flashing hacks; but it’s always a handy thing to know about when you get in a bind. Here [Adan] shows us how to reflash a corrupt BIOS using a Tiva C Launchpad board.

Wanting to hack together her own blow gun [Carlyn] scrapped a handheld vacuum cleaner. When she discovered the pump could not easily be converted from suck to blow she made a handheld suction manipulator which picks up paper plates and a few slightly heavier objects.

Unfortunately a drill press is not one of the tools we have in our lair right now. If we did, this tip about using it to help tap threads in a hole would come in really hand.

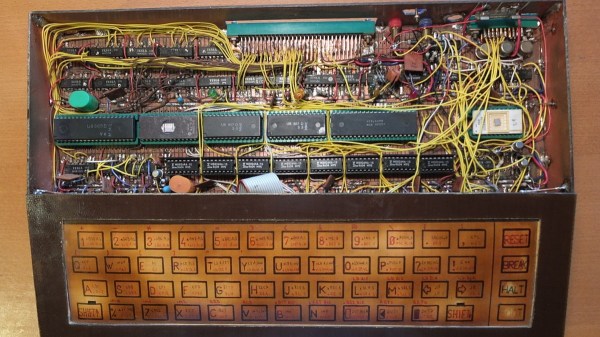
Retro computing fans will appreciate this Z80 computer build (translated). It’s a fairly large mainboard with plenty of chips, resistors, buttons, and seven segment displays. Excellent. [Thanks Daniel]

We start to drool a little bit when we see a teardown post that shows off a piece of equipment really well. We’ve already reached for a bib to catch the slobber from pawing our way through [David’s] teardown of an HP 6010A bench supply.

Hackaday Links: September 8, 2013

hackaday-links-chain

“I’m sorry Dave, I’m afraid I can’t open the dorm room door.” Does your dorm room have a peephole? Take [pjensen’s] lead and turn it into a mini HAL 9000 using a red LED.

Mix a little work in with your hobby skills. [Vittore] needed to build a video looper to drive some TV screens for a Hotel contract job. He grabbed a Raspberry Pi and got to work. The final product (translated) even uses a shared folder on the hotel’s network as the source slides.

We’re not sure if anyone noticed last Monday (it was Labor Day in the U.S.).  We had a little fun with coffee themed posts. [Tom] wrote in to remind us about the HTCPCP: Hyper Text Coffee Pot Control Protocol. If you don’t have time to read it all, he suggests you don’t miss his favorite, error code 418.

Maybe funny reading isn’t your thing right now, but we have some more helpful stuff to offer. Check out [John Chandler’s] Commandments for using PIC microcontrollers from a few years back.

[Andy] has some old smart phones which he is using in his projects. His beef with the touchscreens is that there’s no tactile feedback. Since these are going to be dedicated displays he’s outlining the touch controls with tape to let your finger know what it’s doing.

If you’re living in your first home in America there’s a really good chance it’s a 1950’s ranch house considering how many of them were built after World War II. Bring its infrastructure into the information age with a cable retrofit. [Andrew Rossignol] just did so and posted a lot of pictures of the process.

If you liked [Ken Shirriff’s] post about the Sinclair Scientific Calculator we think you’ll love his continuation of a Z80 reverse engineering series.

Salvaged Robot Arm Used For Light Painting And Pen Plotting

The members of Shackspace got their hands on an antiquated robot arm. It’s a Mitsubishi Movemaster RM-101 and was probably manufactured in the mid 1980’s. There’s almost nothing out there that tells you how to use the thing, and so they set out to figure out how to control the hardware.

This is a great example of how an EPROM dump can be really useful. After further inspection the team discovered that the arm is driven by a Z80 processor whose program is stored on an EPROM. The first thing the guys did was dump the memory since the aging storage will be useless if just a few bits become degraded. This dump will be really useful for others whose chip has already given up the ghost. The data from that dump was disassembled and painstakingly pawed through to figure out what commands were being sent to the arm. This technique worked, as the team was able to re-implement the control protocol and has already used the arm for some light painting and pen plotting (seen above). After the break you can see a control demonstration.

Continue reading “Salvaged Robot Arm Used For Light Painting And Pen Plotting”