A Lambda 8300 Lives Again

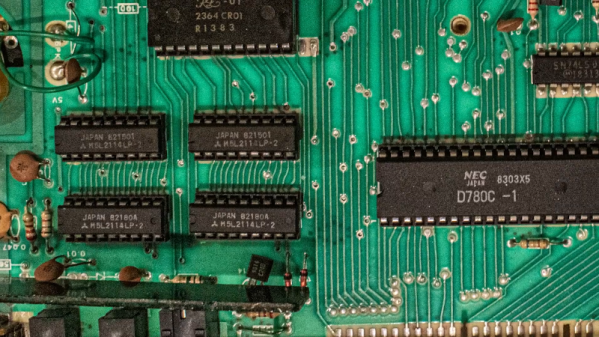
If you follow retrocomputing — or you are simply old enough to remember those days — you hear the same names over and over. Commodore, Apple, Radio Shack, and Sinclair, for example. But what about the Lambda 8300? Most people haven’t heard of these but [Mike] has and he has quite a few of them. The computer is similar to a Sinclair ZX81, but not an exact clone. All of his machines need some repairs (he’s promised repair videos are on their way), but for the video below he wired a monitor directly to the PCB to get steady output, so apparently the RF modulator is the failing subsystem in this case.

Once the video cleared up, you can see a walkthrough of running a simple BASIC program. As was common in those days, the computer used an audio cassette recorder for data storage. [Mike] picked up some dedicated recorders meant for computer use, but neither were in working shape. However, a consumer player works fine.

Continue reading “A Lambda 8300 Lives Again”

One Chip, Sixteen Times The RAM

Have you ever upgraded your computer’s memory sixteen-fold, with a single chip? Tynemouth Software did for a classic Sinclair micro.

For owners of home computers in the early 1980s, one of the most important selling points was how much RAM their device would have. Sometimes though there just wasn’t much choice but to live with what you could afford, so buyers of Sinclair’s budget ZX81 computer had to put up with only 1 kiB of memory. The system bytes took up (by this writer’s memory) around 300 bytes, so user programs were left with only around 700 bytes for their BASIC code. They were aided by Sinclair’s BASIC keywords stored as single bytes, but still that was a limit that imposed coding economy over verbosity.

Sinclair sold a 16 kiB upgrade, the so-called “Rampack”, which located on the ’81’s edge connector and was notorious for being susceptible to the slightest vibration. Meanwhile the mainboard had provision for a 2 kiB chip as a drop-in that was never sold in the UK, and enterprising users could fit larger capacities with soldered combinations of other chips piggybacking the original. And this is what the Tynemouth people have done, they’ve replaced their machine’s dual 1 kiB x 4 chips with a single 62256, and with a bit of pin-bending they’ve managed to do it without the track-cutting that normally accompanies this mod.

Adding chips to a 36-year-old home computer for which there are plenty of available Rampacks might seem a bit of a niche, but in doing so they’ve made a standalone ’81 that’s just a little bit more useable. They’ve also brought a few other components up-to-date, with a composite video mod, switching regulator, and heatsink for the rare ULA chip. If you are of a Certain Generation, it might just bring a tear to your eye to see a ZX81 being given some love.

Did you lose your ZX81 along the way? How about emulating one in mbed?

ZX81 Connects To The Network


[Victor Trucco] makes us wish we spoke Portuguese. He’s done a lot of retrocomputing projects including connecting a ZX81 to the Internet to load programs. The project uses — what else — an ESP8266 to get the WiFi communications. You can see a video below if you want to exercise your high school Portuguese.

It is somewhat ironic that the ZX81’s CPU is kept busy driving the video, reading the keyboard, and running about just over 3 MHz which doesn’t even translate into 3 MIPS on that processor. Meanwhile, the “servant” ESP8266 has a 32-bit Tensilica CPU running at 80 MHz. Times have changed.

Continue reading “ZX81 Connects To The Network”

ZX81 Emulated On An Mbed

This is a wonderful example of the phenomenon of “feature creep”. [Gert] was working on getting a VGA output running on an mbed platform without using (hardly) any discrete components. Using only a few resistors, the mbed was connected to a VGA display running at 640×480. But what could he do with something with VGA out? He decided to emulate an entire Sinclair ZX81 computer, of course.

With more than 1.5 million units sold, the Sinclair ZX81 was a fairly popular computer in the early ’80s. It was [Gert]’s first computer, so it was a natural choice for him to try to emulate. Another reason for the choice was that his mbed-VGA device could only output monochrome color, which was another characteristic of the ZX81.

[Gert] started by modifying a very lean Z80 emulator to make the compiled code run as efficiently as possible on the mbed. Then he went about getting a picture to display on the screen, then he interfaced an SD card and a keyboard to his new machine. To be true to the original, he built everything into an original ZX81 case.

This isn’t the first time we’ve seen a ZX81, but it is one of the better implementations of an emulated version of this system we’ve seen.

Thanks to [Jeroen] for the tip!

Hackaday Links Column Banner

Hackaday Links: May 25, 2014

[Matt] wanted his own light saber. You could argue that this is nearly as dangerous since you can’t see the beam and it doesn’t end a few feet past the business end of the grip. Plus there’s that who “not actually a Jedi” thing.

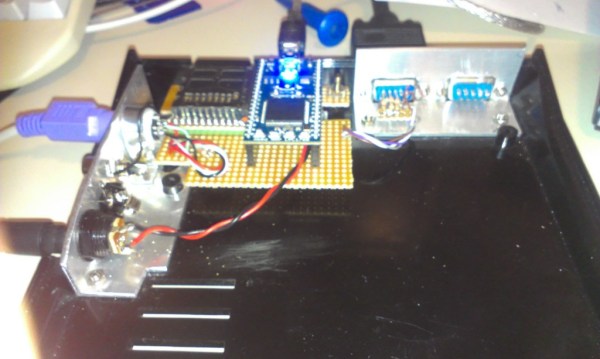
We don’t know if retro computing fans are going to love or hate this (translated). On the one hand it’s pretty cool to see a ZX81 clone up and running. On the other hand, an Amiga 600 case was sacrificed to serve as the body for the hack. [Thanks Juan]

Watchdog timer. If you know what that is your mind immediately says “good idea” when you hear the word. If you don’t know, you need to learn. Watchdogs are reset timers that are built into most microcontrollers. If your firmware gets stuck and doesn’t maintain the timer’s counter at a regular interval the watchdog it will perform a hardware reset and hopefully your hardware will start functioning again. Here’s a guide for using the watchdog in an Arduino, but the concepts are pretty much universal.

We see all kinds of stepper-motor based music machines. One of our favorites was this recent floppy drive jukebox. But not every song is going to sound good on this type of hardware. One that does sound especially neat is the Doctor Who theme on an array of 8 drives.

And finally, if you’re struggling with surface mount soldering we recommend grabbing two soldering irons. But in a pinch just grab some heavy gauge copper wire and wrap it around your soldering iron tip. It ends up being a two-point soldering iron set for the size of specific components such as 0805 resistors. [Thanks Rupert]