A Chink In The Armor Of WPA/WPA2 WiFi Security

Looks like your WiFi might not be quite as secure as you thought it was. A paper recently published by [Stefan Viehböck] details a security flaw in the supposedly robust WPA/WPA2 WiFi security protocol. It’s not actually that protocol which is the culprit, but an in-built feature called Wi-Fi Protected Setup. This is an additional security protocol that allows you to easily setup network devices like printers without the need to give them the WPA passphrase. [Stephan’s] proof-of-concept allows him to get the WPS pin in 4-10 hours using brute force. Once an attacker has that pin, they can immediately get the WPA passphrase with it. This works even if the passphrase is frequently changed.

Apparently, most WiFi access points not only offer WPS, but have it enabled by default. To further muck up the situation, some hardware settings dashboards offer a disable switch that doesn’t actually do anything!

It looks like [Stephan] wasn’t the only one working on this exploit. [Craig] wrote in to let us know he’s already released software to exploit the hole.

Knockoff Game Controller Makes A Fine Remote Shutter Release

remote-shutter-release

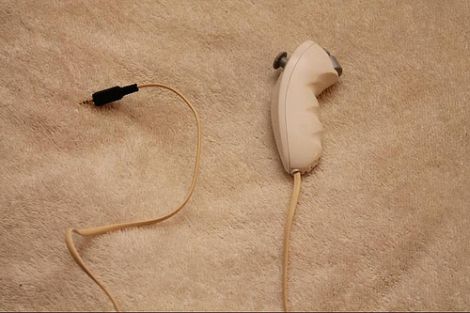
[Duncan Murdock] received a Canon DSLR camera for Christmas and wanted a remote shutter release to go along with it. Since nary a store was open on Christmas, he was pretty much out of luck. Scrounging around in his parts drawer, he found all sorts of goodies waiting to be reused, including a knockoff Wii nunchuck.

He pulled the original cable from the nunchuck and replaced it with an old telephone wire, attaching a 2.5mm plug to the end. The plug goes directly into his camera’s control port, allowing him to trigger the auto focus and shutter mechanisms with the push of a button.

We like the idea of a junk controller being recycled for use in a camera, though we think it has far more potential than being used as a simple wired trigger. If both the nunchuck and camera were fitted with some sort of wireless interface (Bluetooth, IR, etc), we think it would make a great addition to any hobby photographer’s kit.

[Bob] Shows Us How To Make DIY Calendars For Vintage Computer Geeks

nixie-tubes

[Bob Alexander] wrote in to share a hobby of his that we thought was pretty timely considering the new year is quickly approaching. For several years now he has put together a custom calendar for himself, including both dates he finds important along with sweet pictures of vintage computer equipment. Friends and family found his calendars so intriguing that they asked him to make some for them as well.

Each year his stack of calendar requests grew, and he found that no outlet – online or otherwise could produce exactly what he wanted. Instead of settling, he wrote a small application that lets him customize and print calendars to his heart’s content.

We think this is much cooler than buying one at your local bookstore, and we’re guessing that our readers likely agree. If you were creating your own custom calendar, what cool vintage computer hardware would you choose to display? What if you were designing a Hack-a-Day calendar? Let us know in the comments – we’re itching to find something interesting to look at while we count down to New Year’s Eve!

Relighting A Gauge Cluster

When a few lights in the dashboard of  [Garrett]’s truck burned out, he was looking at a hefty repair bill. The repair shop would have to replace the huge PCB to change a few soldered light bulbs, so he was looking at a $500 repair bill. Lighting up a LED is everyone’s first project, so [Garrett] decided to change out the bulbs with LEDs and save a few dollars.

The repair was very simple – after removing the dials and needles, [Garrett] found a huge PCB with a few burnt out bulbs on board. He took a multimeter to each bulb’s solder pad and replaced each one with an LED and resistor. The finished project looks like it came out of a factory and is a huge improvement over the ugly amber bulbs originally found in his truck.  [Garrett] also posted a nice Instructable of his build showing the nicely soldered lamp replacements.

Solar-powered CNC Woodburning

[Johnie] built himself a CNC woodburner powered by the sun. Like the solar 3D printer we saw last summer, [Johnie]’s build uses a giant Fresnel lens to focus sunlight onto a piece of wood. To get some control out of his build, a 2-axis bed was made from scrounged and junked parts.

The lens in [Johnie]’s build looks to be about a foot square – more than hot enough to burn a few holes in things from our experience. The bed (hopefully) gets around this problem by being built entirely out of clear acrylic. The idea behind the acrylic bed is that the focused light will pass through harmlessly, and not melt the entire thing.

Now that we think about it, we couldn’t come up with a better project to enter in the Buildlounge laser cutter contest. For everybody else working on their laser cutter projects, the deadline is January 1st. Better get those wrenches out and irons hot, because we’ve seen a few awesome projects for the Buildlounge build off already.

Augmented Reality Ex Nihilo

[David] sent in a nice project to demonstrate augmented reality with ARtoolkit and discuss the deep philosophical underpinnings of the meaning of nothingness. The good news is he was able to create a volume control button on a sheet of paper with a marker. The bad news is the philosophical treatment is a bit weak; [David] built something cool, so we’re able to let that slide for now.

This build was inspired by the Impromptu Sound Board made using a Kinect and a piece of paper. The idea behind the sound board is simple – draw some buttons on the paper, and use them to play short sound clips. [David] took this idea to make a small tutorial on augmented reality for Occam’s Razor.

The hardware is very simple – just a webcam, a piece of paper, and a marker. After [David] draws a large square on the paper, the code recognizes it as a volume control. Rotating the paper counterclockwise increases the volume, and clockwise turns the volume down. It’s a neat build to get into the foundations of augmented reality.

Check out the video demo of [David]’s build after the break.

Continue reading “Augmented Reality Ex Nihilo”

Repairing A Commercial-grade Pick And Place Machine

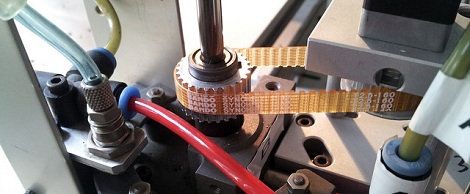
It looks like Null Space Labs has a new pick and place machine. This immense repair job began when [Charliex] and [Gleep] found a JukiPlacemat 360 pick and place machine. The idea of having their very own pick and place machine proved intoxicating, possibly too much so because the didn’t return the machine when they found out it wasn’t working.

After a ton of work that involved adding a camera, [Charliex] and the rest of the builders at Null Space Labs finally have their own pick and place machine that works. This was a complete rebuild from the ground up. So many things didn’t work on the machine, they might have been better off building one from scratch. Aside from the massive effort that went into turning the shell of a machine into a working unit, we really have to commend everyone who worked on it.

The team added a nice GUI to control the machine. The guys have already run a successful test and ovened a few boards, so everything works as it should have at purchase. It’ll be great for making next year’s LayerOne conference badges.