Solving Endstop Woes With A Simple Analog Filter

NoiseEndstop

You know what’s cool? Using your engineering knowledge to solve problems that you have while building something. This is exactly what [Reinis] did when his 3D printer’s endstop wasn’t working.

Many of us automatically go to a microcontroller when we run into a problem with a sensor, but often a simple analog filter will do the trick. The endstop in [Reinis’s] RepRap style 3D printer was giving off an unusual amount of noise when closed. When he hooked the endstop up to his oscilloscope, he was shocked to see how much noise there really was. In comes the low-pass filter. Unhappy with the response time of his low-pass filter, [Reinis] solved the problem using a pullup resistor. Two resistors and a capacitor was all that he needed to fix the problem. A great solution!

How have you used analog filters in your projects? Send us a tip and let us know!

Web Controlled Servo From A BeagleBone Black

bbb_servo

[Babak] created an in-depth tutorial on how he got his BeagleBone Black to control a servo from a web browser.

[Babak] configured a pin on his BeagleBone Black (BBB) as a PWM line and connected it to the control line on a micro hobby servo. The BBB is running a Node.js web server that displays a simple web page to control the servo. The browser sends a WebSocket request to a small WebSocket node server also running on the BBB that then writes the appropriate PWM value to the pin connected to the servo.

The code for node WebSocket server and web server can be found on his GitHub page. There is also a small node library to control PWM lines on the BBB. Though the end result is simple, controlling the servo can be done from any browser that can make a network connection to the BeagleBone Black. Check out the video after the jump for a description and demonstration.

Continue reading “Web Controlled Servo From A BeagleBone Black”

An Affordable Full Body Studio Grade 3D Scanner

Looking for a professional 3D scanning setup for all your animation or simulation needs? With this impressive 3D scanning setup from the folks over at [Artanim], you’ll be doing Matrix limbos in no time!  They’ve taken 64 Canon Powershot A1400 cameras to create eight portable “scanning poles” set up in a circle to take 3D images of, well, pretty much anything you can fit in between them! 

Not wanting to charge 64 sets of batteries every time they used the scanner or to pay for 64 official power adapters, they came up with a crafty solution: wooden batteries. Well, actually, wooden power adapters to be specific. This allows them to wire up all the cameras directly to a DC power supply, instead of 64 wall warts.

To capture the images they used the Canon Hack Development Kit, which allowed them to control the cameras with custom scripts. 3D processing is done in a program called Agisoft Photoscan, which only requires a few tweaks to get a good model. Check out [Artanim’s] website for some excellent examples of 3D scanned people.

Continue reading “An Affordable Full Body Studio Grade 3D Scanner”

Using An NRF24L01 For Air Bootloading

nrfboot_small

[Necromant] wrote a library to flash his microcontroller over an RF link using an NRF24L01 wireless communication module. The NRF24L01 is a cheap RF module that can be easily integrated into many microcontroller projects. Though there are Arduino libraries for driving the NRF24L01, [Necromat] decided to make a port of one with no Arduino dependencies.

The resulting bootloader fits into 4K of RAM flash with packet loss and recovery along with user-configurable hardware or software SPI. Programming speeds are not the highest, but [NecromatNecromant] believes this to be a property of the VUSB rather than the transfer rate from the NRF24L01 or the target microcontroller.

To program the target AVR chip, [NecromatNecromant] used another NRF24L01 module connected to his uISP dongle over USB.  Using a custom tool to interface with the uISP, the target board can be programmed in a similar fashion as avrdude. Check out the code for the ISP dongle and the AVR bootloader on his GitHub page.

I Can Fix The Space Station With A Metronome, A Metronome, A Metronome

ISS

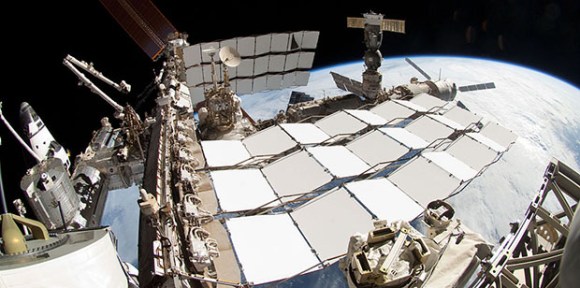
If the space station were left to its own devices, the living quarters would get incredibly hot. There are computers, hardware, and six crew members, all generating heat that must be gotten rid of. To do this, there are two heat exchangers inside the station that take warm water, dump that heat to ammonia, and send that ammonia out to panels outside the station. On December 11, 2013, Loop A of the thermal control system shut down, putting the station one failure away from evacuation. Plans for a spacewalk were tabled, but the ground crew managed to fix this hardware failure by telling the astronauts to push buttons, a metronome, and a software patch.

The problem with Loop A of the Internal Thermal Control System was a flow control valve that regulated the amount of ammonia flowing through the heat exchange. Too much ammonia, and the station would be far too cold. Too little, and it would be too hot. This valve is electronically controlled and takes exactly 13 seconds to move from open to closed. The first attempt at fixing the problem was having ground crew send the command to open the valve and cut the power halfway through. This involved using a metronome app on a phone to send two commands 6.5 seconds apart. It worked, but not quite well enough.

The failure of the metronome technique led [Todd Quasny] to write a script to turn the ‘on’ and ‘off’ commands from the ground to the ISS with millisecond resolution. This meant the commands to control the valve could be sent with the right delay, but they weren’t received with the right delay. This is a problem that had to be fixed from the station’s computers.

To finally solve the problem, ISS software engineer [Steve Joiner] was called in to write a software patch for the thermal control system. This is spaceflight and writing software is a long a laborious process of testing and code reviews. Nevertheless, the team managed to write and upload a patch in just two days.

This patch gave controllers the ability to control the valve with a resolution of 100 milliseconds, good enough for very fine control of the thermal system, and all without requiring the massive amount of planning that goes into a spacewalk or resupply mission.

Ups to [Ed Van Cise] for this tip. If you’re curious about the headline….

SOAP: The Home Automation Router And Kickstarter Scam

How would you like a 7″ tablet with a Quad-core ARM Cortex A9 processor, USB 3.0, 32 GB of storage, 802.11ac, four ports of Gigabit LAN, Bluetooth 4.0, NFC, SATA, HDMI, built-in Zigbee and RFID modules, a camera, speaker and microphone, all for $170? Sound too good to be true? That’s because it probably is. Meet SOAP, the home automation router with a touchscreen, that’s shaping up to be one of the largest scams Kickstarter has ever seen.

There have been a few threads scattered over the web going over some of the… “inconsistencies” about the SOAP kickstarter, mainly focusing on the possibility of fake Facebook likes and Twitter followers. There’s also the question of their development process: they started building a router with an Arduino, then moved on to a Raspberry Pi, a Beaglebone, Intel Atom-powered Minnowboard, the Gizmo Board, PandaBoard, and Wandboard. If you’re keeping track, that’s at least six completely different architectures used in their development iterations. Anyone who has ever tried to build something – not even build a product, mind you – will realize there’s something off here. This isn’t even considering a reasonably accurate BOM breakdown that puts the total cost of production at $131.

The most damning evidence comes from screenshots of the final board design. These pics have since been removed from the Kickstarter page, but they’re still available on the Google cache. The SOAP team claims they’re putting USB 3.0 ports on their board, but the pics clearly show only four pins on each of the USB ports. USB 3.0 requires nine pins. A closer inspection reveals these screenshots are from the files for Novena, [Bunnie Huang]’s open source laptop.

Continue reading “SOAP: The Home Automation Router And Kickstarter Scam”

Turning A Router Into An Arduino Yún

yun

The Arduino Yún was the first of a new breed of Arduinos that added a big honkin’ Linux System on Chip to the familiar ATMega microcontroller and unique pin headers. It’s a surprisingly powerful system, but also very simple: basically, it’s just an Atheros AR9331 running Linux, an ATMega32u4 doing its Arduino thing, both connected by a serial connection. The Atheros AR9931 is also found in a router popular amongst hardware hackers. It really was only a matter of time before someone ported the Yun software to a router, then.

[Tony] took a TL-WR703N router and put OpenWRT on it. Turning this router into the Linux side of a Yún was a simple matter of uploading the Yún software to the root directory of the router and rebooting it. The Arduino side of the Yún is handled by an Arduino Mega connected to the USB port of the router. A quick update to Arduino’s boards.txt file, and a hacked together Yún is just a strip of duct tape away.

The Yún may not be extremely popular, but it does have a few interesting use cases. Maybe not enough to drop $70 on a board, but if you already have a WR703 router, this is a great way to experiment.

Thanks [Matt] for the tip.