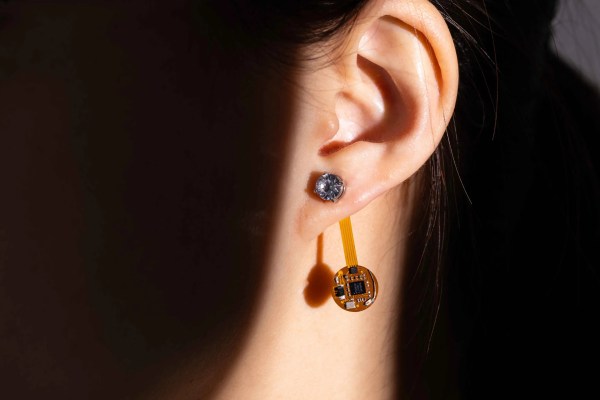
If you want to constantly measure body temperature to track things like ovulation, you usually have to wear something around your wrist or finger in the form of a smartwatch or ring. Well, what if you can’t or don’t want to adorn yourself this way? Then there’s the thermal earring.
 Developed at the University of Washington, the thermal earring is quite small and unobtrusive compared to a smartwatch. Sure, it dangles, but that’s so it can measure ambient temperature for comparison’s sake.
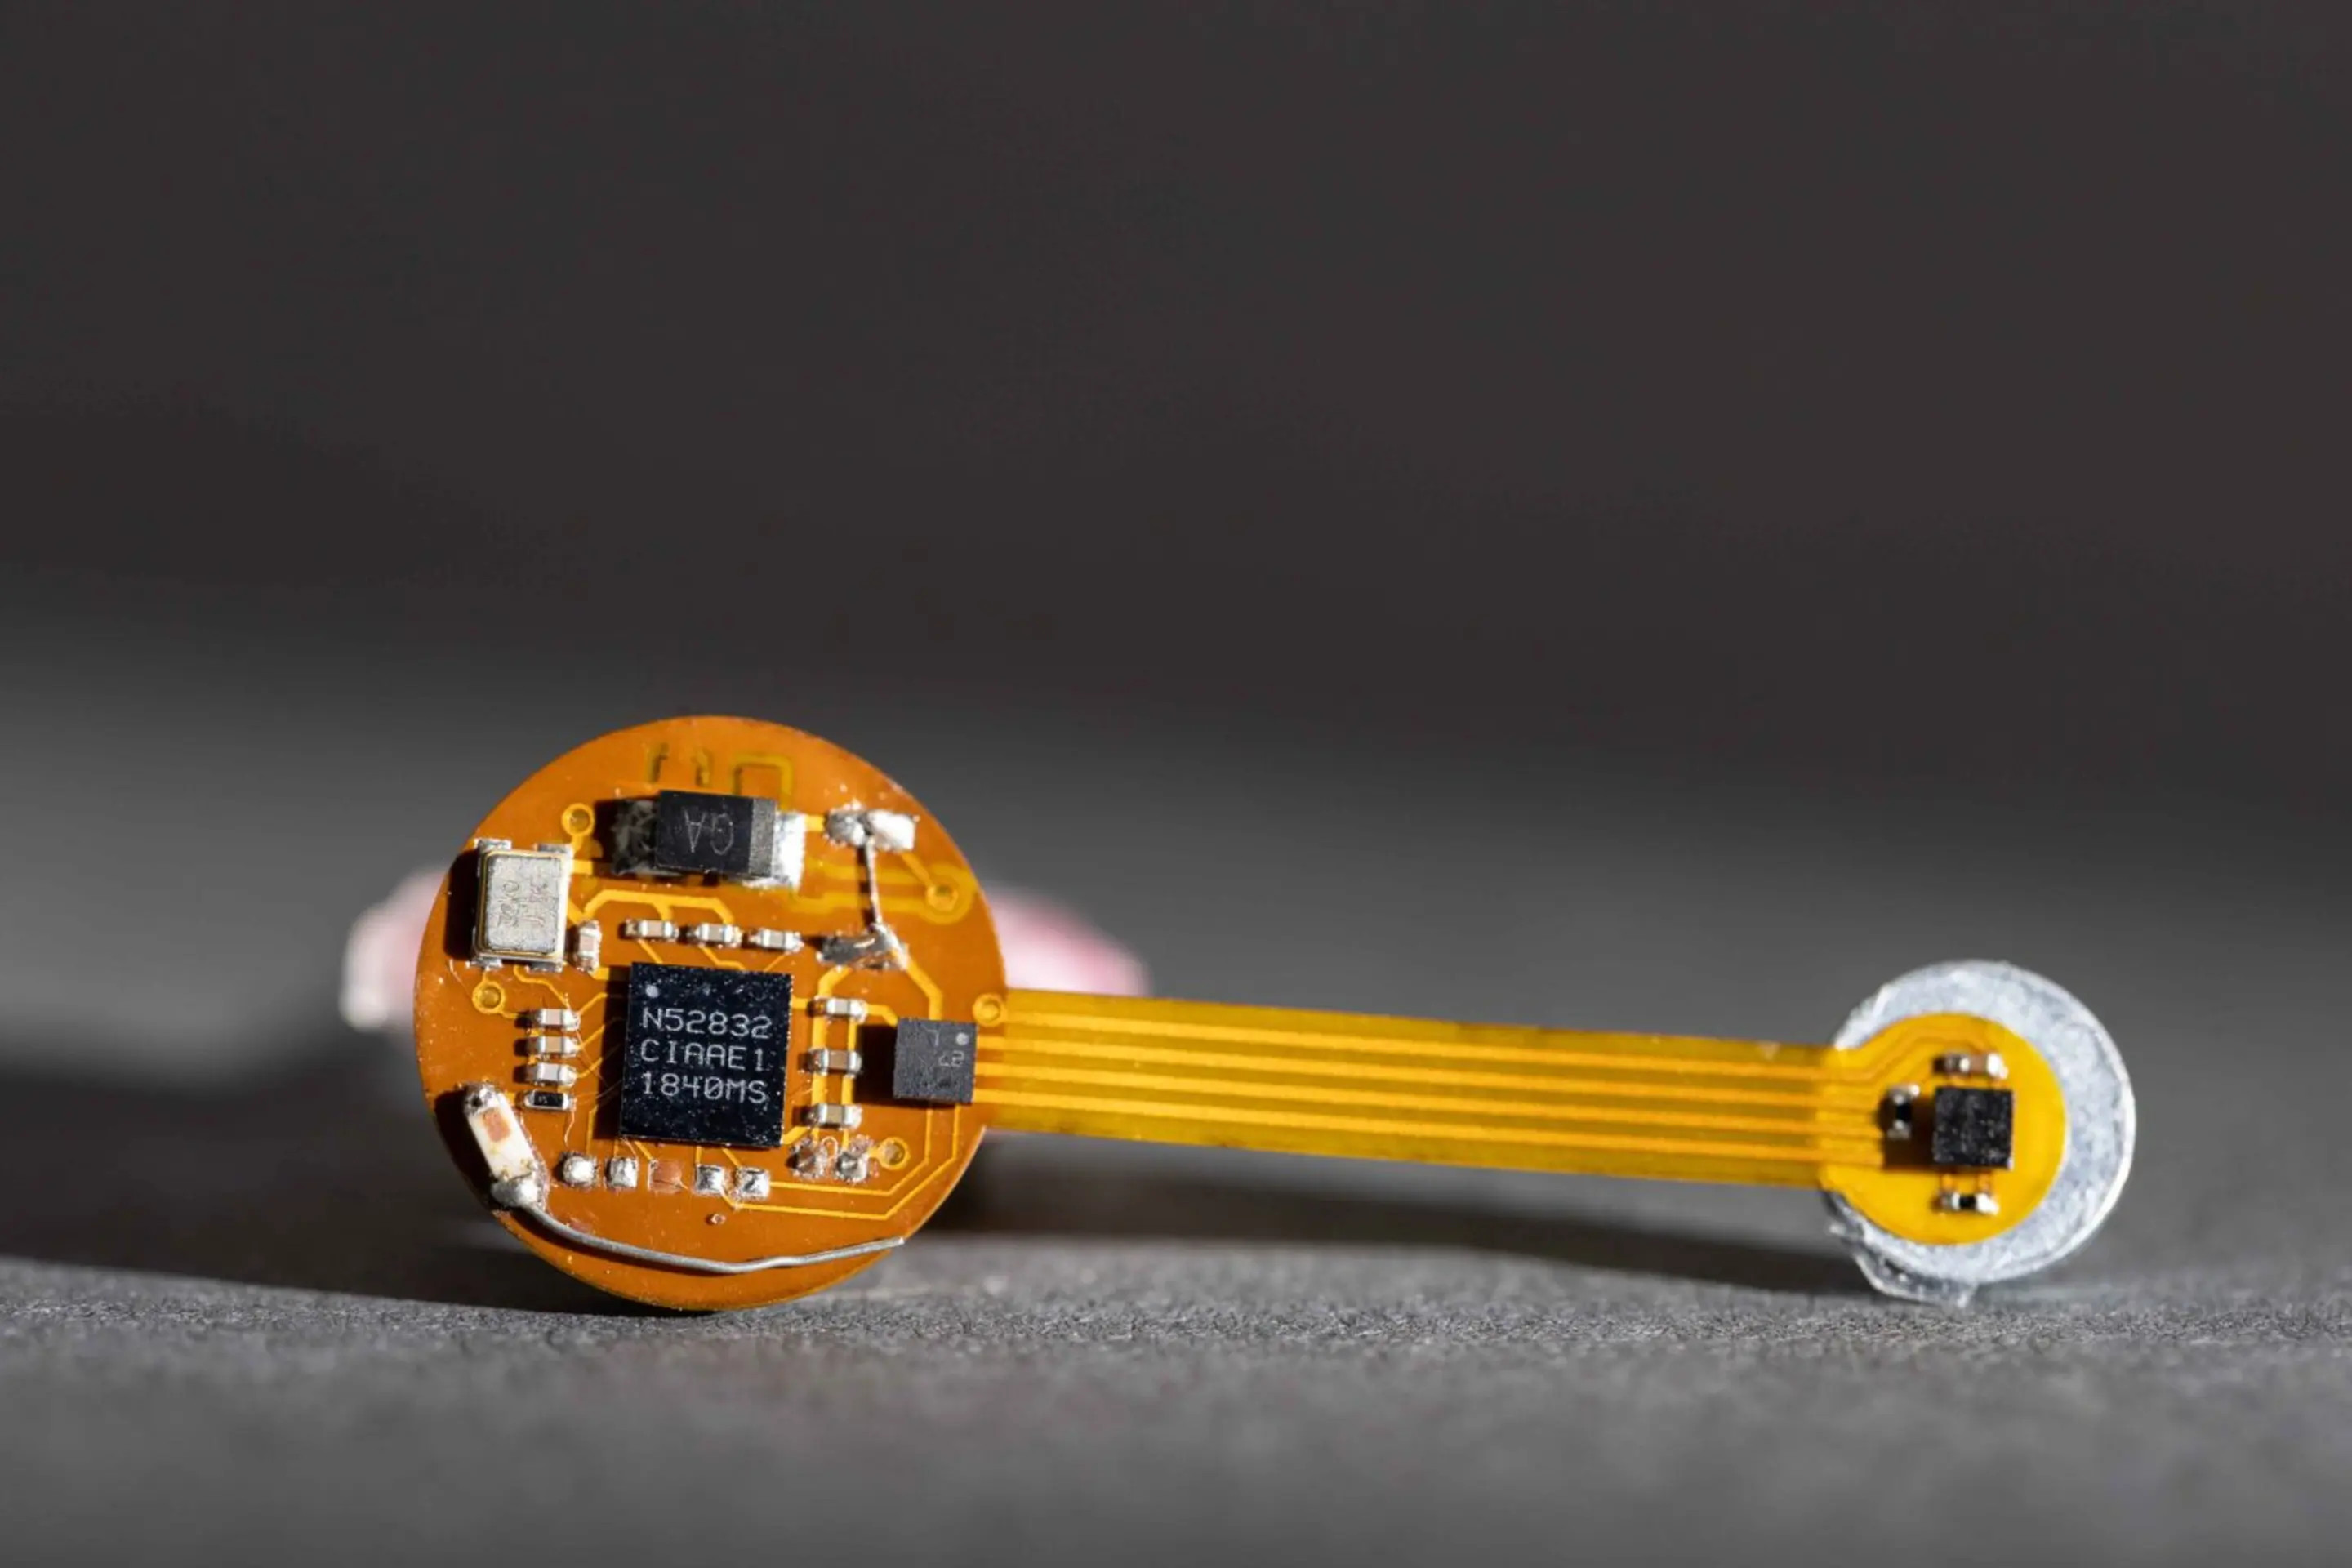
You don’t even need to have pierced ears — the earring attaches to the lobe magnetically. And yeah, the earring can be decorated to hide the circuitry, but you know we would rock the bare boards.
The earring uses BLE to transmit readings throughout the day, and of course goes into sleep mode between transmissions to save power. Coincidentally, it runs for 28 days per charge, which is the length of the average menstrual cycle. While the earring at this time merely “shows promise” as a means of monitoring stress and ovulation, it did outperform a smartwatch at measuring skin temperature while the wearers were at rest.
This is definitely not the only pair of earrings we’ve got around here. These art deco earrings use flexible PCBs, and this pair will light up the night.