Keeping An Old 8mm Projector Alive With High-power LEDs

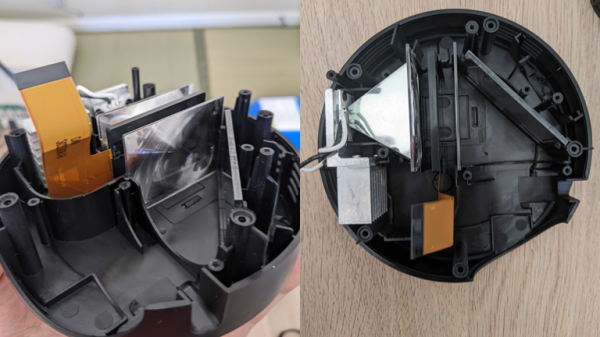
There’s a certain mystique about old home movies and 8mm film; whether it’s footage from a family gathering from 40 years ago or a stop-motion animation you made when you were 12, there’s an immediacy for film that the VHS tapes from your family’s first camcorder can’t match. [Teslas Moustache] has been getting into 8mm cameras and projectors, so when he came across a 8mm/super 8 projector that needed a bulb, he knew he had a worthwhile project on his hands.

To replace the burnt-out and very expensive to replace incandescent bulb, [Teslas] sourced a very bright star LED from Jameco. This 1 Watt LED puts out more than enough light to project a frame of film onto a screen and fortunately doesn’t get as hot as the stock bulb.

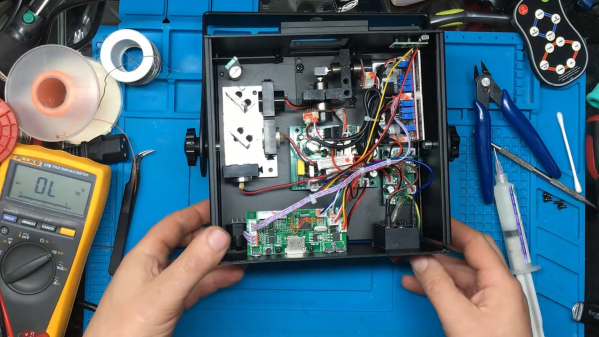
To power the LED, [Teslas] used a cell phone charger powered from the 120 VAC incandescent socket to supply the requisite 5 Volts at 1 Amp (Ohm’s Law works on coffee) power for the LED. Right now, there’s still the matter of fabricating a nice enclosure to mount the LED and charger in the bulb socket, but once [Teslas] figures that out, he’ll have a very nice 8mm projector on his hands.

Retrofitting LCD Projectors With High-powered LEDs

highpower_led

[Devon] recently repaired a handful of Phillips LCD projectors which he was quite excited to use. The only problem is that he didn’t want to mess with replacing the bulbs after every 2000 hours of use at $100 apiece. He was pretty confident that he could find a better way to drive the projectors, so he disassembled them once more and started looking around for bulb replacements.

He figured that a high-powered LED would do the trick, so he ordered a handful of parts and went about his first retrofit. Using his oscilloscope, he found that the control board pulses the high voltage board when the projector is powered on, and continues to pulse a signal until the machine is turned off. At this point, the HV board powers down the bulb.

He created a small circuit using a PIC that is used to interpret the initial pulse from the control board as well as watch for the steady “heartbeat” pulses that occur while the projector is powered on. This board is used to control the driver board for the high-powered LED he purchased.

His bulb replacement works well as far as color fidelity is concerned, but is not nearly as bright as he hoped for. He has plans to source some far brighter LEDs or automobile HID lighting in the very near future, and we look forward to seeing if he can match the brightness of the original bulbs.

Giant Demonstrator Explains How DLP Projectors Work

Texas Instruments developed digital mirror devices, and the subsequent digital light processing (DLP) projector, starting in the late 1980s. The technology is a wondrous and fanciful application of micro-scale electronics and optics. Most of us that have tangled with these devices have had to learn their mode of operation from diagrams and our own imagination. But what if you just built one at a large enough scale that you could see how it worked? Well, [jbumstead] did just that!

A real Digital Micromirror Device (DMD) consists of hundreds of thousands of mirrors, which would be impractical to recreate. This build settles for a simpler 5×5 array made using half-inch square mirrors. It uses solenoids to move each individual mirror between a flat and angled position to create the display. The solenoids are all under the command of an Arduino Mega which controls the overall state of the display and shows various patterns.

It’s not perfect, with the mirrors not quite matching in angles at all times, but it demonstrates the concept perfectly well. When you see it in action with light bouncing off it, you can easily understand how this could be used to make a display of many thousands of pixels in a projector arrangement. We’ve featured some other DLP hacks before, too, so dive in if you’re interested.

Continue reading “Giant Demonstrator Explains How DLP Projectors Work”

Laser Projector Built From An Old Hard Drive

Spinning hard drives are being phased out of most consumer-grade computers in favor of faster technology like solid-state drives and their various interfaces. But there’s still millions of them in circulation that will eventually get pulled from service — so what do we do with them? If you’ve got one that would otherwise be going in the garbage, they can be turned into some other interesting devices like this laser text projector.

Even the slowest drives spin at around 5000 RPM, which is perfect for this type of application. The device works by mounting twelve mirrors, each at a slightly different angle, on a drum which is spun by the drive’s motor. Bouncing a laser off of the spinning drum results in a projection of twelve horizontal lines. By rapidly switching the laser on and off depending on which mirror it’s pointing at, the length of each line can be controlled.

Thanks to persistence of vision, that allows you to show text on the surface that the laser is projected on. At speeds this high, it took [Ben] of Ben Makes Everything quite a few iterations to get it to a usable space. From sensors that were too slow to lasers not bright enough to 3D prints that were not accurate enough, he goes through the design of his build and the process in excellent detail.

After solving all of the problems including building his own constant-current laser power supply, and burning up a few laser diodes in the process, [Ben] has a laser projector capable of displaying readable text at a great distance which is also portable, running on a 12 V power supply. There are some possible areas of improvement that he notes as well, such as an unbalanced 3D printed part causing a bit of a wobble and the Arduino controller not being fast enough for more text. But it’s an impressive project nonetheless, similar to a two-mirror version we saw some time ago but with the ability to display text as well.

Continue reading “Laser Projector Built From An Old Hard Drive”

What’s Inside A Super-Cheap Projector? Not A Lot!

[Raymond Ma] has a penchant for browsing Aliexpress and purchasing curious pieces of hardware that are as high on promises as they are low on cost. This is a process he aptly sums up with his opening line of “I should have known better, but…” Luckily, these devices all get torn down and analyzed so we can each enjoy and share a little slice of disappointment.

One such item is the $30 USD YT200 mini projector, which at 320×180 is almost as low on pixels as it is on cost. Still, [Raymond] looks inside to find out if there is perhaps more hacking potential than there is image resolution.

The YT200 lacks any kind of normal video input, and the anemic 15 lumen output is brazenly branded as a feature to protect children’s eyes from excessive brightness.

Light from the single LED is collimated with some Fresnel lenses. That light passes through an LCD panel, and from there the image bounces off a mirror and through a focusing lens housed in a spiral guide. Focal adjustments are made with a small lever, and the whole assembly provides just enough friction to prevent the lens from moving out of focus on its own.

The device actually does work fairly well for what it is: a way to play a range of different media types off a connected USB storage device. As long as one is in a dark room, anyway.

[Raymond] hopes to find some alternate use for the device. Might we suggest projecting into a frosted glass globe to create a sort of spherical display? A spooky eye animation on a USB stick might pair well with that.

An RGB laser projector opened up on a workbench

Laser Projector Needs Hardware Hack After Software Mod

You probably recognize that dreadful feeling when you reboot a gadget after updating its firmware, only to be greeted by a blank screen and an unresponsive device. This apparently happened to the previous owner of a bricked RGB laser projector that [Buy It Fix It] got his hands on: it briefly flashed its laser on power-up but otherwise remained completely dead.

A thorough inspection of the major components didn’t reveal any physical damage, so the issue had to be in software. [Buy It Fix It] managed to connect his Segger J-link programmer to the STM32 main processor and downloaded the contents of its firmware, only to find the remains of a PDF file which seemed to have been accidentally flashed into the chip’s program space. Fixing the device should then just be a matter of restoring the proper firmware, but [Buy It Fix It] wasn’t able to find a copy of it anywhere.

A PCB with a few mod wires on itWhat he did find was Maximus64’s GitHub repository that contained a software mod for a different projector model, as well as its original firmware. Flashing that version didn’t fix [Buy It Fix It]’s projector either, although it did now start to actuate its galvos.

A bit of reverse engineering revealed that the two projectors were very similar from a hardware point of view, but had their laser drivers hooked up to different I/O pins: simply cutting the board traces and soldering some wires to re-route the signals was enough to bring the projector back into a working state.

Having to modify hardware in order to make it fit a piece of software is unfortunate, but sometimes you just have to make do with what you’ve got. If you’ve got no firmware to begin with, then you might even have to write your own from scratch.

Continue reading “Laser Projector Needs Hardware Hack After Software Mod”

Laser Projector Relies On Steppers Rather Than Galvanometers

Laser light shows have always been real crowd-pleasers. There’s just something about the frenetic movement of a single point of intensely bright light making fluid animations that really captures the imagination. Large-scale laser shows require a lot of gear, of course, but that doesn’t mean you can’t get in on the fun yourself using something like this homebrew X-Y laser projector.

This is actually [Stanley]’s second pass at a stepper-based DIY projector; we featured his previous build back in 2016. This time around, he wanted to move beyond the “module mix-and-match” style of construction, so rather than use an Arduino and stepper shield, he rolled his own controller PCB to hold an ESP32 and a pair of STSPIN220 stepper drivers. The business end of the new version saw improvements, too — given that he was seeing unwanted softening of corners and curving of straight lines in the first projector’s images, he opted for smaller steppers holding smaller mirrors this time around. There’s also a new 3D printed chassis to hold everything, simplifying the build and keeping the two mirrors in better alignment.

The video below has the build details and some nice footage of the projector in action — it’s hard to go wrong with lasers and smoke. The performance seems pretty good, so the improvements seem to have paid off. And for those of you tapping out your “Should have used galvos” comments below, relax; [Stanley] says he’s thinking about ways to make his own galvanometers for the next version.

Continue reading “Laser Projector Relies On Steppers Rather Than Galvanometers”