Solar Cell Fabric Makes Anything Solar

MIT has been working on very thin solar cells made of a film just a few microns thick. The problem? The cells are so thin that they’re hard to work with. You could make a small solar cell on top of, say, a glass slide, but that’s not all that interesting since you can make perfectly good solar cells that are as fragile as glass using conventional techniques. But in a new paper, MIT researchers describe creating 50-micron-thin fabrics that can generate electricity from solar.

The process still involves using chemical vapor deposition to produce the solar cell on glass. However, the cells are removed from the glass, prepared with electrodes, and then transferred to a piece of fabric which acts as a new substrate.

The fabric used in the paper is a composite fabric known as Dyneema composite fabric. It uses ultra-high molecular weight polyethylene fibers and sheets of Mylar. This material has low weight but a very high strength. A UV cure adhesive bonds the fabric and solar cells.

Honestly, we doubt anyone will be making these in their garages anytime soon. But we would love to see what you could do with a roll of this fabric. Wearables, self-charging laptop bags, or solar-powered instruments in an airborne drone could all take advantage of the material’s flexibility and low weight.

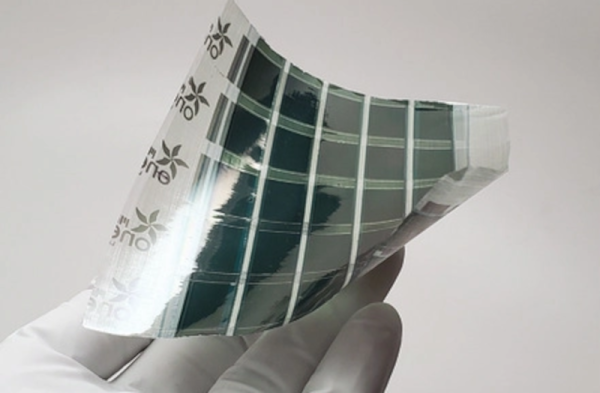
Image-Generating AI Can Texture An Entire 3D Scene In Blender

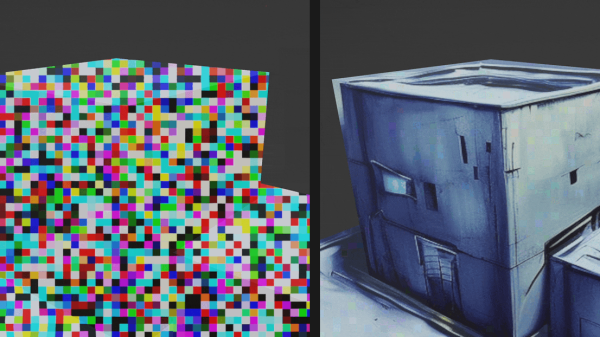
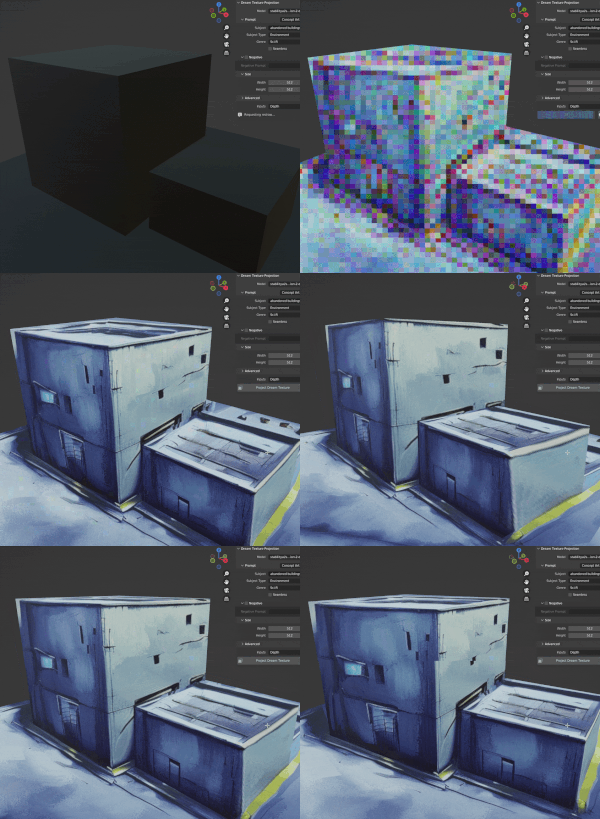
[Carson Katri] has a fantastic solution to easily add textures to 3D scenes in Blender: have an image-generating AI create the texture on demand, and do it for you.

It’s not perfect — the odd door or window feature might suffer from a lack of right angles — but it’s pretty amazing.

As shown here, two featureless blocks on a featureless plain become run-down buildings by wrapping the 3D objects in a suitable image. It’s all done with the help of the Dream Textures add-on for Blender.

The solution uses Stable Diffusion to generate a texture for a scene based on a text prompt (e.g. “sci-fi abandoned buildings”), and leverages an understanding of a scene’s depth for best results. The AI-generated results aren’t always entirely perfect, but the process is pretty amazing. Not to mention fantastically fast compared to creating from scratch.

AI image generation capabilities are progressing at a breakneck pace, and giving people access to tools that can be run locally is what drives interesting and useful applications like this one here.

Curious to know more about how systems like Stable Diffusion work? Here’s a pretty good technical primer, and the Washington Post recently published a less-technical (but accurate) interactive article explaining how AI image generators work, as well as the impact they are having.

Hackaday Links Column Banner

Hackaday Links: December 18, 2022

By now everyone has probably seen the devastation wrought by the structural failure of what was once the world’s largest free-standing cylindrical aquarium. The scale of the tank, which until about 5:50 AM Berlin time on Friday graced the lobby of the Raddison Blu hotel, was amazing — 16 meters tall, 12 meters in diameter, holding a million liters of saltwater and some 1,500 tropical fish. The tank sat atop a bar in the hotel lobby and was so big that it even had an elevator passing up through the middle of it.

But for some reason, the tank failed catastrophically, emptying its contents into the hotel lobby and spilling the hapless fish out into the freezing streets of Berlin. No humans were killed by the flood, which is miraculous when you consider the forces that were unleashed here. Given the level of destruction, the displaced hotel guests, and the fact that a €13 million structure just up and failed, we’re pretty sure there will be a thorough analysis of the incident. We’re pretty interested in why structures fail, so we’ll be looking forward to finding out the story here.

Continue reading “Hackaday Links: December 18, 2022”

The display of a medical ultrasound scanner showing "HackedScan II"

Medical Ultrasound Scanner Gives Up Its Secrets, Runs DOOM

Medical equipment often makes for interesting teardown videos: the strict requirements imposed by certification bodies mean you’ll find good quality components and a high standard of design and manufacturing. But when [Buy It Fix It] bought an ultrasound scanner on eBay, he wasn’t interested in tearing it down: his plan was to use it to find out if his sheep are in lamb, so he went on to repair it and modify it for its new purpose.

The device in question is a Mediwatch Bardscan II, which is meant to be used for scanning people’s bladders. The mainboard has a completely different model number however, which suggests that the basic design is used for several types of ultrasound scanners. The system is powered by an AMD Geode processor that runs Windows XP Embedded stored on a CompactFlash card, so examining the internal software is easy: the scanner interface even runs on a regular Windows PC.

Several files on the internal drive point at hidden features, with filenames like kidney.dib and liver.dib indicating that the instrument can scan more than just bladders. The drive also holds several versions of the scanning app, as well as a .ini file in which lots of features can be enabled or disabled. By running the executable through x32dbg, [Buy It Fix It] was even able to recover the password to enable the “Advanced Settings” menu — it’s “u10” in case you were wondering.

With a bit of file editing, [Buy It Fix It] managed to turn the rather basic system into a way more flexible ultrasound scanner. For example, he can now adjust the scan depth, replay previous scans and make notes on top of any captured images. It can even run DOOM, as he demonstrates at the end of the video — though we can imagine his sheep might not enjoy the sight of their owner approaching them with a box full of flame-throwing demons.

Medical ultrasound scanners, which have been around for quite a while, may appear to be complex machines, but it is possible to make a simple version with easily available components.

Continue reading “Medical Ultrasound Scanner Gives Up Its Secrets, Runs DOOM

Antweight Combat Robot Tips, Shared From Experience

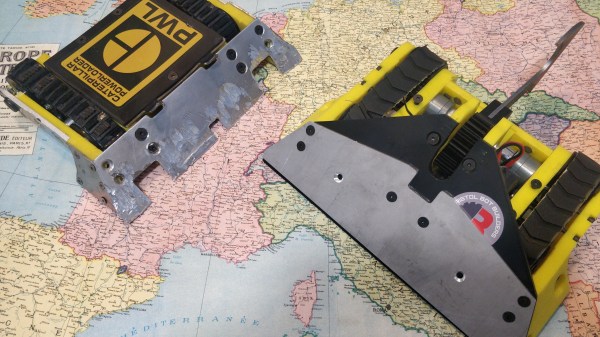
[Harry]’s newest robot, the MotherLoader V2, looks fantastic but was ultimately more of a learning experience and test bed for some experimental features. Luckily for us, [Harry] created a lengthy write-up detailing everything that he tried and revised.

3D printing and aluminum both feature heavily in antweight robots, in part because when contestants are limited to 150 grams it’s safe to say that every bit counts. We recommend reading [Harry]’s entire article to get all the details, but here are some of the bigger takeaways.

Treads provide a lot of contact surface, but there are a lot of ways they can go wrong. Pliability and grip have to be good matches for the robot’s design, otherwise the tread might bunch up or otherwise perform poorly when trying to maneuver. [Harry] had several dud efforts, but ended up with a great result by borrowing an idea from another competitor: composite tracks.

These have an inner track printed from flexible TPU filament, and an outer layer formed by casting silicone directly onto the 3D printed core. It’s a somewhat involved process, but the result is a durable and custom-fitted inner track on the inside, and a softer grip outside. Best of both worlds, and easily tailored to match requirements.

Speaking of TPU, [Harry] discovered that it can be worth printing structural parts with TPU. While ABS is usually the material of choice for durable components, printing solid parts in TPU has a lot to recommend it when it comes to 150 gram robots. Not only can TPU parts be stiff enough to hold up structurally, but they can really take a beating and happily spring back into shape afterwards.

We’ve seen [Harry]’s work before on antweight combat robots, and it’s always nice to peek behind the scenes and gaze into the details. Especially for processes like this, where failures are far more educational than successes.

A Transistor? Memory? Wait, It’s Both!

What do you get if you cross graphene, hexagonal boron nitride, and tungsten diselenide? Well, according to researchers at Hunan University, you get a field effect transistor that can act as both a switching element or a memory cell. The partial floating-gate field-effect transistor or PFGFET uses 2D van der Waals heterostructures to deal with isolated atomic layers. The paper in Nature is unfortunately behind a pay wall, but you can read a summary over on [TechExplore].

The graphene acts as the gate, and the transistor can be switched between n-type behavior and p-type behavior. It can also be configured as a switching element or as a memory element similar to an EEPROM cell.

One advantage of having configurable transistor types is that a single transistor structure can produce CMOS or complementary circuits. Traditionally, a CMOS IC has two different transistor structures and often producing one of them requires extra effort.

The configuration takes place by applying a control voltage pulse. A negative control voltage produces a p-type FET and a positive voltage configures the same transistor as an n-type. If you don’t have access to the paper, the figures available online offer a good bit of insight into the device’s design.

If you want to learn more about ordinary MOSFETs, we talk about them often. You can also get the skinny on CMOS from [Bil Herd].

What’s Inside A Super-Cheap Projector? Not A Lot!

[Raymond Ma] has a penchant for browsing Aliexpress and purchasing curious pieces of hardware that are as high on promises as they are low on cost. This is a process he aptly sums up with his opening line of “I should have known better, but…” Luckily, these devices all get torn down and analyzed so we can each enjoy and share a little slice of disappointment.

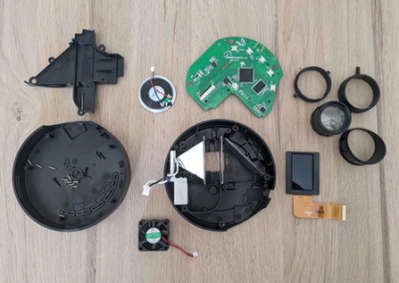
One such item is the $30 USD YT200 mini projector, which at 320×180 is almost as low on pixels as it is on cost. Still, [Raymond] looks inside to find out if there is perhaps more hacking potential than there is image resolution.

The YT200 lacks any kind of normal video input, and the anemic 15 lumen output is brazenly branded as a feature to protect children’s eyes from excessive brightness.

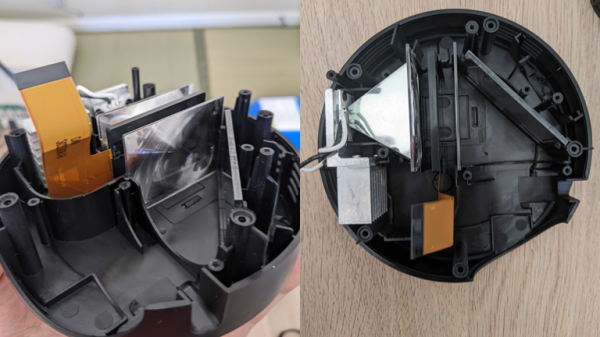
Light from the single LED is collimated with some Fresnel lenses. That light passes through an LCD panel, and from there the image bounces off a mirror and through a focusing lens housed in a spiral guide. Focal adjustments are made with a small lever, and the whole assembly provides just enough friction to prevent the lens from moving out of focus on its own.

The device actually does work fairly well for what it is: a way to play a range of different media types off a connected USB storage device. As long as one is in a dark room, anyway.

[Raymond] hopes to find some alternate use for the device. Might we suggest projecting into a frosted glass globe to create a sort of spherical display? A spooky eye animation on a USB stick might pair well with that.