Ultimate Bokeh With A Projector Lens

Bokeh is a photography term that’s a bit difficult to define but is basically soft, aesthetically pleasing background blur, often used to make a subject stand out. Also called “background separation” or “subject isolation”, achieving it optically requires a fast lens with an aperture below 2.8 or preferably lower. These lenses can get very expensive, but in the video after the break [Matt] from [DIY Perks] blows all the commercially available options out of the water. Using an old episcope projector, he built a photography rig with background separation equivalent to that of a non-existent 35mm f0.4 lens.

Unlike most conventional projectors used to project a prerecorded image, episcopes were used to project an image of physical objects, like books. To use this lens directly in a camera is impossible, due to the size of the imaging circle projected out the back of the lens. At a diameter of 500mm, there is simply no imaging sensor available to capture it. Instead, [Matt] built a projection screen for the image and photographed it from the opposite side with a normal camera.

The projection screen was made by sandwiching a sheet of diffuser film between two sheets of clear acrylic held in a frame of aluminum extrusions. To block out all other light, [Matt] added aluminum shrouds on either side of the screen, which also serves to mount the lens and a camera. The shroud on the lens’ side is mounted on a separate aluminum frame, enabling the image to be focused by adjusting the distance between the screen and lens. Linear rods and bearings on 3D printed mounts allow smooth motion, while a motor-driven lead screw connected to a wired remote does the actual adjustment. The gap between the two halves was covered with bellows made from black paper. Continue reading “Ultimate Bokeh With A Projector Lens”

Making A Projector Screen Out Of Flex Seal Works Okay, Kinda

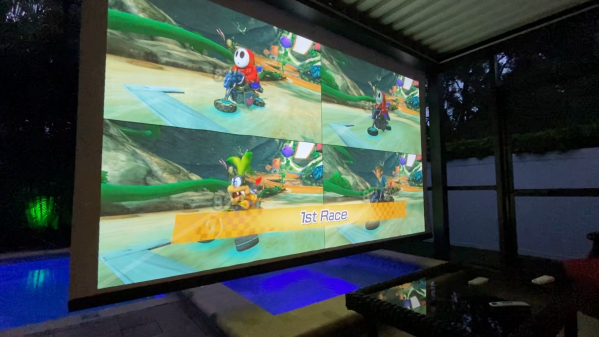
Watching movies on the big screen is fun, but getting out to the cinema or drive-in can be a hassle. It’s possible to get the same experience at home with a little creativity, as shown in this DIY projector screen build by [The Hook Up].

The build started with a giant motorized roller screen designed for a patio. It was scored on the cheap as it was salvaged after removal from its original home. Having seen a screen door turned into a boat with the help of Flex Seal, [The Hook Up] was confident that the flyscreen could be sealed up and used for projection.

Right away, the going got tough. Light applications weren’t really filling in the holes in the flyscreen, while thick applications had major issues with runs. Eventually, the screen was painted with 3 gallons of white Flex Seal and hung up to test.

The runs caused issues, as the lumpy screen texture was distracting when viewing movies. Additionally, the glossy finish was creating unsightly reflections. After some trial and error, the issues were solved by sanding the Flex Seal surface flat and using matte clear spray paint to dull the shine.

The result was a grand projection screen that rolls down at the touch of a button, the likes of which we’ve seen before, though at significant cost. [The Hook Up] readily admitted that the several hundred dollars invested might have been better spent on buying a pre-made screen. Nonetheless, it’s a cool project, and we respect the creator for putting in the work! Video after the break.
Continue reading “Making A Projector Screen Out Of Flex Seal Works Okay, Kinda”

A True 4K Projector From Scrap EBay Components

Cinemas all over the world have become no-go zones with COVID-19 around, but watching the latest blockbuster on the small screen at home is simply not the same. You could bring the big screen home, but buying a quality projector is going to set you back a small pile of cash. Fortunately [Matt] from [DIY Perks] has an alternative for us, demonstrating how to build your own true 4K projector with parts bought off eBay, for a fraction of the price.

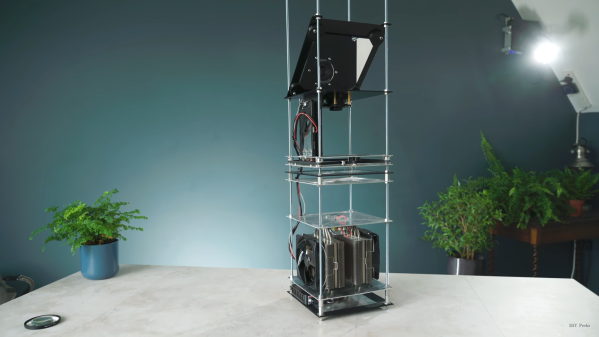
The core of the projector is a small 4K LCD panel, which is from a modified Sony smartphone. [Matt] disassembled the phone, removed the backlight from the LCD, which leaves it semi-transparent, and mounted it at a right angle to the rest of the phone body. The battery was also replaced with a voltage regulator to simulate a full battery. To create a practical projector, a much brighter backlight is needed. [Matt] used a 100W 10 mm diameter LED for this purpose. The LED needs some serious cooling to prevent it from burning itself out, and a large CPU cooler does the job perfectly. Two Fresnel lenses in series are used to turn the diverging light from the LED into a converging light source to pass through the LCD. An old 135 mm large format camera lens is placed at the focal point of light to act as a projection lens. The entire assembly is mounted on a vertical frame of threaded rods, nuts, and aluminium plates. [Matt] also used these threaded rods with GT2 pulleys to create a simple but effective moving platform for the projection lens that allows the focus of the projected image to be adjusted. The frame is topped off by a 45-degree mirror to project the image against a wall instead of the roof, and the frame is covered with aluminium panels.

The video after the break goes into incredible detail on how projector functions and how to build your own down. It definitely looks like a doable build for most hackers. [Matt] will also be releasing a complete PDF build guide in the next few weeks. Continue reading “A True 4K Projector From Scrap EBay Components”

Fail Of The Week: Bright Idea For LED Signs Goes Bad

Typically when we select a project for “Fail to the Week” honors, it’s because something went wrong with the technology of the project. But the tech of [Leo Fernekes]’ innovative LED sign system was never the problem; it was the realities of scaling up to production as well as the broken patent process that put a nail in this promising project’s coffin, which [Leo] sums up succinctly as “The Inventor’s Paradox” in the video below.

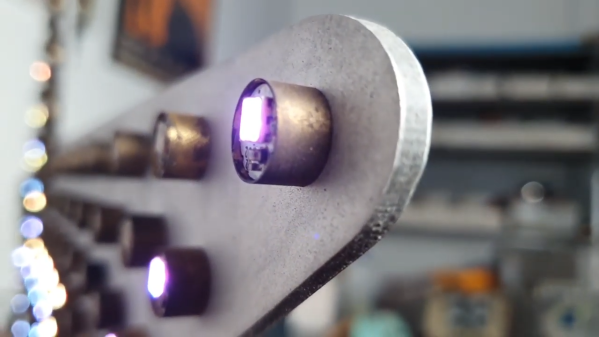
The idea [Leo] had a few years back was pretty smart. He noticed that there was no middle ground between cheap, pre-made LED signs and expensive programmable signboards, so he sought to fill the gap. The result was an ingenious “LED pin”, a tiny module with an RGB LED and a microcontroller along with a small number of support components. The big idea is that each pin would store its own part of a display-wide animation in flash memory. Each pin has two terminals that connect to metal cladding on either side of the board they attach to. These two conductors supply not only power but synchronization for all the pins with a low-frequency square wave. [Leo]’s method for programming the animations — using a light sensor on each pin to receive signals from a video projector — is perhaps even more ingenious than the pins themselves.

[Leo]’s idea seemed destined for greatness, but alas, the cruel realities of scaling up struck hard. Each prototype pin had a low part count, but to be manufactured economically, the entire BOM would have to be reduced to almost nothing. That means an ASIC, but the time and expense involved in tooling up for that were too much to bear. [Leo] has nothing good to say about the patent game, either, which his business partners in this venture insisted on playing. There’s plenty of detail in the video, but he sums it up with a pithy proclamation: “Patents suck.”

Watching this video, it’s hard not to feel sorry for [Leo] for all the time he spent getting the tech right only to have no feasible way to get a return on that investment. It’s a sobering tale for those of us who fancy ourselves to be inventors, and a cautionary tale about the perils of participating in a patent system that clearly operates for the benefit of the corporations rather than the solo inventor. It’s not impossible to win at this game, as our own [Bob Baddeley] shows us, but it is easy to fail.

Continue reading “Fail Of The Week: Bright Idea For LED Signs Goes Bad”

Gesture Controlled Doom

DOOM will forever be remembered as one of the founding games of the entire FPS genre. It also stands as a game which has long been a fertile ground for hackers and modders. [Nick Bild] decided to bring gesture control to iD’s classic shooter, courtesy of machine learning.

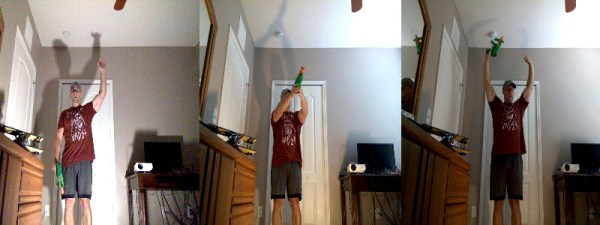
The setup consists of a Jetson Nano fitted with a camera, which films the player and uses a convolutional neural network to recognise the player’s various gestures. Once recognised, an API request is sent to a laptop playing Doom which simulates the relevant keystrokes. The laptop is hooked up to a projector, creating a large screen which allows the wildly gesturing player to more easily follow the action.

The neural network was trained on 3300 images – 300 per gesture. [Nick] found that using a larger data set actually performed less well, as he became less diligent in reliably performing the gestures. This demonstrates that quality matters in training networks, as well as quantity.

Reports are that the network is fairly reliable, and it appears to work quite well. Unfortunately, playability is limited as it’s not possible to gesture for more than one key at once. Overall though, it serves as a tidy example of how to do gesture recognition with CNNs.

If you’re not convinced by this demonstration, you might be interested to learn that neural networks can also be used to name tomatoes. If you don’t want to roll your own pose detection, check out this selfie drone that uses CMU’s OpenPose library. Video after the break.

Continue reading “Gesture Controlled Doom”

A Petite Pico Projector For Portable Pi

A few years ago, new, innovative pico projectors, influenced by one of the TI development kits, started appearing in Kickstarter projects and other various DIY endeavours. Those projects fizzled out, most likely due to the cost of the projectors, but we got a few laughs out of it: that wearable smartphone that projected a screen onto your wrist used the same technology.

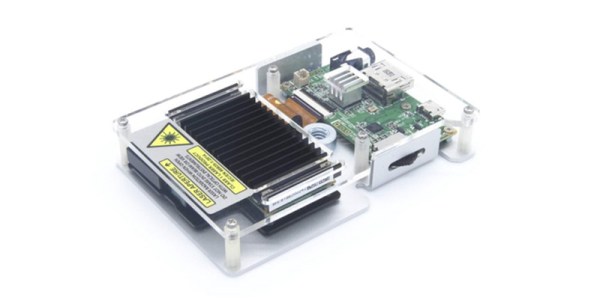
But there’s a need for a small projector, a pico projector, or in this case a femto projector. It’s the Nebra Anybeam, and it’s a small projector that uses lasers, and it comes in the form of a Raspberry Pi hat. We would like to congratulate the team for shipping the ideal use case of their product first.

The key features of this pico projector address the shortcomings of existing projectors that can fit in your pocket. This uses a laser, and there’s no bulb, and the power consumption can be as low as 3 Watts. Power is provided over a micro USB cable. The resolution of this projector is 720p, which is sufficient for a quick setup for watching a movie, but the brightness is listed as equivalent to 150 ANSI lumens, about the same as small projectors from a few years ago.

But of course the big selling point isn’t the brightness or resolution, it’s all about the smallness of the projector itself. There is a developer’s kit, a Pi Hat, a fit-in-your-pocket version with an enclosure, and a ‘monster ball’ version of the Anybeam.

Amplifier Controlled Motorized Display

It’s easy to get jaded by gadgets like the Chromecast or Sonos, which let the user control AV equipment remotely from a mobile device or computer. You can pick something to play from your phone and send it off to your speakers via the magic of Wi-Fi. But it’s still nice to have a display to look at for music visualizations and that sort of thing, at least occasionally.

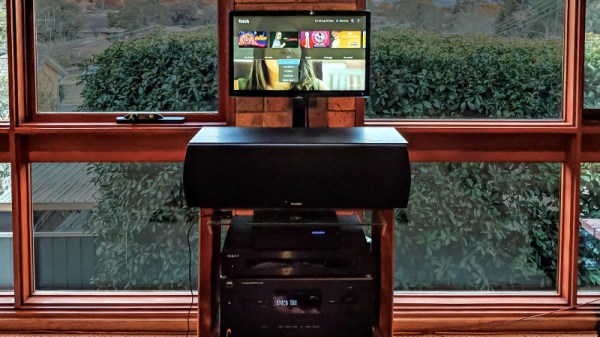
To address this only occasional desire to have a display on your media setup, you could follow in the footsteps of [Steven Elliott] and create a DIY motorized display which only pops up when needed. Inspired by seeing videos of TVs rising out of cabinets and other such trickery, he decided to create his own version using an old computer monitor he had lying around.

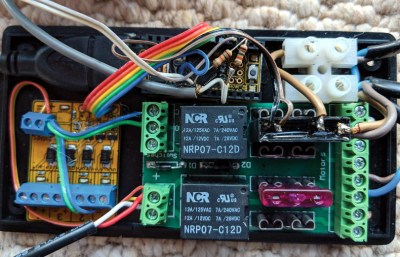
The monitor is lifted with a beefy linear actuator, which has been placed inside of a square metal fence post to keep from rotating. It already had a power supply and control board with relays for extending and retracting, so [Steven] just needed to find a convenient way of firing them off.

The answer came from a somewhat unconventional source: his amplifier. [Steven] explains that many amplifiers feature a “Trigger Output”, which uses a standard stereo 3.5mm connector and sends a 12V pulse to connected device. This is generally used to turn on downstream devices when the amplifier switches to the respective input. It’s too short and not nearly powerful enough to close the actuators relays, but it’s easy enough to detect.

[Steven] uses a LeoStick microcontroller to wait for the pulse from the amplifier, and then use that to raise or lower the display depending on the selected input. There’s also a SPST momentary switch which can be used to trigger the actuator manually. Beyond the fact the linear actuator is a bit loud, he says the setup works very well and prevents him from having to start up his projector if he just wants to take a quick glance at what’s playing or program his DVR.

We don’t see many motorized display lifts like this anymore, not since wall mounted LCDs became popular anyway. But it’s still a cool effect, and today made quite a bit easier thanks to the fact that TVs and monitors no longer weigh as much as a small car.

[Thanks to Baldpower for the tip.]