An Open Hardware Modem For The Modern Era

Readers of a certain age will no doubt remember the external modems that used to sit next to their computers, with the madly flashing LEDs and cacophony of familiar squeals announcing your impending connection to a realm of infinite possibilities. By comparison, connecting to the Internet these days is about as exciting as flicking on the kitchen light. Perhaps even less so.

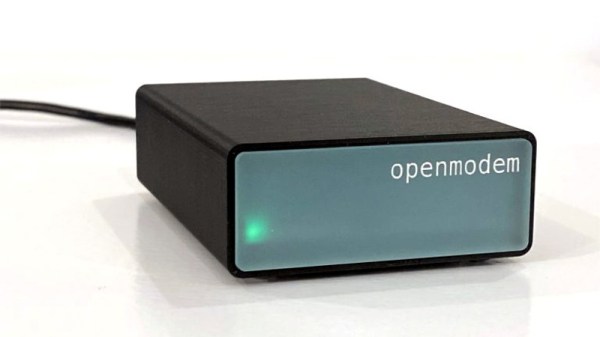
But while we don’t use them to connect our devices to the Internet anymore, that doesn’t mean the analog modem is completely without its use. The OpenModem by [Mark Qvist] is an open hardware and software audio frequency-shift keying (AFSK) modem that recalls some of the charm (and connection speeds) of those early devices.
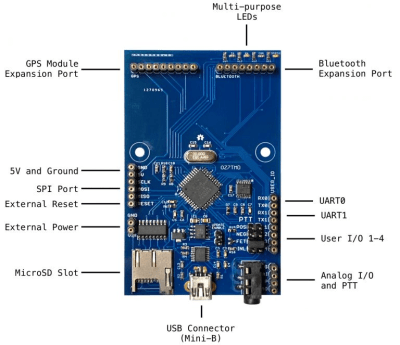
It’s intended primarily for packet radio communications, and as such is designed to tie into a radio’s Push-to-Talk functionality with a standard 3.5 mm jack connector. Support for AES-128 encryption means it will take a bit more than an RTL-SDR to eavesdrop on your communications. Though if you’re really worried about others listening in, the project page says you could even use the OpenModem over a wired connection as you would have in the old days.

If you just want a simple and reliable way to get a secure AFSK communication link going, the OpenModem looks like it would be a great choice. But more than that, it offers a compelling platform for learning and experimentation. The hardware is compatible with the Arduino IDE, so you can even write your own firmware should you want to spin up your own take on this classic communications device.

The OpenModem is the evolution of the MicroModem that [Mark] developed years ago, and it’s clear that the project has come a long way since then. Of course, if you’re more about the look than the underlying technology, you could always just put a WiFi access point into the case of an old analog modem.

[Thanks to Boofdas for the tip.]

Robot Listens To Commands–Literally

Where you might see a can, [Adam Kumpf] sees a robot. [Adam’s] robot (named [Canny]) doesn’t move around, but it does have expressive eyebrows, multicolored eyes, and a speaker for a mouth. What makes it interesting, though, is the fact that it receives audio commands via the headphones it wears. You can see [Canny] in action in the video below.

The headphones couple audio tones to [Canny’s] microphone using AFSK (audio frequency shift keying). [Canny] uses an opamp to bring the microphone level up and then uses a 567 PLL IC to decode the audio tones. [Adam] selected two clever frequencies for the mark and space (12345 Hz and 9876 Hz). In addition to being numerically entertaining, the frequencies are far enough apart to be easy to detect, pass through the headphones with no problem, and are not harmonically related.

Continue reading “Robot Listens To Commands–Literally”

MicroModem, For Data Transmission Explorations

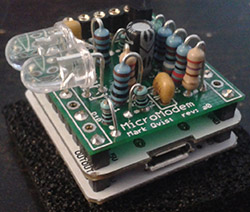
modemThem kids with those Arduinos don’t know what they’re missing. A serial connection is just too easy, and there’s so much fun to be had with low bandwidth modems. [Mark] made the MicroModem with this in mind. It’s a 1200 baud AFSK modem, capable of APRS, TCP/IP over SLIP, mesh network experimentations, and even long-range radio communication.
As the MicroModem is designed to be an introduction to digital wireless communication, it’s an extremely simple build using only 17 components on a board compatible with the Microduino. The software is built around something called MinimalProtocol1, a protocol that will be received by all other listening stations, features error correction, and automatic data compression. There’s also the ability to send TCP/IP over the link, which allowed [Mark] to load up our retro site at a blistering 1200 bps.

The code is extremely well documented, as seen on the Github for this project, with board files and even breadboard layouts included. [Mark] has three PCBs of his prototype left over, and he’s willing to give those out to other Hackaday readers who would like to give his modem a shot.

Decoding News Helicopter Signals On YouTube

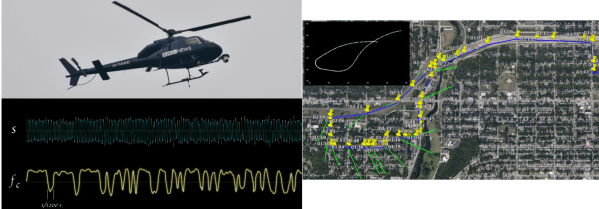
A serendipitous YouTube video recommendation led [Oona] to a raw copy of a news helicopter car chase video. While watching the video she noticed an odd sound playing from her left speaker. That was all it took to put [Oona] on the hunt. Decoding mystery signals is a bit of an obsession for her. We last saw [Oona] decoding radio signals for bus stop displays. She isolated the left audio channel and sent it through baudline software, which helped her determine it was a binary frequency shift keyed (BFSK) signal. A bit more work with SoX, and she had a 1200 baud bit stream.

Opening up the decoded file in a hex editor revealed the data. Packets were 47 bytes each. Most of the data packets was static. However, thee groups of bytes continuously changed. [Oona] decoded these numbers as latitude and longitude, and plotted the resulting data on Google Earth. Plotting her data against the position of the car in the video revealed a match. [Oona] had a complete track of the news helicopter as it followed the car. The telemetry data is in 7-bit Bell 202 ASCII, and is most likely part of an Interruptible Foldback (IFB) system used by the helicopter news crew and the studio producers. Click past the break for the YouTube video that started this all.

Continue reading “Decoding News Helicopter Signals On YouTube”

Fail Of The Week: AFSK Build Doomed By Rail Noise

fotw-afsk-rail-noise

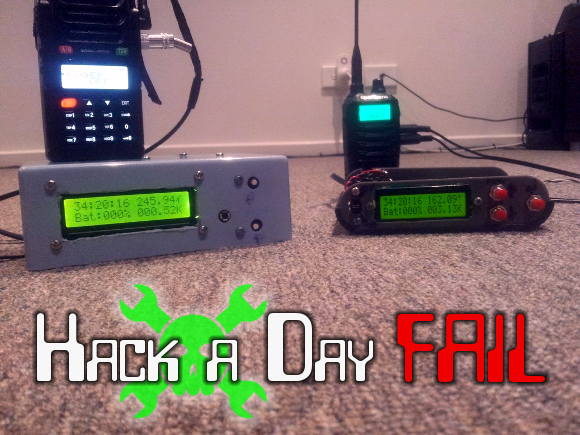
[Scott] and his buddies were having some fun with their handheld transmitters one day when they decided it was time to build some add-on hardware that could transmit and receive location data. They set their sights on a set of Audio Frequency Shift Keying units that could each encoded and decipher location from the counterpart.

The build got off to an easy start, centering around an Arduino board with a GPS module for capturing precise location data. Next it was time to implement AFSK. On the transmitting side this was done by bit banging the output pins. After a look at the resulting signals on an oscilloscope the team was able to tune the firmware for a pretty tight 1200 and 2200 Hz output. But trouble was brewing on the decoding side of the equation.

The first decoding attempt used the FreqMeasure library written by [Paul Stoffregen]. After no success they moved to a hardware solution in the form of the XR-2211 FSK Demodulator chip. It should have been simple, feed it the signals and read the digital output pins to capture the desired data. This is the point at which you need to click the project link at the top to soak in all of the gory details. Long story short, a noisy power rail was causing sporadic performance of this chip. By the time this issue was discovered interest had waned and the project was ditched as a failure. Was there a quick fix that could have salvaged it such as adding a filtering circuit for that chip? Let us know how you would get this back on track by leaving a comment below.

[Thanks Lewin]


2013-09-05-Hackaday-Fail-tips-tileFail of the Week is a Hackaday column which runs every Wednesday. Help keep the fun rolling by writing about your past failures and sending us a link to the story — or sending in links to fail write ups you find in your Internet travels.

A Low-Cost Modular High Altitude Balloon Tracker With Mesh Networked Sensors

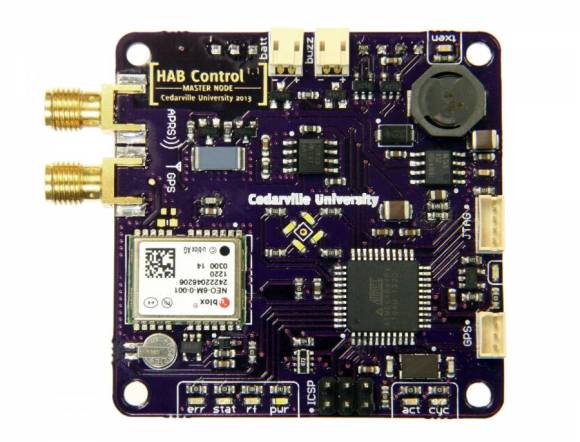
[Ethan] just tipped us about a project he and a few colleagues worked on last year for their senior design project. It’s a low-cost open hardware/software high altitude balloon tracker with sensors that form a mesh network with a master node. The latter (shown above) includes an ATmega644, an onboard GPS module (NEO-6M), a micro SD card slot, a 300mW APRS (144.39MHz) transmitter and finally headers to plug an XBee radio. This platform is therefore in charge of getting wireless data from the slave platforms, storing it in the uSD card while transmitting the balloon position via APRS along with other data. It’s interesting to note that to keep the design low-cost, they chose a relatively cheap analog radio module ($~40) and hacked together AFSK modulation of their output signal with hardware PWM outputs and a sine-wave lookup table.

The slave nodes are composed of ‘slave motherboards’ on which can be plugged several daughter-boards: geiger counters, atmospheric sensors, camera control/accelerometer boards. If you want to build your own system, be sure to check out this page which includes all the necessary instructions and resources.