BlinkM Smart Garage Door Opener

garage_indicator

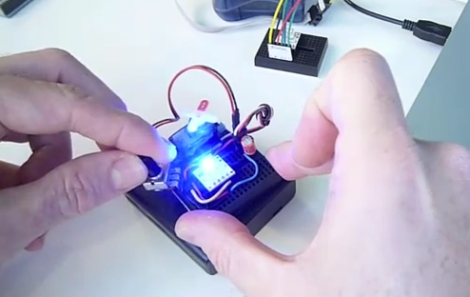
Calling Canada home, Hackaday reader [TheRafMan] has seen his share of bitterly cold winters. He also knows all too well how hard it is to get his cars started in the morning if somebody happens to leave the garage open. After the door was left open overnight for the second time this last winter, he decided that it was time to add an indicator inside the house that would alert him when the garage had not been closed .

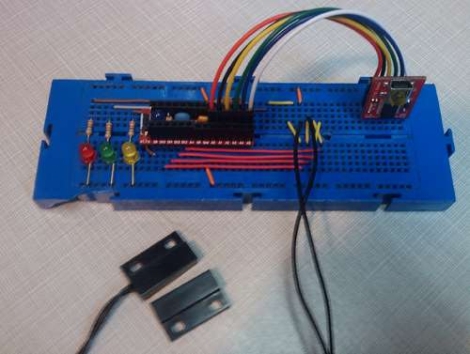
Inspired by our BlinkM Arduino coverage a short while back, his circuit incorporates a BlinkM as well as several other components he already had on hand. He disassembled the garage door switch situated in the house and fit the BlinkM into the switch box once he had finished programming it. A set of wires was run to the BlinkM, connecting it to both a power supply located in the garage as well as the magnetic switch he mounted on the door.

The end result is a simple and elegant indicator that leaves plenty of room for expansion. In the near future, he plans on adding an additional indicator strobe to let him know when the mail has arrived, not unlike this system we covered a few months ago.

Stick around to see a quick video demonstration of his garage door indicator in action.

Continue reading “BlinkM Smart Garage Door Opener”

Converting The BlinkM Into The World’s Tiniest Arduino

blinkm_arduino

The BlinkM “Smart LED” is a great little device on its own accord. It allows for complete control of its RGB LED using a built-in microcontroller, enabling the user to do a wide array of things that normally require PWM to accomplish. At just over half an inch square, this little device might also be the smallest Arduino on the market.

The BlinkM packs an ATiny85 micro controller, which allows it to be flashed with the Arduino bootloader thanks to the people over at the [High-Low Tech group at MIT]. They did some tweaking of the Arduino IDE configuration files and incorporated some core library code created by [Alessandro Saporetti] to get the job done – all of which is available on their site.

Once the code is uploaded to the BlinkM, you essentially have a micro Arduino running at 8MHz with a built in LED and 2 I/O lines (5 if you snip off the LED). It’s a great device to have on hand if you feel like a full-fledged Arduino would be overkill in your project.

Stick around to see a video tutorial of the reflashing process.

Continue reading “Converting The BlinkM Into The World’s Tiniest Arduino”

Interactive LED Block Wall

led_pixel_wall

[Dave Vondle] from IDEO Labs sent in the large LED pixel wall he built using BlinkM modules, an Arduino, and Flash to control it. The overall result is a blindingly bright, large, public display for people to interact with. The best part about the project is that [Dave Vondle] documents everything; from hardware to schematics to source code. Unfortunately, he was forced to remove the wall due to construction, but since every part of the project is open source, it lends itself to be easily recreated. I’m sure we’d all like to see a wireless controller hookup to play pong on the streets of Chicago.

4 LED RGB Controller

4rgbled-angle-rainbow_thumb (Custom)

[Steven] was inspired by the BlinkM and Shiftbrite modules, but really wanted something that could be controlled via RS232. He decided to build his own RGB LED module capable of PWM that fit his needs. He’s using a PIC16F628 microcontroller as the base. Each module has 4 individually addressable LEDs with multiple intensities for each color. The units can be daisy chained as well. The schematics and PCB files are available on his site for download.

[via Hacked Gadgets]

Wireless BlinkM Control

blinkm

[John] has been working with several BlinkM RGB devices. He’s created a controller to talk to each of the BlinkMs wirelessly and change their behavior. The core is an old relay tester box used to test telephone circuits. Each of its four knobs are connected to the analog inputs on the Arduino. The signal is transmitted using RFlink devices. Each BlinkM is paired with an ATmega168 and receiver. The control box also has a switch to send the same signal to all of the devices at the same time. The transmit and receive code are available on his site. You can find a video of it embedded below.

Continue reading “Wireless BlinkM Control”