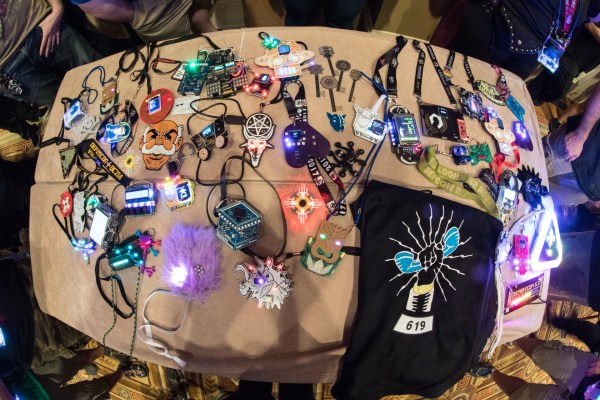
At this point, it’s not really correct to describe DEF CON as a single, gigantic conference for security, tech, and other ‘hacky’ activities. DEF CON is more of a collection of groups hosting villages, get-togethers, meetups, and parties where like-minded individuals share their time, company, electronic war stories, and whiskey. One of the largest groups measured by the number of rideable, inflatable unicorns is Queercon, a ‘conference within a conference’ dedicated to LGBT causes, a rager of a party, and a killer conference badge.
 The Queercon badge is always a work of art, and this year is no exception. Last year, we took a look at an immaculate squid/cuttlefish badge, and a few years before that, the Queercon badge was a beautiful 3.5″ floppy embedded with far too many RGB LEDs. This year’s Queercon badge was equally as amazing, quite literally pushing badgecraft into another dimension. The folks behind the Queercon badge just wrote up their postmortem on the badge, and it’s an excellent example of how to push PCBs into the space of human interaction.
The development of the 2017 Queercon badge had a really tough act to follow. Last year’s Blooper squid/cuttlefish badge is a high point in the world of functional PCB art, and by January of this year, the team didn’t know where to take badgecraft next.
In the end, the QC badge team decided on a ‘failsafe’ design — it wasn’t necessarily going to be the best idea, but the design would minimize risk and development time.
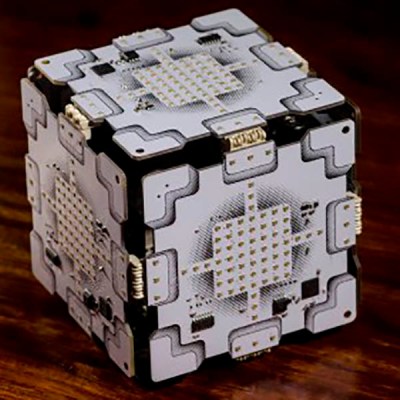
The two obvious features of this badge are an incredible number of tiny RGB LEDs, and very strange hermaphroditic edge connectors, allowing these badges to be plugged together into a panel of badges or a cube. What does this badge do? It blinks. If you have five friends, you can make something that looks like the Companion Cube from Portal.
Hardware
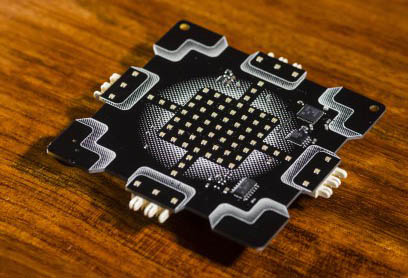
The killer feature for this badge is a vast array of RGB LEDs. Instead of going with WS2812s or APA101s, the Queercon badge team found simple, 0604 RGB LEDs, priced at about $0.026 a piece. There are 73 LEDs in total, all driven by the same TI LED driver used in previous years, combined with two shift registers and 15 FETs to control the LED commons. Although the LED driver is able to address all 219, and even though the badge is powered by a 32-bit ARM Cortex M3 microcontroller, this is pretty much the limit of how many LEDs can be controlled with this setup.
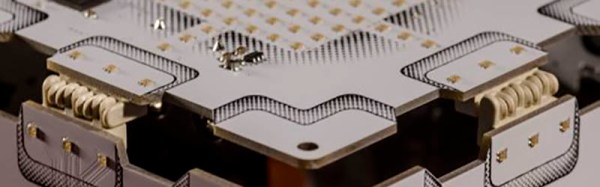
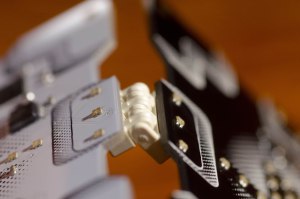 The Queercon badge always has a bit of interconnectedness built in, and this year is no exception. This year the badge uses a strange universal connector mounted along the four sides of the badge. When one badge is plugged into the other, they mate producing a ‘fabric’ of glowing badges. The range of motion on this connector allows for 180 degrees of rotation, but surprisingly most Queercon badge holders only assembled single planes of badges. It took a bit of cajoling from the badgemakers to get people to assemble a cube, and no other weird shapes were constructed out of multiple badges. If anyone likes this idea of interconnected badges, I would like to personally suggest equilateral triangles — this would allow for icosahedrons or hexagon-based solids.
A Game
A badge wouldn’t be complete without a game, and the Queercon badge has it in spades. The UI/UX/graphics designer [Jonathan] came up with a game loosely based on a game called ‘Alchemy’. Every badge comes loaded with a set of basic elements (air, fire, water, earth), represented as pixel art on the 7×7 RGB LED matrix. Combining these elements leads to even more elements — water plus fire equals beer, for example. Think of it as crafting in Minecraft, but with badges.
Starbucks was responsible for sponsoring a portion of Queercon this year, so ten special badges were loaded up with a fifth element: coffee. Elements derived from the coffee element required a Starbucks sponsor badge.
As we all expect from a DEF CON badge, there was a crypto challenge and contest. The full write up is available here, with the solution somewhat related to a cube of badges.
A Complete Success
When the badges came back from the fab house, the failure rate for this year’s Queercon badge was 0.7%. That’s an amazing yield for any independent hardware badge, and is honestly one of the most impressive aspects of this year’s Queercon. Failure modes during the con were probably related to spilling a drink on a badge, although there was a rash of failed CPUs. This is probably related to ESD, and during the con rework of failed badges was basically impossible because of drunk soldering in a dimly lit hotel room.
If there’s one failure of this year’s Queercon, it’s simply that it’s becoming too popular. From last year, Queercon saw 200% growth for the main party, which meant not everyone got a badge. That’s unfortunate, but plans are in the works for more inventory next year, providing DEF CON 26 isn’t cancelled, which it is. A shame, really.


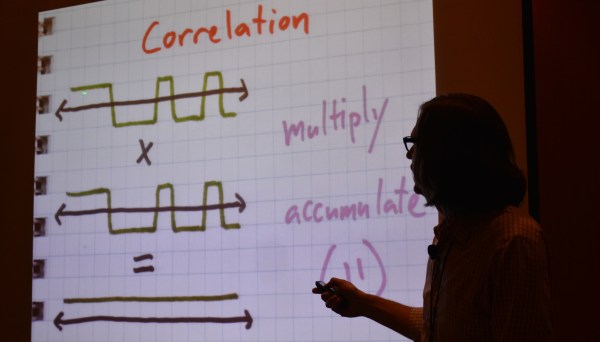


 [Michael] mentioned simple math tricks, and he wasn’t kidding. It’s easy to assume that someone as experienced in RF as he would have a different definition of ‘simple’ than we would. But truly, he’s using multiplication and subtraction to do an awful lot.

 The
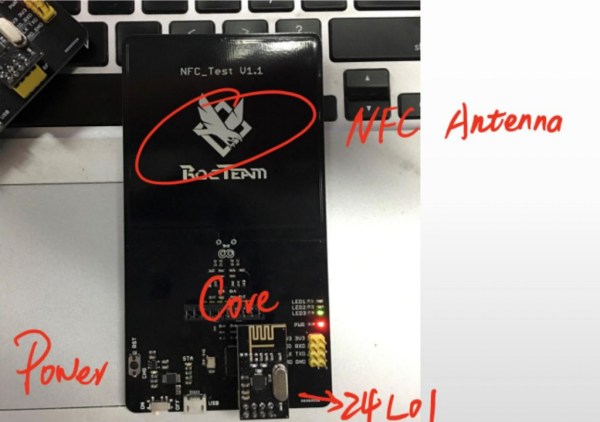
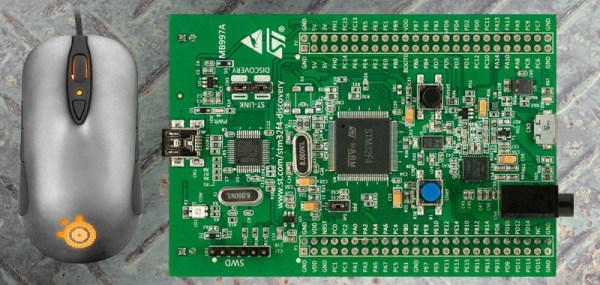
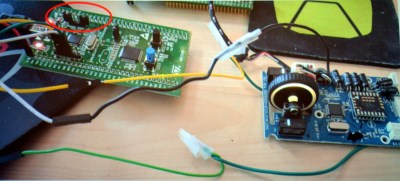
The 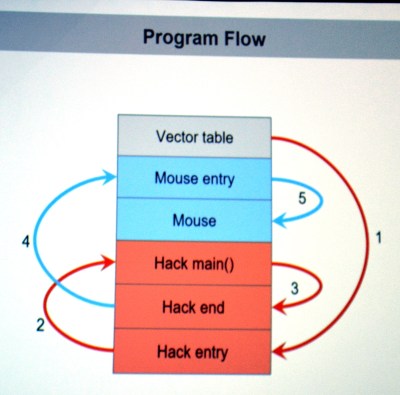 They first looked through the binary for a large block of zero values signifying unused space in flash. The injected firmware is designed to enumerate as a USB keyboard, open Notepad, then type out, save, and execute a PowerShell script before throwing back to the stock firmware (ensuring the mouse would still function as a mouse). Basically, this builds a