A digital caliper connected to a tablet computer

Custom Interface Adds USB And Wi-Fi To Digital Calipers

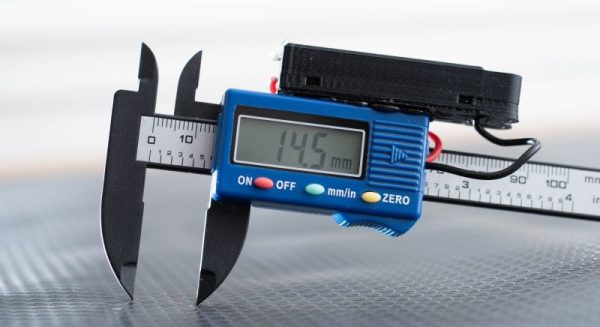
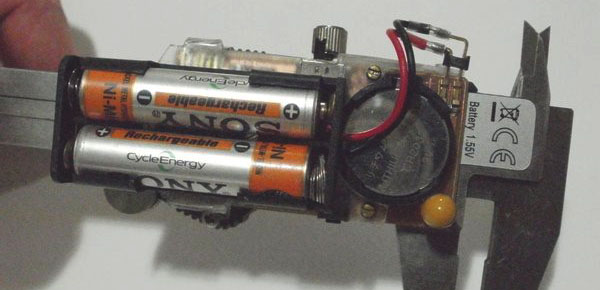
Although old-school machinists typically prefer the mechanical vernier scale on their trusty calipers, many users nowadays buy calipers with a digital readout. These models often come with additional features like differential measurements, or a “hold” function for those situations where you have to maneuver the instrument somewhere deep inside a machine. Another useful feature is a data link that lets you log your measurements on a computer directly instead of manually entering all the values.

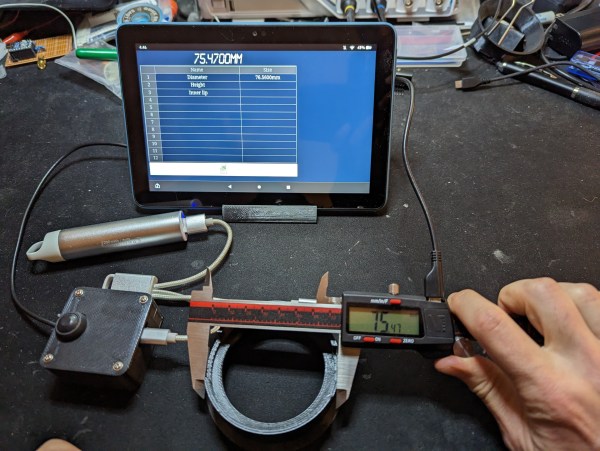
The VINCA-branded caliper that [Liba2k] bought has such a data link feature, which requires a USB adapter that’s sold separately. There is a micro-USB connector on the tool itself, but instead of implementing a USB interface, this is used to carry a proprietary serial protocol — a design decision that ought to be classified as a felony if you ask us. Rather than buying the official USB adapter, [Liba2k] decoded the protocol and built his own interface called VINCA Reader that can connect through either USB or Wi-Fi.

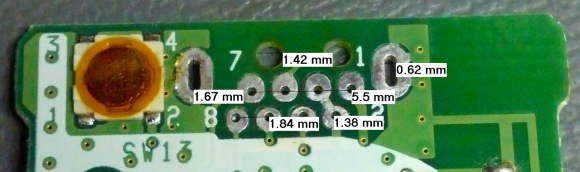
The serial format turned out to be a simple serial bus that clocks out 24 bits at a time. In order to adapt its 1.2 V signal level to the 3.3 V used by an ESP32, [Liba2k] designed a simple level shifter circuit using a handful of discrete components. The ESP can communicate with the computer through its Wi-Fi interface, for which [Liba2k] wrote a spreadsheet-like application; alternatively, an ordinary USB cable can be connected to emulate a keyboard for use with any other software.

With its added Wi-Fi feature, the VINCA Reader is actually more complete than the official USB adapter, and will probably be cheaper as well. The serial interface appears to be common to all caliper manufacturers, although many went for a more sensible connector than micro-USB. An automated readout system is particularly handy if you have to make thousands of similar measurements.

Cheap Caliper Hack Keeps ‘Em Running Longer

Many a hacker is a fan of the cheapest calipers on the market. Manufactured in China and priced low enough that they’re virtually disposable, they get a lot of jobs done in the world where clinical accuracy isn’t required. However, their batteries often die when left in a drawer for a long time. [Ben] was sick of that, and got to hacking.

The result was a quick-and-dirty mod that allows the calipers to be powered by a AAA battery. The average AAA cell has 5-10 times the capacity of the typical LR44 coin cells used in these devices.

[Ben] whipped this up with an eye to making it work rather than making it nice, so there are some shortcuts taken. The battery housing was 3D-printed on the lowest-quality settings that were viable, and it’s held to the calipers with hot glue. Similarly, bare wire ends were used instead of proper contacts, taking advantage of the battery being crammed in to make a good connection.

It’s a hack that will likely save [Ben] much frustration, as he’ll now rarely open his drawer to find his calipers dead. However, one [Pete Prodoehl] suggests another useful trick: store the calipers in the closed position with the lock screw tight to save them turning themselves on accidentally.

Whichever way you go, you’ve hopefully learned something today that will keep your cheap calipers working when you need them. Next, you might consider hacking them to capture data, too.

Custom Caliper Tracks For When You’re Going The Distance

The working principle of digital calipers is mysterious enough that we’d never think to dismantle, much less improve them, right? Well, think again, as [Limi DIY] retrofits the processing element onto a custom track, extending the calipers measurement distance to a whopping 650 mm. Combined with a prior project to extract the measurement data, the result makes for a working multi-axis digital readout, a handy device for machine tools like a manual lathe or milling machine.

Digital calipers operate on the principle of measuring an array of variable capacitors. If we scratch our heads and look back at our physics notes, we’ll recall that the capacitance between two parallel conductive plates is linearly proportional to the surface area. By fixing one dimension of both plates and by sliding one plate over the other, we effectively change the area, giving ourselves a simple linear displacement sensor! (There are some classy error-correcting techniques too, and this [PDF] is a great place to look for more details.)

The theory takeaway is that this array of parallel plates can be embedded directly into a printed circuit board. We just need to know the dimensions. After some close measurement work, [Limi DIY] extracted the crucial measurements and fabbed a PCB with the pattern duplicated over 650 mm. After retrofitting the original processing element onto this new track, they had a working measurement device that’s far longer than the original!

If you’ve ever been tempted to disassemble your calipers but too nervous to bite off the investment, now’s your chance to follow along as [Lima DIY] demonstrates the gratuitous disassembly process for you in video format. And the fruits of their labor is also captured on a project post that includes the key dimensions if you’re looking to do the same thing.

If you’re looking for other ways to improve your calipers, why not start by giving them a major battery life boost.

Thanks to [absd] via [Jubilee Discord] for the tip!

Continue reading “Custom Caliper Tracks For When You’re Going The Distance”

Ask Hackaday: What Tools Do You Reach For First?

Let’s face it, in your workshop there are convenient tools, and there are quality tools, but so often they aren’t both. Think back to the tools you reach for first. Very often for me, speed and convenience win out. I don’t want to look too hard for that drill or saw, and want them to work as expected when I reach for them. At the same time, there are some tools that simply must be stored away, and can’t perch on my workbench forever or sit on a shelf.

It really is a balancing act sometimes. I don’t have a sure fire formula for when to break out the expensive tools, and what jobs are easy with the less expensive. I’ll lay out some of my most-often utilized tools in my arsenal, then I want to hear from you on your own faves.

Continue reading “Ask Hackaday: What Tools Do You Reach For First?”

Making An Inexpensive DRO

[Andrew] wanted a digital readout (DRO) for his mini lathe and mini mill, but found that buying even one DRO cost as much as either of his machines. The solution? You guessed it, he built his own for cheap, using inexpensive digital calipers purchased off eBay.

The DRO he created features a touch screen with a menu system running on an LPCXpresso, while smaller OLED screens serve as labels for the 7-segment displays to the right. The DRO switches back and forth between the lathe and mill, and while the software isn’t done, [Andrew] hopes to be able to transfer measurements from one machine to the other.

In a very sweet touch, [Andrew] hacked cheap digital calipers to provide measurements for each axis, where they provide a resolution of 0.01mm. There are six daughter boards, one for each caliper, and each has a PIC that converts from serial to I2C, freeing the main firmware from dealing with six separate data streams.

The DRO doesn’t have a case, [Andrew] has it positioned out of chip-range from either machine.

A previous DRO we featured in 2012 used an Android tablet as its display.

Giving Digital Calipers Bluetooth

[Fede]’s wife uses a pair of digital calipers to take measurements of fruits, leaves, and stems as part of her field research. Usually this means taking a measurement and writing it down in a log book. All things must be digitized, so [Fede] came up with a way to wirelessly log data off a pair of cheap Chinese calipers with a custom-made Bluetooth circuit.

Most of these cheap Chinese digital calipers already have a serial output, so [Fede] only needed to build a circuit to take the serial output and dump it in to an off-the-shelf Bluetooth module. He fabbed a custom circuit board for this, and after seeing the increased battery drain from the Bluetooth module, decided to add an external battery pack.

In addition to etching his own board for sending the serial output of the calipers to a Bluetooth module, [Fede] also put together a custom flex circuit to connect the two boards. It’s just a small bit of brass glued to a transparency sheet etched with ferric chloride, but the end result looks amazingly professional for something whipped up in a home lab.

Reverse Engineering Salvaged Part Footprints

reverse-engineering-component-footprints

So you just pulled a fancy component off of a board from some broken electronics and you want to use it in your own project. What if the data sheet you found for it doesn’t include measurements for the footprint? Sure, you could pull out your digital calipers, but look at the measurements in the image above. How the heck are you supposed to accurately measure that? [Steve] found an easy answer for this problem. He uses microscope software to process an image of the board.

One common task when working with a microscope is measuring the items which are being viewed under magnification. [Steve] harnessed the power of a piece of free software called MiCam. One of its features is the ability to select an area of the photograph so serve as the measuring stick. To get the labels seen in the image above he selected the left and right edges of the board as the legend. He used his digital calipers to get a precise measurement of this area, then let the software automatically calculate the rest of the distances which he selected with his cursor.

MiCam is written for Windows machines. If you know of Linux or OSX alternatives please let us know in the comments.