Upgrading The Batteries In A BMW I3

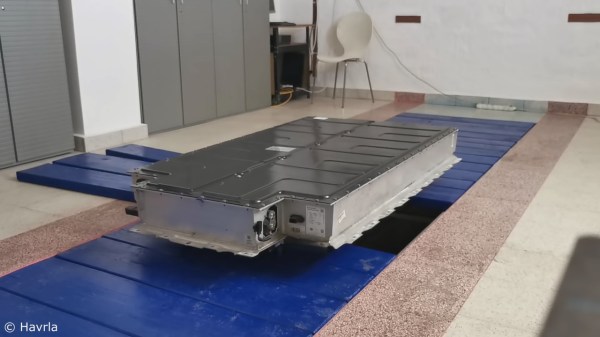
The BMW i3 debuted on the market in late 2013, one of the brand’s first electric cars. Also available with an optional range-extending engine, early models featured a 60 Ah battery providing up to 130km range on a full charge. However, times have changed, and over the years, BMW have updated the model with larger capacity batteries over the years. So what does it take to retrofit an older model with the newer, fatter, juicer 120 Ah pack?

It’s all helpfully laid out in a video by [Daniel], who notes that it’s not a job for the faint of heart or poorly equipped. The good news is that, mechanically, the newer batteries have the same external dimensions as the older packs, meaning they can be bolted in without requiring any cutting, welding or, adapters. But that’s about it for the good news. The batteries are cooled by the air conditioning system, meaning that removal and replacement means draining the system of refrigerant using highly expensive specialised hardware. Additionally, many batteries in crashed cars are disabled when the airbags are triggered for safety reasons, requiring unlocking through BMW’s proprietary software or replacement of the internal battery controller. Then there’s the usual laundry list of gradual changes that happen across any automotive line, meaning that certain model years and trim packages can have incompatible plugs and connectors or other features.

Overall, it can be quite a bit of work to do, and with the tools required, something that needs the services of a dedicated mechanic’s workshop. However, find an experienced shop that regularly works with EVs, and you might find they can facilitate the upgrade for you without too much fuss. We’ve seen [Daniel] tackle upgrades before, such as a much easier swap on the Nissan Leaf. Video after the break.

Continue reading “Upgrading The Batteries In A BMW I3”

Where There’s Smoke, There’s A Knockoff 3D Printer

These days, it’s possible to buy clones of popular 3D printers from China for satisfyingly low prices. As always, you get what you pay for, and while usable, often they require some modification to reach their full potential. [g3ggo] recently laid down €270 for a clone of the Prusa i3 by Geeetech, knowing it would require some modifications for safety and performance.

First on the bill was a wobbly Z-axis, which was dealt with by printing some new parts designed to fix this issue which have already been developed by the community. Forums are your friend here – often an enterprising user will have already developed fixes for the most common issues, and if they haven’t, you can always step up to be the hero yourself. There was a darker problem lurking inside, though.

[g3ggo] began to wonder why the MOSFETs for the hot end were running so hot. It turned out to be an issue of gate drive – the FETs were only being driven with 5V, which for the given part, wasn’t enough to reach its lowest R_DS(on) and thus was causing the overheating issue. It gets worse, though – the heatsinks on the MOSFETs were bolted on directly without insulation, and sitting fractions of a millimeter above traces on the PCB. Unfortunately, with a small scratch to the soldermask, this caused a short circuit, destroying the hot end and MOSFETs and narrowly avoiding a fire. This is why you never leave 3D printers unattended.

The fix? Replacing the MOSFETs with a part that could deal with a 5V gate drive was the first step, followed by using insulating pads & glue to stop the heatsinks contacting the PCB. Now with the cooler running MOSFETs, there’s less chance of fire, and the mainboard’s cooling fan isn’t even required anymore. Overall, for a small investment in time and parts, [g3ggo] now has a useful 3D printer and learned something along the way. Solid effort!

Prusa Releases 4-Extruder Upgrade

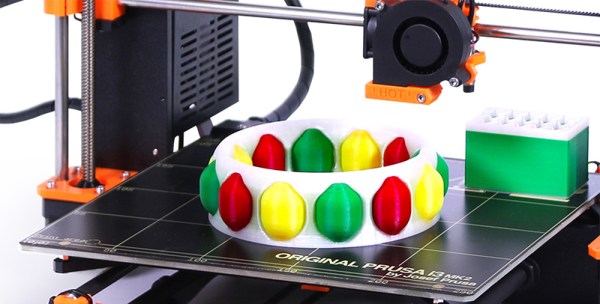
Let’s talk multi-material printing on desktop 3D printers. There are a lot of problems when printing in more than one color. The easiest way to do this is simply to add another extruder and hotend to a printer, but this reduces the build volume, adds more mass to the part of the printer that doesn’t need any more mass, and making sure each nozzle is at the correct Z-height is difficult. The best solution for multi-material printing is some sort of mixing hotend that only squirts plastic from one nozzle, fed by a Bowden system.

[Prusa], the man, not the printer, has just released a multi-material upgrade for the Prusa i3 mk2. This upgrade allows the i3 mk2 to print in four colors using only one hotend, and does it in a way that allows anyone to turn their printer into a multi-material powerhouse.

The basic idea behind this multi-material upgrade is a four-way Y-shaped filament path. Each color of filament is loaded into a separate extruder, and when the material is changed the currently ‘active’ filament is retracted out of the heater block to just before where the filament paths cross. After the filament is swapped in the hotend, the remainder of the previous color of filament is squirted out onto a small (3x5cm) tower.

Because this is an upgrade to the i3 mk2, Prusa needed a way to add three additional stepper motors to the build without having to replace the printer’s electronics board. He’s doing this with an SSR-based multiplexer that allows one stepper motor output and a few GPIOs to control four motors.

If you have an i3 mk2, a four- material upgrade for your printer will be available for $249 USD in a few months. That means a full color, four-extruder i3 mk 2 costs less than $1000 USD, a price no other multi-material printer can touch.

You can check out [Prusa’s] video of the multi-material upgrade below. The printer and the man will be touring the US for Maker Faire and Open Hardware Summit, and you can bet we’re going to get some video of this multi-material printer in action.

Continue reading “Prusa Releases 4-Extruder Upgrade”

Wanhao Duplicator I3 Should Put An End To “Cheapest Printer” Kickstarters

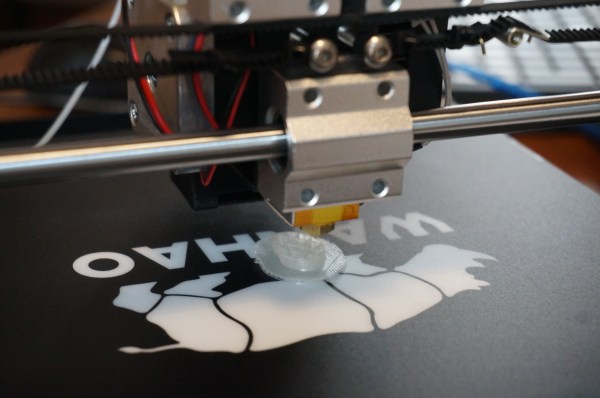
Is the Wanhao Duplicator the best printer on the market? Not at all. Is it a contender for best low-price printer?Definitely. If you consider it a low priced kit printer instead of a finished product then it’s possible that, in its price class, it is hands down the best out there.

For somewhere between 300 and 500 dollars, the Duplicator is a hell of a printer. Also selling under the name Cocoon and Maker Select, the printer is a thin folded sheet steel frame clone of the Prusa i3. I opened the box expecting the most flagrant cost cutting I could imagine. I figured the steel would be paper thin. The holes wouldn’t line up. I expected the connections to be improperly terminated. I expected a fire.

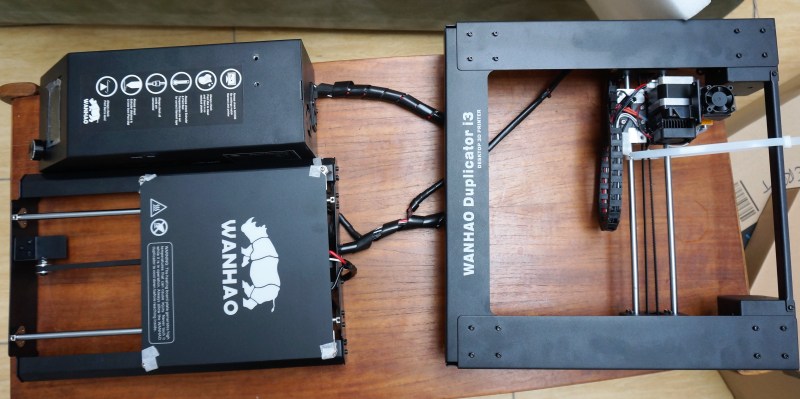
The Duplicator six screws away from being fully assembled. When the manual says find a 1m x 1m flat area to work in it's not kidding. This table was too small.
The Duplicator six screws away from being fully assembled. When the manual says find a 1m x 1m flat area to work in it’s not kidding. This table was too small.

What I got was up and printing in under an hour. What I got was something designed by someone who cares, but with an obvious cost goal. As a bonus, it even printed pretty well. As mentioned, the basic shape of the frame is that of a Prusa i3. A horizontal bit holds the bed and y movement. A vertical bit is attached to the middle of that, making a T. It holds the X, Z, and nozzle.

Continue reading “Wanhao Duplicator I3 Should Put An End To “Cheapest Printer” Kickstarters”

Prusa Shows Us The New I3 MK2 3D Printer And Where The Community Is Headed

Josef Prusa’s designs have always been trustworthy. He has a talent for scouring the body of work out there in the RepRap community, finding the most valuable innovations, and then blending them together along with some innovations of his own into something greater than the sum of its parts. So, it’s not hard to say, that once a feature shows up in one of his printers, it is the direction that printers are going. With the latest version of the often imitated Prusa i3 design, we can see what’s next.

Continue reading “Prusa Shows Us The New I3 MK2 3D Printer And Where The Community Is Headed”

My precision mechanism adjuster. NSFW. As in if you use one of these to adjust a precision mechanism at work you'll get fired. Home use is fine tho;)

Fail Of The Week: My 3D Printer Upgrade

After years of cutting my hands on the exposed threads of my Prusa Mendel i2, it was time for a long overdue upgrade. I didn’t want to just buy a new printer because it’s no fun. So, I decided to buy a new frame for my printer. I settled on the P3Steel, a laser cut steel version of the Prusa i3. It doesn’t suffer from the potential squaring problems of the vanilla i3 and the steel makes it less wobbly than the acrylic or wood framed printers of similar designs.

My trusty i2. Very sharp. It... uh.. grew organically.
My trusty i2. Very sharp. It… uh.. grew organically.

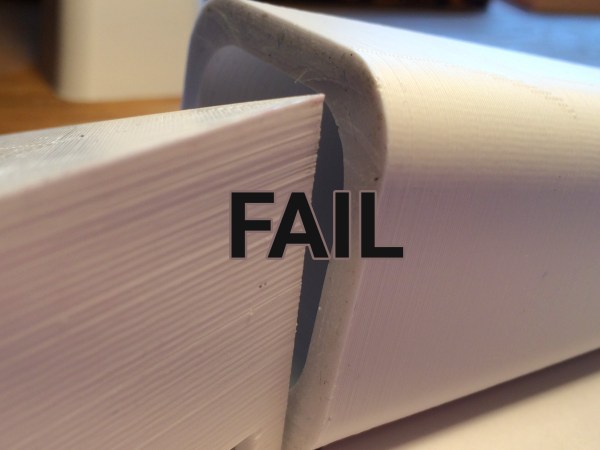
I expected a huge increase in reliability and print quality from my new frame. I wanted less time fiddling with it and more time printing. My biggest hope was that switching to the M5 threaded screw instead of the M8 the i2 used would boost my z-layer accuracy. I got my old printer working just long enough to print out the parts for my new one, and gleefully assembled my new printer.

I didn’t wait until all the electronics were nicely mounted. No. It was time. I fired it up. I was expecting the squarest, quietest, and most accurate print with breathtakingly aligned z-layers. I did not get any of that. There was a definite and visible ripple all along my print. My first inclination was that I was over-extruding. Certainly my shiny new mechanics could not be at fault. Plus, I built this printer, and I am a good printer builder who knows what he’s doing. Over-extruding looks very much like a problem with the Z-axis. So, I tuned my extrusion until it was perfect.

Continue reading “Fail Of The Week: My 3D Printer Upgrade”

redbull creation competition

2015 RedBull Creation Competition Is Underway!

I’m here as a judge at the 2015 RedBull Creation Competition in Detroit — it’s a super intense 72 hour build off where makers, engineers, and artists can come to show us what they’ve got. This year’s theme is pretty broad: Serious Fun.

The event is at Recycle Here and is open to the public, so if you’re in the area, come check it out! A massive recycling depot warehouse has been temporarily transformed into a giant workshop. Teams have access to some serious tools including heavy duty welding equipment, industrial forming tools like pipe benders, brake presses, your standard drill presses, cutting equipment and of course laser cutters and 3D printers.

There are two competition categories — Open Class, which was free for anyone to join with a team, and Invite Only. The six Invite Only teams are working in the Recycle Here workshop, and the teams competing in the open category are scattered across the city, making use of their own workshops or hackerspaces. The theme was only just announced yesterday, and the 72 hour countdown has been ticking away ever since.  I can’t wait to see what awesome interactive projects can be built in time to show off to the public this weekend.

Continue reading “2015 RedBull Creation Competition Is Underway!”