1980’s Ingenuity Yields Mechanical Intervalometer

DIY Intervalometer

Let’s go back in time to the 1980’s, when shoulder pads were in vogue and the flux capacitor was first invented. New apartment housing was being built in [Vince’s] neighborhood, and he wanted some time-lapse footage of the construction. He had recently inherited an Elmo Super-8mm film camera that featured a remote control port and a speed selector. [Vince] figured he might be able to build his own intervalometer get some time-lapse footage of the construction. He was right.

An intervalometer is a device which counts intervals of time. These are commonly used in photography for taking time-lapse photos. You can configure the intervalometer to take a photo every few seconds, minutes, hours, etc. This photographic technique is great when you want see changes in a process that would normally be very subtle to the human eye. In this case, construction.

[Vince] started out by building his own remote control switch for the camera. A simple paddle-style momentary micro switch worked perfectly. After configuring the camera speed setting to “1”, he found that by pressing the remote button he could capture one single frame. Now all he needed was a way to press the button automatically every so often.

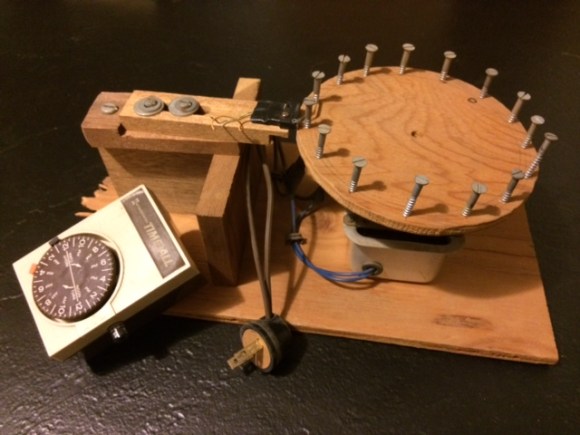
Being mechanically minded, [Vince] opted to build a mechanical solution rather than an electronic circuit. He first purchased a grandfather clock mechanism that had the biggest motor he could find. He then purchased a flange that allowed him to mount a custom-made wooden disk to the end of the minute hand’s axle. This resulted in a wheel that would spin exactly once per hour.

He then screwed 15 wood screws around the edge of the wheel, placed exactly 24 degrees apart. The custom paddle switch and motor assembly were mounted to each other in such a way that the wood screws would press the micro switch as they went by. The end result was a device that would automatically press the micro switch 15 times per hour. Continue reading “1980’s Ingenuity Yields Mechanical Intervalometer”

Clever Reed Switch Catches Thief

When [Abhimanyu Kumar] noticed money going missing from his small bookshop, he decided to set up a little trap to catch the thief.

The problem was that the bookshop’s money was stored inside a cupboard in their house (back end of the shop), which meant that the culprit was likely one of their own employees. They already have a CCTV system installed in the actual store, and although he could simply add another camera in the house, [Abhimanyu] didn’t really want to do that.

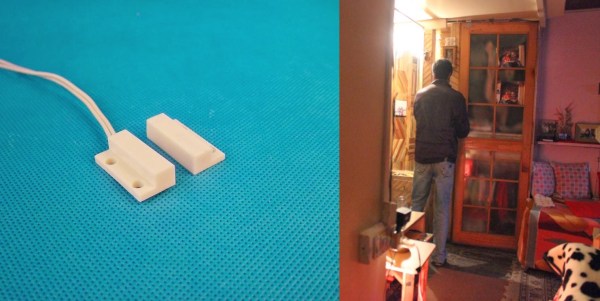
He instead devised a simple security trap: dubbed the Jugaad Security System. In Hindi, Jugaad quite literally means “hack”. He added a small magnetic reed switch to the cupboard where the money is stored—well, was stored—which is then linked directly to an intervalometer. This then connects to an inconspicuous DSLR sitting on one of the work benches. He aimed the camera at the cupboard and, in case the lights are out when the system is tripped, set it to an extremely high ISO.

Continue reading “Clever Reed Switch Catches Thief”

ShuttAVR Can Snap A Pic Or Serve As An Intervalometer

shuttAVR-intervalometer-hack

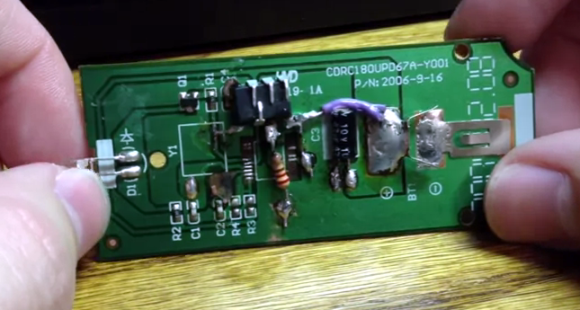
This project started as a simple microcontroller replacement on this IR camera remote control PCB. But the soldering job went rather badly for [Balthamos] so he changed things up and designed his own simple AVR remote shutter release and intervalometer.

The DIP chip seen with most of its legs bent backwards is the ATtiny25 which makes the system work. It’s patched into the traces for the battery connections, button (on the other side of the board) and the IR LED he’s pinching with his left hand. Point it at a Cannon camera and push the button to snap a photo. But as you can see in the clip after the break it also serves as an intervalometer; letting him take several pictures with a user-defined pause between each. That mode is selected by first pressing and holding the button. Once released the chip waits for a second button press to register the delay. The new circuit still fits in the original case after just a bit of alteration to it.

Continue reading “ShuttAVR Can Snap A Pic Or Serve As An Intervalometer”

DIY Intervalometer Uses A Great Looking Enclosure

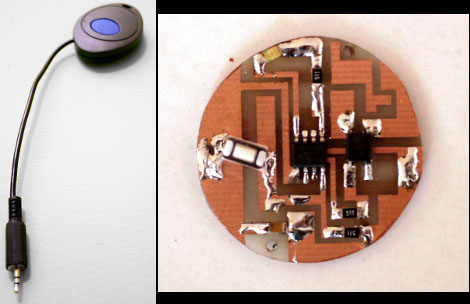
That finished look for your project is all about the enclosure you find to host it. We think [Punge] really did a great job with the case for this DIY intervalometer. The build section of the project page links to the company that makes the enclosures. They’re meant to host round PCBs with several options for button configuration. Combine this with enough space for a coin cell and you’ve got a great looking custom device.

The intervalometer itself is much like others we’ve seen. It uses an audio-jack connector to control the camera. You have the option of using a three or four contact version depending on what your camera supports. The PIC 12F683 uses an optocoupler with a built-in transistor to do the switching. A single button seen at nine o’clock on the board above is all it takes to start the device off. Press and hold once to wake it up, then wait for your desired interval and press the button again to start the timed shots.

You’ll notice that there is no programming head in this design. A separate board was etched to attach the PicKit, with the surface mount chip just held in place during programming.

Checking The Accuracy Of Fake Watches

Since [th3badwolf] realized a wrist watch is the ultimate men’s fashion accessory, he’s been trolling around eBay looking for a nice looking, but still inexpensive wearable chronometer. The Fauxlex brand isn’t normally regarded for accurate time keeping, so he decided measure the accuracy of his off-brand watches in a really clever way.

[th3badwolf] had a camera with a built-in intervalometer lying around and figured if the camera was set to take one picture a minute, the second hand would stay still while the minute and hour hands moved. An hour-long test confirmed his theory and he pointed his cameras towards his knock-off watches.

In the resulting time-lapse video available after the break, [th3badwolf] calculated that the first and third watches lose about 24 seconds a day. He attributes this fact to the watches having the same clockworks. The second watch gains nearly three minutes a day, and he’s trying to send that one back to the supplier. We’re not sure how that will end up, but at least [th3badwolf] has two reasonably accurate watches now.

Continue reading “Checking The Accuracy Of Fake Watches”

Take A Picture Of A Bang With A Camera Sound Trigger

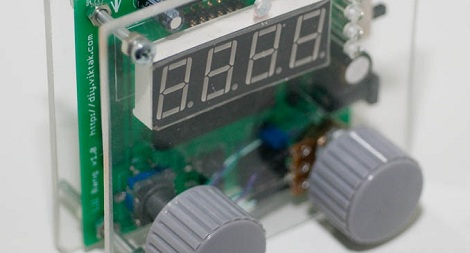
We’ve featured dozens of digital camera triggers over the years. Very rarely do we come across one as well designed as [Viktor]’s ‘lil bang sound trigger that snaps a picture whenever a microphone picks up a loud noise.

[Viktor]’s build is based around a PIC16F microcontroller with an LM386 amp connected to a microphone. On the front of the device, the right knob controls the sensitivity of the microphone and the left knob sets the delay between detection and the trigger.

The ‘lil bang trigger connects to the camera through an opto-isolated 3.5 mm jack that is compatible with all the fancy Canon and Nikon DSLRs. The delay between sound detection can be changed from 0 to 255 ms, allowing for precise control over a high-speed photography rig.

All this work comes after the  light-activated trigger [Viktor] built for taking pictures of lightning. The sound-activated version wouldn’t work for lightning pics, but he thinks it could be useful for collision or explosion photographic studies. Check out the video of [Viktor]’s ‘lil Bang in action after the break.

Continue reading “Take A Picture Of A Bang With A Camera Sound Trigger”

Build An Intervalometer With These Simple Fabrication Techniques

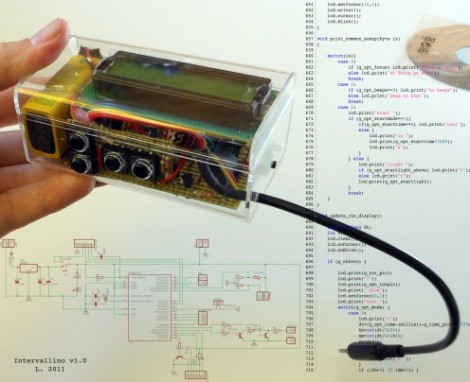
[L] just finished building this intervalometer and his verbose documentation of the project has a little bit of everything. The fabrication uses common prototyping materials, and simple skills that are easy to master even for the beginner.

The hardware is based around an ATmega8 microcontroller. After snooping around the Internet [L] wanted to see if the voltage divider based focus and shutter commands that are present in some camera remote shutter controls would work for his model. Investigation with a commercial shutter release showed him how it was done, so he incorporated that into his design. When it comes to firmware for the device we really like his explanation of the menu system. There’s a lot of settings and he did a great job of planning the user interface to make them all work on the finished product.

The schematic and board layout were done with Eagle. During the layout process he made choices for easy assembly using strip board, and even walks us through the steps when cutting the traces and adding jumper wires. It’s nicely finished in this clear plastic case and demonstrated in the video after the break.

Continue reading “Build An Intervalometer With These Simple Fabrication Techniques”