Power Sipping Master Keeps Slave Clock On Time

Few things are as infuriating as clocks that are not synchronized. It’s frustrating when the clock on the range and the clock on the microwave act like they’re in time zones that are one minute apart. Now picture that same issue over dozens of clocks in a train station, or hundreds in a school or factory. It’s no wonder that slave clocks, which advance on signals from a master clock, were developed.

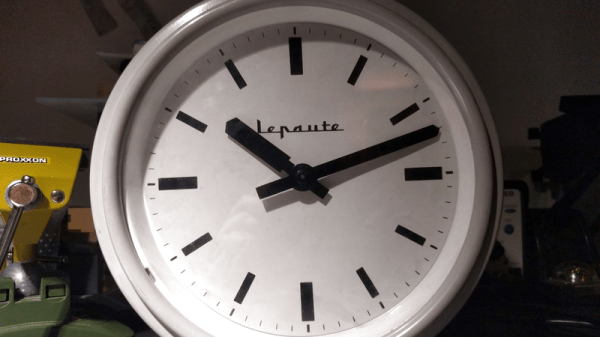
When a pair of vintage Lepaute slave clocks made their way to [melka], he knew just what to do – build his own master clock to keep the slave on track. This particularly stylish slave clock uses pulses of alternating polarity every 30 seconds and will work on 1.5-volt pulses, which let [melka] meet his design goal of running for a year off a single AA battery. To keep the power needs low, [melka] relies on the RTC to wake up the MSP430 every second to increment a counter. When it hits 30, a pulse is sent to the clock’s motor through an H-bridge; the MCU alternates the polarity of every other pulse to advance the clock.

It’s not immediately clear how the clock is set; we recall the slave clocks in high school rapidly advancing for Daylight Saving adjustments, so we assume [melka] has provided some way of pulsing the clock quickly to set the time. Regardless, it’s a good lesson in low-power design. And be sure to check out this PIC-based master clock replacement, too.

VFD 430 Clock, NYC Style

[Daniel] seems to have a lot of time on his hands for building clocks, and that’s fine by us. For his latest build, he used a vacuum fluorescent display (VFD) to display hours, minutes, and seconds using an MSP430 to drive it.

Like the analog meter clock he built recently, there is no RTC. Instead, [Daniel] used the 430’s watchdog timer to generate 1Hz interrupts from the 430’s 32KHz clock. [Daniel] wanted to try Manhattan-style board construction for this project, so he built each module on a punch-cut stripboard island and super glued them to a copper-clad board. We have to agree with [Daniel] that the bare-bones construction is a nice complement to the aesthetic of the VFD.

[Daniel] set out to avoid using a VFD display driver, but each of the segments require +50V. He ran through a couple of drawing board ideas, such as using 17 transistors to drive them all before eventually settling on the MAX6921 VFD driver. The +50V comes from an open-loop boost converter he built that steps up from 12V.

The time is set with two interrupt-triggering buttons that use the shift register example from TI as a jumping off point. All of the code is available on [Daniel]’s site. Stick around after the break for a quick demo of the clock.

Continue reading “VFD 430 Clock, NYC Style”

Current Meter Shows Current Time

This isn’t the first of its type, but [Daniel]’s MSP430 based Analog Gauge Clock certainly ticks off the “hack” quotient. He admits an earlier Voltmeter Clock we featured a while back inspired him to build his version.

[Daniel] was taking an Embedded systems class, and needed to build an MSP430G2553 microcontroller based final project. Which is why he decided to implement the real time clock using the micro-controller itself, instead of using an external RTC module. This also simplified the hardware used – the microcontroller, a crystal, three analog ammeters, and a few passives were all that he needed. Other than the Ammeters, everything else came from his parts bin. Fresh face plates were put on the ammeters, and the circuit was assembled on a piece of strip board. A piece of bent steel plate served as the housing.

The interesting part is the software. He wrote all of it in bare C, without resorting to using the Energia IDE. He walks through all of the important parts of his code on his blog post. Setting load capacitance for the timing crystal was important, so he experimented with an oscilloscope to see which value worked best. And TI’s Application Note on MSP430 32-kHz Crystal Oscillators (PDF) proved to be a useful resource. Three PWM output’s run the three ammeters which indicate hours, minutes and seconds. Push-button switches let him set the clock. See a short demo of the clock in the video below.

Continue reading “Current Meter Shows Current Time”

IR Remote For Smartphone Via Bluetooth Adapter

Quite often, the raison d’être for building a project is to learn and hone one’s skills. In which case it doesn’t matter if the end use seems a bit frivolous. [indiantinker] built BlueIR, a device to control Bluetooth A2DP devices using an archaic IR Remote using a BT-Aux Adapter.

Sounds convoluted? Let’s try again. He uses an old IR remote to send data to a MSP430-series  microcontroller, which is connected over serial to a USB Bluetooth Receiver Adapter, which in turn is connected to a set of wired speakers. The Bluetooth adapter is paired with his phone. The IR remote allows him to control the audio player commands on his phone from a far greater distance compared to the bluetooth adapter.

He begins by breaking open the BT adapter to find that the markings on the chip have been erased. What he did find instead, were two pads promisingly marked as TX and RX, but he still did not know the baud rate or the command set. Digging around the Internet, he figured out that the chip used was the OVC3860 Bluetooth 2.0 + EDR Stereo Audio Processor and found its list of AT Commands. After some tests using a serial console he figured out that it worked at 115600 baud. Soon enough, he had it hooked up to the MSP430 Launchpad and was able to communicate. Next up, he built a small PCB, using the toner transfer method. The board consists of the MSP430G2553 micro controller, IR receiver, LED, some decoupling capacitors and a few pull up resistors. He leached power from the 3.3V regulator on the host BT adapter. The assembled PCB is piggy backed on top of the BT adapter for the time being, and a 3d printed housing is on his to-do list. His code is available at the BlueIR Github repo and the video below shows it in action.

Continue reading “IR Remote For Smartphone Via Bluetooth Adapter”

RoomMote home automation

RoomMote, A DIY Remote For Your Room Project

[Rohit] wrote in to tell us about a project he has created. Like most projects, his solves a problem. Sometimes while sleeping, a mosquito will infiltrate his room. He has a mosquito repellent machine but there are 2 problems, he has to get up to turn it on/off and it smells bad when in use. [Rohit] only needed a remote-controlled mosquito repelling machine but decided to make a 6 channel system he calls the RoomMote.

From the beginning, the plan was to use an old Sony TV remote to do the transmitting. The receiver unit was completely made from scratch. [Rohit] designed his own circuit around a surface mount MSP430 chip and made a really nice looking PCB to fit inside a project box he had kicking around. The MSP430 chip was programmed to turn relays on and off based on the signals received from the Sony remote.  These relays are inside an electrical box and control AC outlets. Just plug in your light, radio or mosquito repellent into the appropriate outlet for wireless control. Code for the MSP430 is made available on [Rohit’s] project page for anyone wanting to make something similar.

In addition to the relays, there is an RGB LED strip attached to the custom circuit board. By using more of the Sony remote’s buttons, the LED strip can output 6 pre-programmed colors, some mood lighting for the mosquitoes!

Continue reading “RoomMote, A DIY Remote For Your Room Project”

A Look At The Upgraded MSP430 Chip Shipping With The TI Launchpad

[JMN] took some time to look at the MSP430G2553 mircocontroller (translated). Specifically, he was interested in the clock options and the low power modes. This chip is one of the upgraded processors which have been shipping with the TI Launchpad.

Both the MSP430G2553 and MSP430G2452 come with the Launchpad development board. They replace the MSP430G2231 and MSP430G2211 which came with the original offering. If you already have a Launchpad the chips themselves can be had for around $2.25 and are easily programmed since the development hardware hasn’t changed.

The review starts off by looking at clock options for the processor. The internal VLO is put to the test first, with a look at the power consumption followed by temperature stability through the use of a hair dryer. The actual frequency provided has fairly low accuracy, but it stays pretty stable when hit with the hot air. The next test uses the provided 32.768 kHz clock crystal as an external input. The crystal came with the Launchpad board, and the chip has configurable internal capacitors so this is as easy as soldering the package in place. Hit the link at the top to find out how this clock source fared in testing.

[Thanks D]

Tearing Down Disney’s Glow With The Show Props

disneys-glow-with-the-show-teardown

[Andy’s] boss recently returned from a trip to Disneyland with a set of light-up [Mickey Mouse] ears in tow. He said that during the event, every set of “Glow with the Show” ears in the crowd changed colors in sync with the performance. After he and some co-workers speculated on how this was pulled off, [Andy’s] boss gave him a new assignment – to find out how the darned things work!

[Andy] carefully disassembled the ears, sharing his findings and speculations with us. Inside, he found a small flexible circuit board powered by three AAA batteries. At the center of the device resides a TI MSP430G2553 which is tasked with controlling the RGB LEDs embedded in the ears.

In one ear, he spotted what he believes to be a Vishay TSMP6000 IR receiver. Vishay-branded or not, he verified that it does indeed pick up IR signals using his oscilloscope and a TV remote. In the other ear, he found a pair of small IR diodes, which he speculates are used to repeat the IR timing/sync signal received in the opposite side of the device.

The synchronization methods seem completely different than those found in the Xylobands we covered a while back, so we’re really intrigued to find out more about technology behind them.

Stick around to see a video of the light show in action, and since [Andy] says he’s willing to entertain any thoughts on how Disney makes their magic happen, be sure to sound off in the comments.

Continue reading “Tearing Down Disney’s Glow With The Show Props”